If cables are connected to both the Mgmt port and the micro-USB console port, input and output functions on
both ports.
9. Connect the switch to a power source
NOTE:
• If you are stacking your 2930M switches, then the first switch to power-on is the switch that you
want to be the stack Commander.
• The second switch to power-on is the one that you want to be the stack Standby.
• For the other switches in the stack, their member ID will be determined by the order in which they
are booted.
For more information, see Stacking information and topologies on page 51.
Procedure
1. Plug the included power cord into the power connector on the switch and into a nearby AC power source.
2. Recheck the LEDs during self-test. For more information, see
General LED behavior: on page 40.
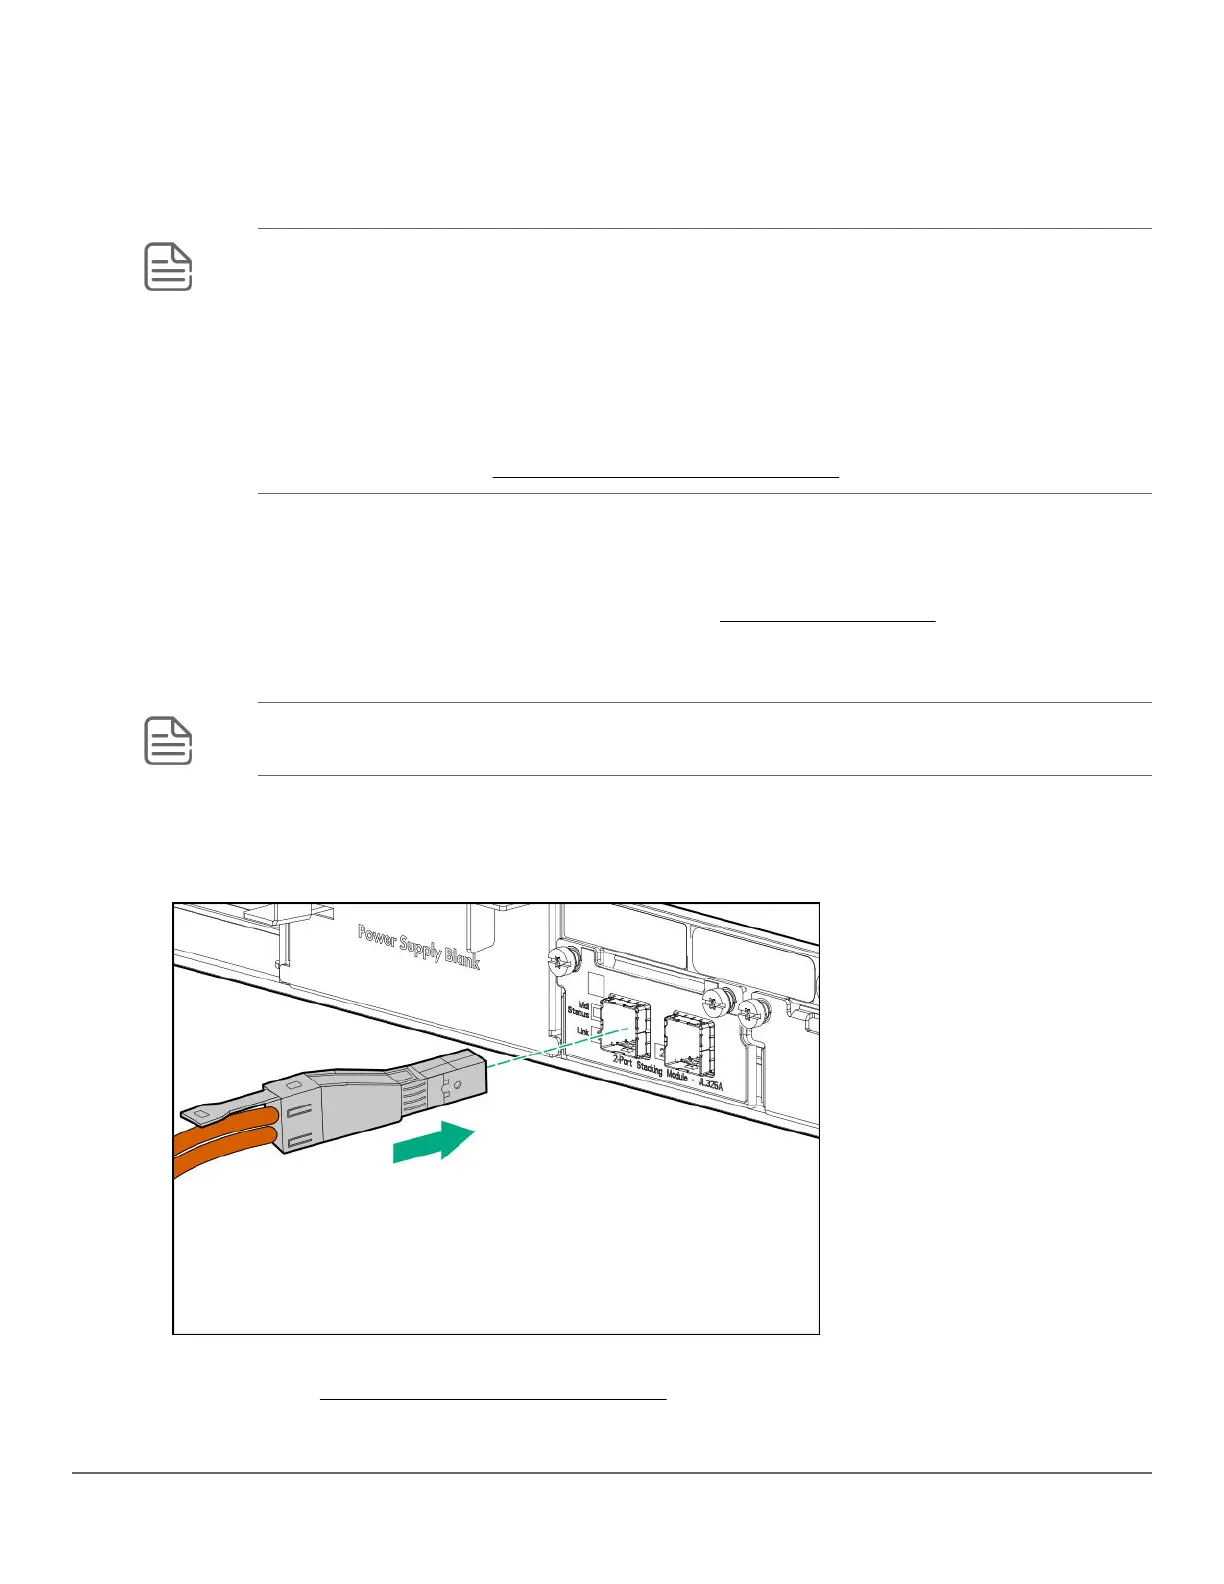
10. (Optional) Installing the stacking cables
NOTE: Hot swapping the stacking cables is supported. You can install or remove a stacking cable
with the switch powered on. (Hot-swapping stacking modules is not supported.)
1. Slide in the stacking cable connector until it clicks into place. to make sure that the cable connector is fully
latched, pull on the connector itself (not the tab) .
Figure 14: Installing a stacking cable
2. Connect the other end of the cable to a stacking module in another 2930M switch. For more connectivity
information, see Stacking information and topologies.
48 Aruba 2930M Switches
 Loading...