Page 69 of 78
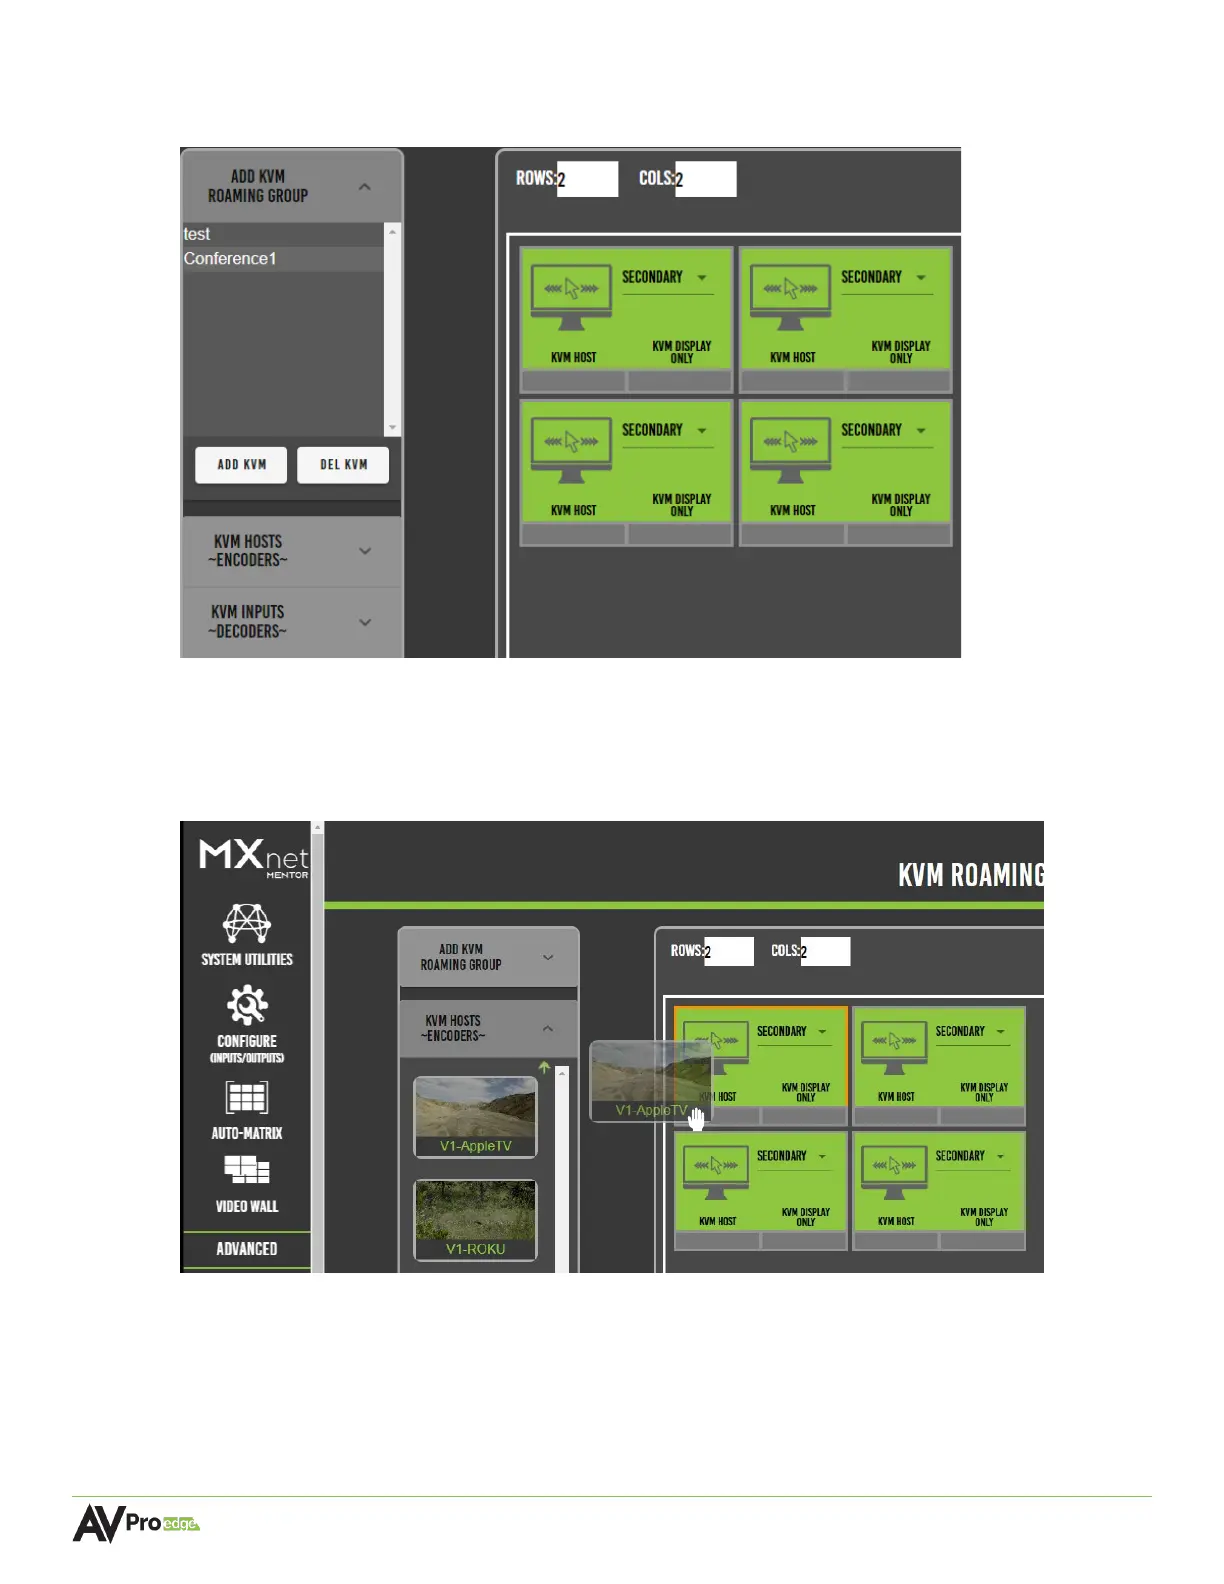
3 The newly created kvm group will now appear under the add kvm roaming group dropdown
menu, select this to generate a virtual layout of the specified rows and columns as tiles.
4 Select the kvm hosts encoders dropdown menu, this will show a list of the encoders with
their connected source’s preview image as a selectable thumbnail.
5 Select the encoder by clicking and dragging the source’s thumbnail, moving it over to the
right, and dropping it onto a tile.
The encoder’s custom name will now appear in the bottom-left of the selected tile, indicating
the selected source is now assigned as the USB host.
6 Select the kvm inputs decoders dropdown menu, this will show a list of the decoders as
selectable buttons.
 Loading...