6. Lamps and lamp houses
6
7
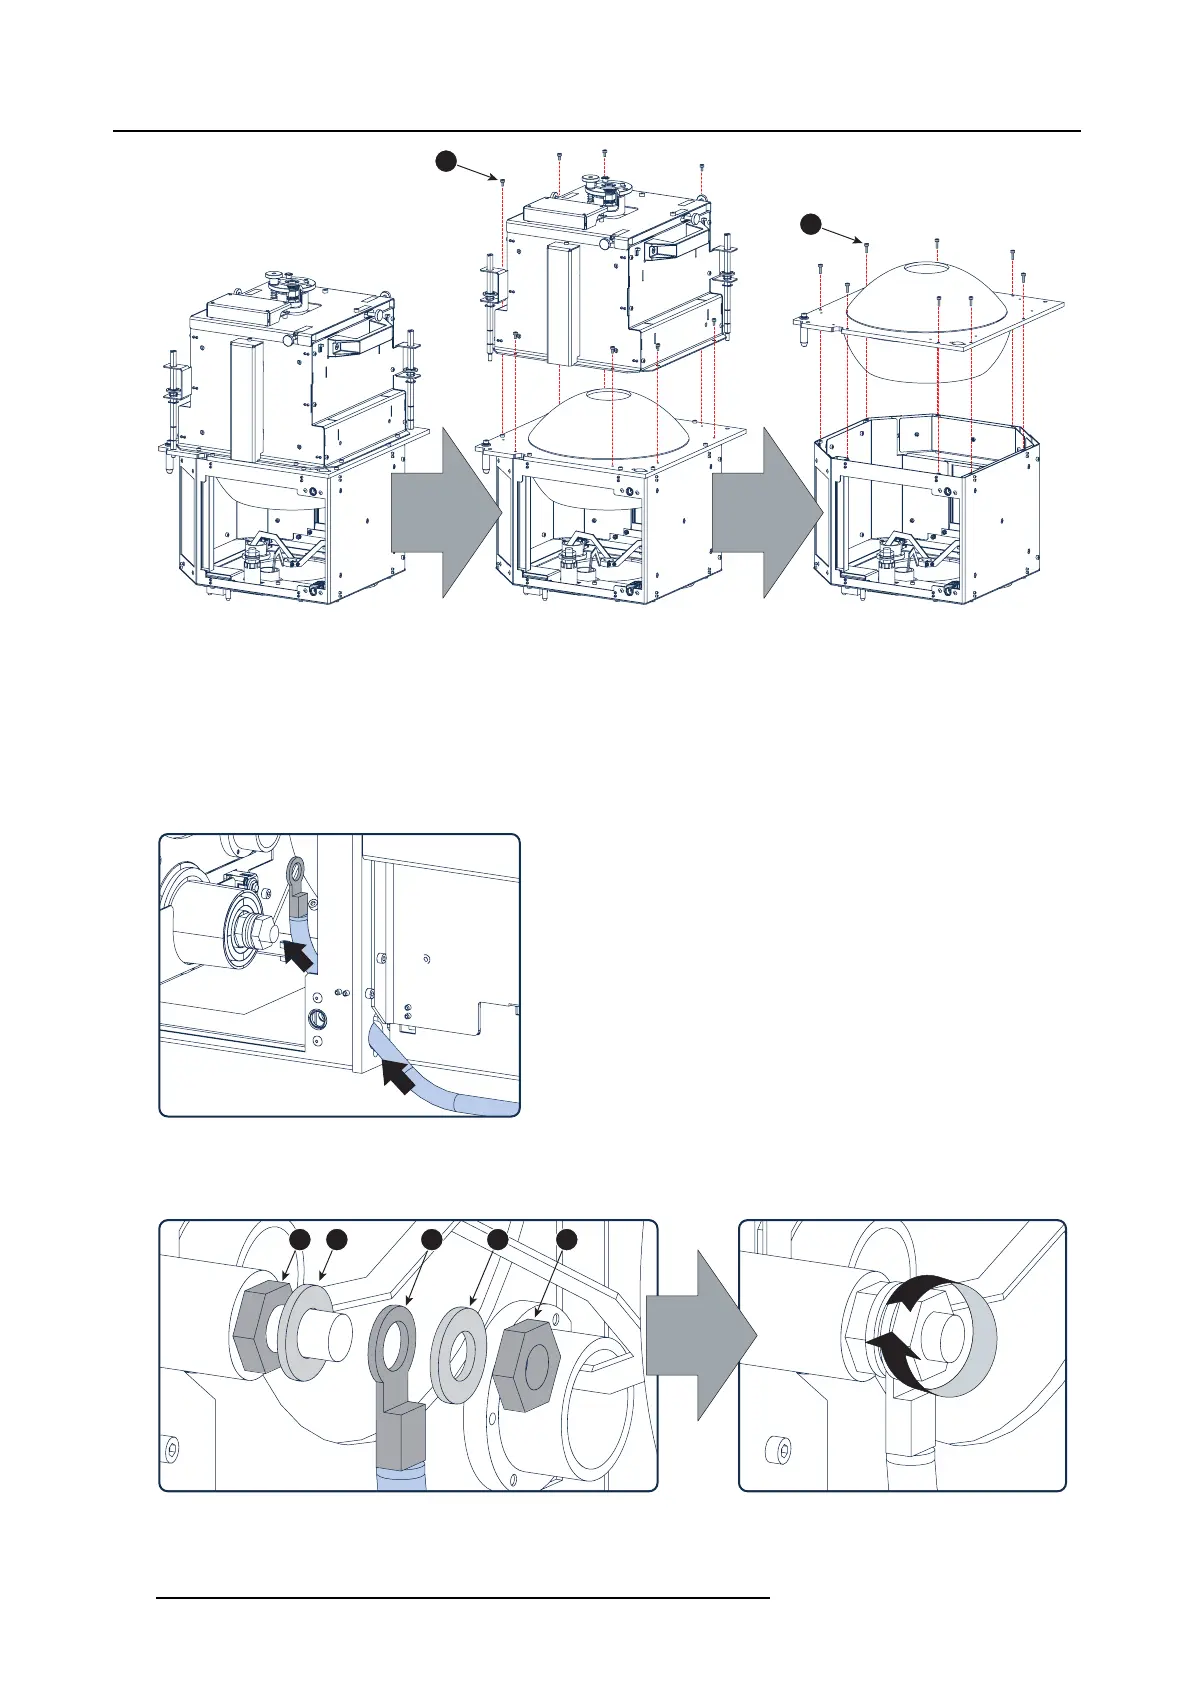
Image 6-44
7. Place a new reflector assembly upon the a node side of the lamp house and fasten with 8 hexagon head cap screws (reference
7 image 6-44). Use a 2,5 mm Allen wrench. These screws must ha ve a length of 10 mm. Make sure to position the reflector
assembly correctly.
Caution: Do not touch the glass of the reflector assem bly. Hold fast the reflec tor as sem bly by its metal mounting plate.
8. Reinstall the cathode side of the lamp house (see middle d rawing of image 6-44). Fasten with 8 hexagon head cap s crews
(reference 6 image 6- 44). Use a 2,5 mm Allen wr ench.
9. Reinstall the bottom profiles. See im age 6- 43. Use a 2,5 mm Allen wrench.
10.Guide the cathode wire inside the lamp house as illustrated.
Image 6-45
11.R econnect the c athode wire with the lamp ho use. Make s ure to place a washer (reference 2 and 4 ) b etween the nuts and the
eye of the c athode wire (reference 3
). Use a torque o f 9 N m to fasten the nuts (reference 1 and 5). Block the first nu t (refe rence
1) with a 17 mm open-end wrench w hile applying a torque of 9 Nm on the second nut (reference 5) with a torque wrench.
1 2 3 4 5
9 Nm
Image 6-46
12.R einstall the side cover of the lamp house.
120 R5905043 DP2K-12C/11CX 19/02/2018

 Loading...


