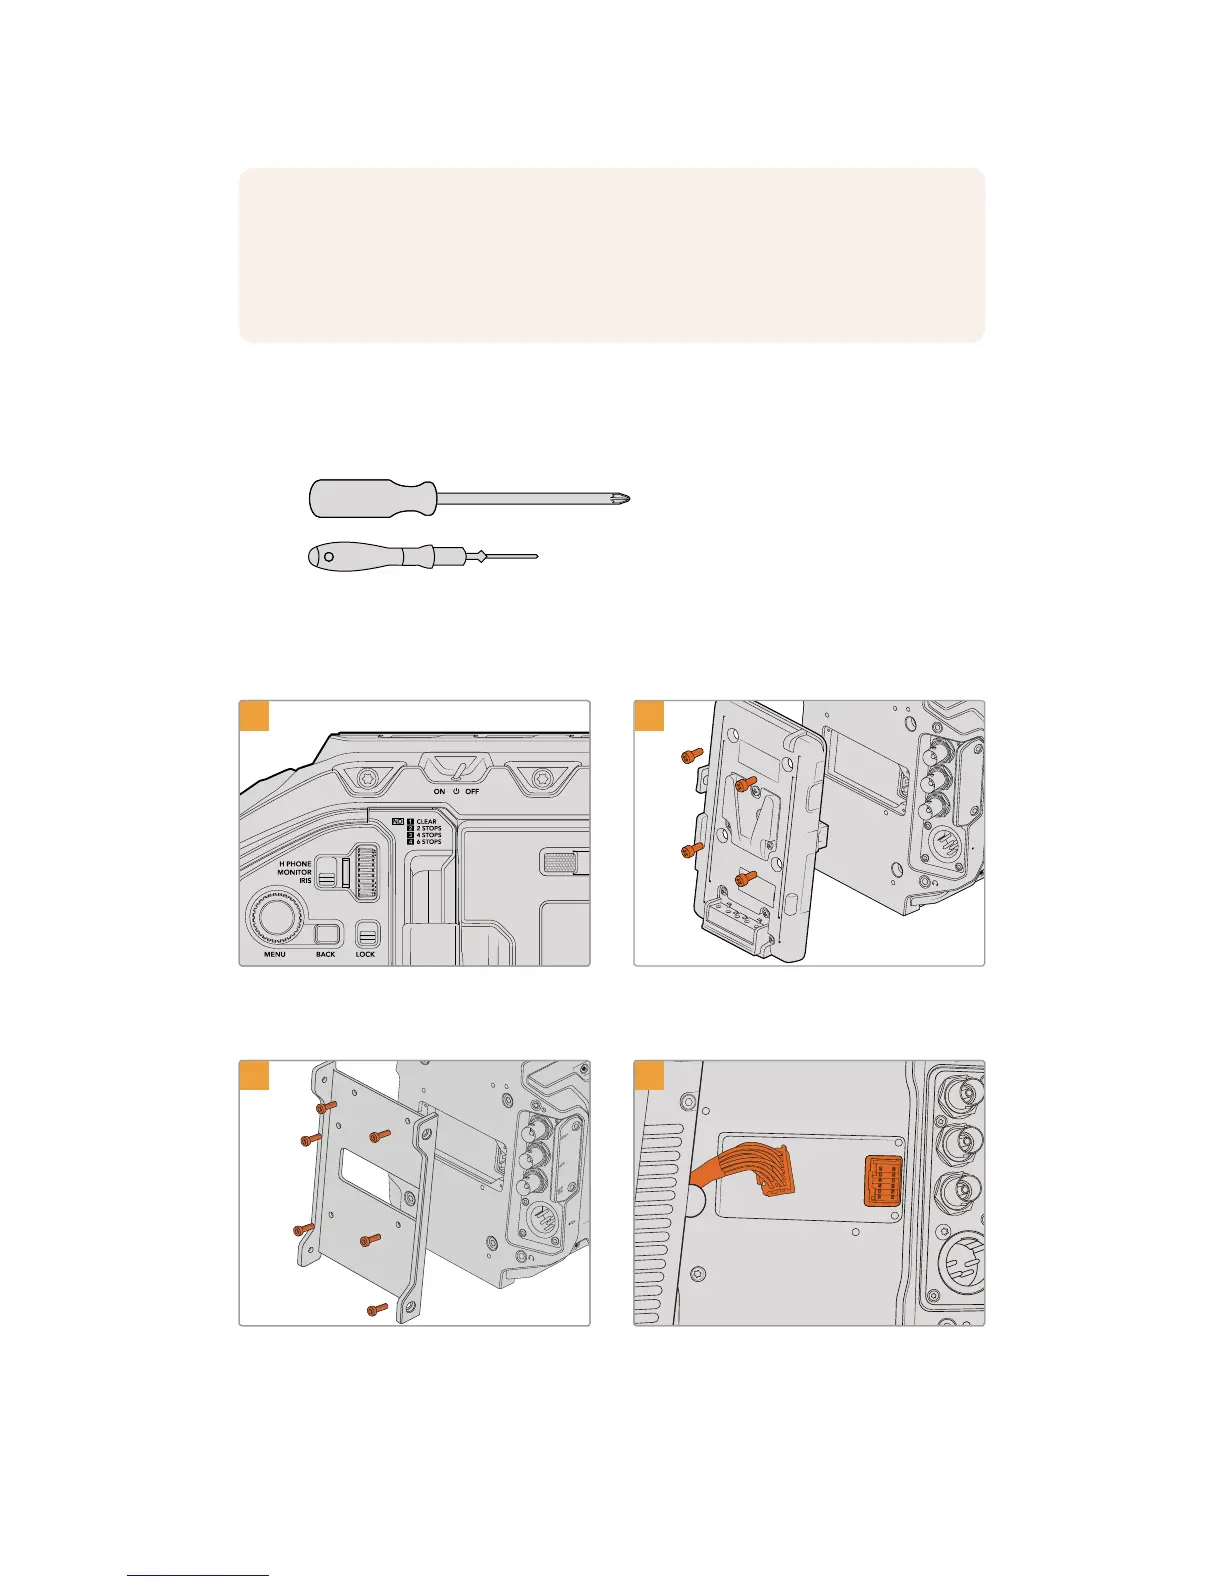
When attaching Blackmagic Camera Fiber Converter, you will need the following tools:
1 x phillips head screwdriver
1 x 2.5mm Hex driver
To attach the Blackmagic Camera Fiber Converter to your URSA Mini or URSABroadcast,
you will need a large phillips head screwdriver and a 2.5mm Hex driver
To mount and connect Blackmagic Camera Fiber Converter:
1 2
SDI OUT
SDI IN
REF IN
TC IN
12V
Ensure your camera is powered off. If using
URSA Mini Pro or URSA Broadcast, power
itoffby moving the power switch to ‘off’.
Remove the battery plate or molex power
coverplate, if attached, using a phillips
headscrewdriver.
SDI OUT
SDI IN
REF IN
TC IN
12V
USB
SDI IN
SDI OUT
REF OUT
ETHERNET
4
Attach Blackmagic Camera Fiber Converter’s
mounting bracket using 6 x 2.5mm Hex screws.
Plug the molex connector on Blackmagic
Camera Fiber Converter into the molex power
socket on your camera’s rear panel.
NOTE Before installing Blackmagic Camera Fiber Converter you should check that
URSA Mini’s internal software is version 4.4 or above and URSA Broadcast is 4.6 or
above. You can check your software version on page 4 of the camera's 'setup' menu.
For more information on updating your camera firmware see the section ‘Blackmagic
Camera Setup Utility' in this manual.
172Getting Started with BlackmagicFiber Converters