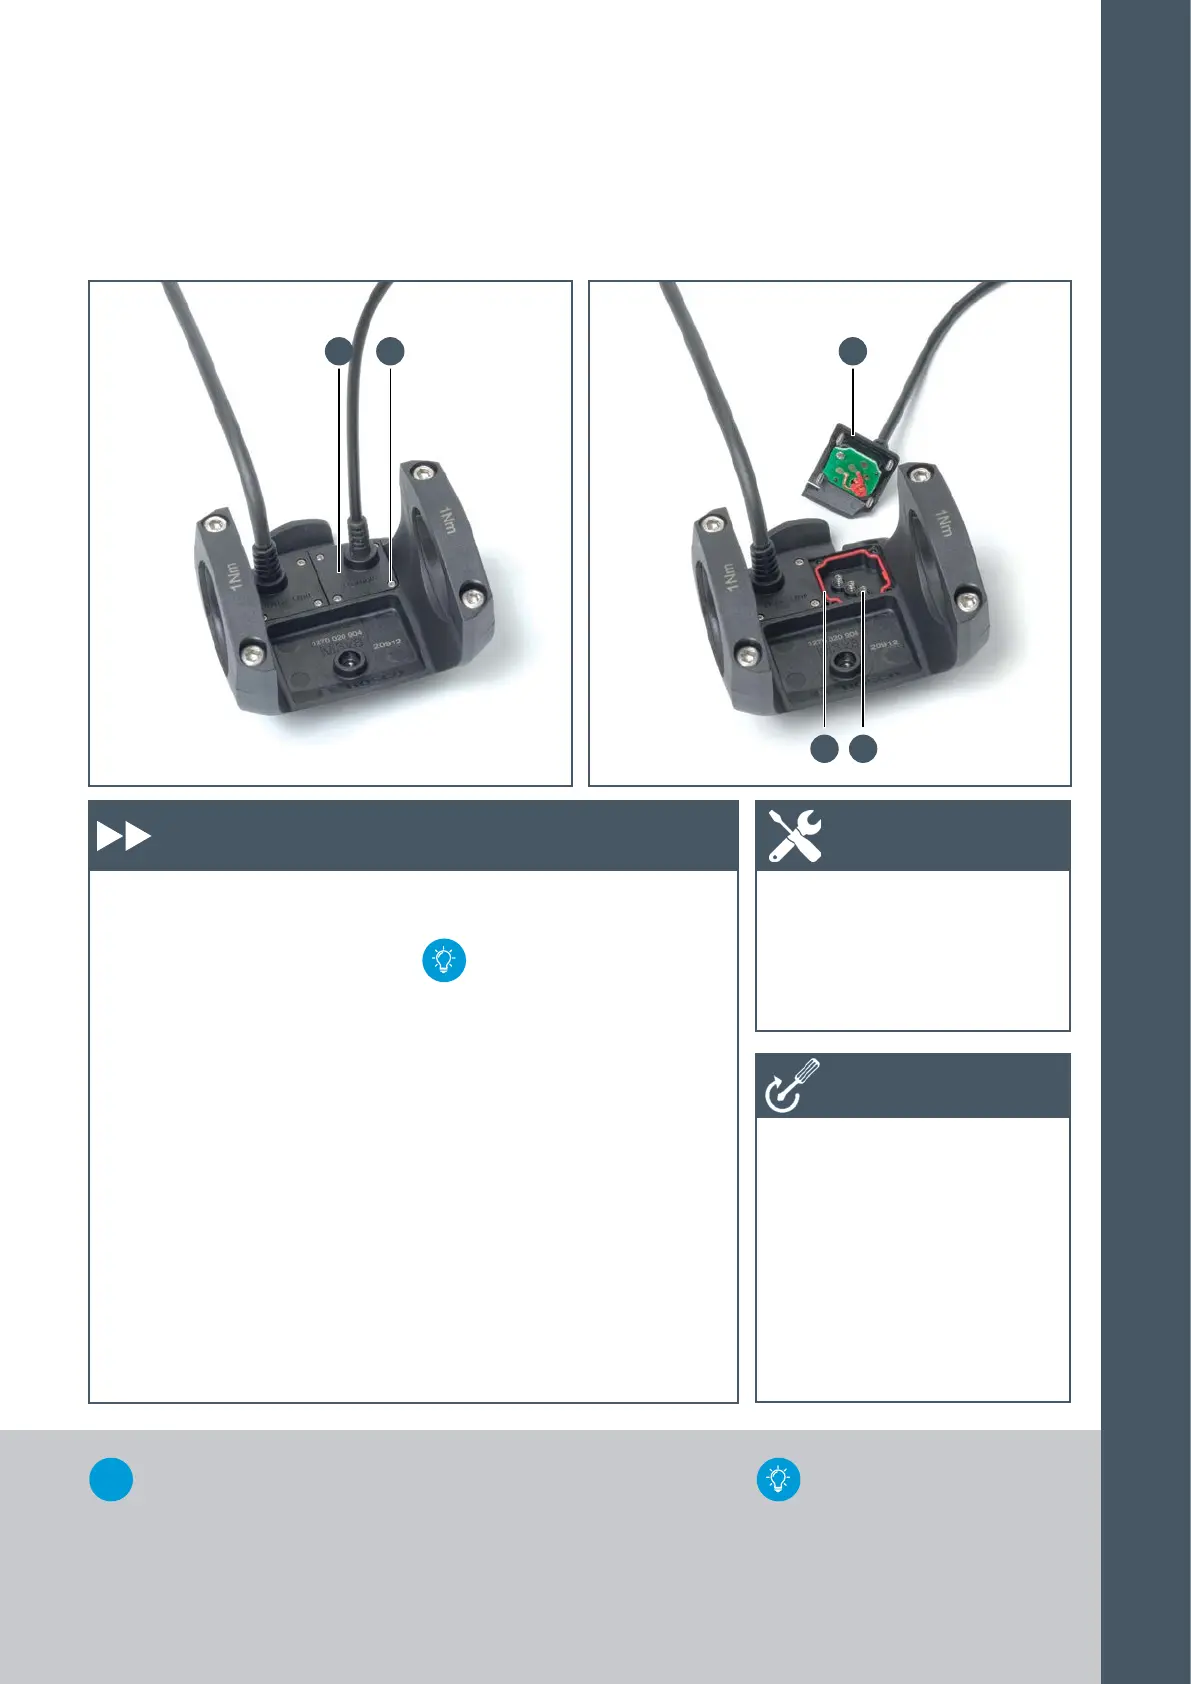
A
CD
B B
177
6.3 On-Board Computer and Control Unit 6.3 On-Board Computer and Control Unit
Replace the cable
on the mount
1. Remove the on-board computer
from the mount.
2. Remove the mount
3. Carefully remove the four
screws (A) and the contact
plate (B). When doing so, make
sure that the contact springs
(C) do not fall out of the
mount. When installing the
contact springs, make sure that
the seal (D) is seated perfectly.
When replacing the mount,
it is not necessary to
replace the cable on the
drive unit as well. A new
mount can be screwed
directly onto the contact
plate (see figure on right).
Cables laid in the eBike
frame do not need to be
time-consumingly rerouted.
X Phillips screwdriver size PH00
X Torque wrench
Work steps (identical for both the Intuvia and Nyon) Tool
X Control unit cable on mount
(Phillips screwdriver size
PH00):
0.1 Nm
Tightening
torques
Intuvia - Digital Control Unit
X Platinum, Order number:
1.270.016.723
X Anthracite, Order number:
1.270.016.724
For Intuvia with software
older than Version 5.3.0.0.
Perform a software update
in order to enable use of the
digital control unit.
NEW
Display mount for Intuvia and
Nyon with new cable length of
1300 mm (incl. cable for drive
unit and
3 x 4 rubber spacers.
Order number
1.270.020.929
6
INSTALLATION/
REMOVAL




 To Next Page