A
C ED
B B F
176
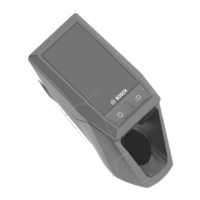
6.3 On-Board Computer and Control Unit
Secure the on-board com-
puter in the mount
(if
requested by customer)
1. Attach the on-board computer
(A) to the mount (B)
2. Secure in position with the
blocking screw (C) (M3 x 8)
X Do not use a longer screw
for any reason
X The blocking screw is no
longer accessible after
attachment to the handle-
bar.
Installing the mount
1. Position the mount (B) in the
center on the handlebar.
2. Install rubber spacers (D) (for
handlebars with diameters
Ø 22.2 mm, 25.4 mm or 31.8
mm – also available as separate
spare part).
3. Screw the mount casings (E)
onto the lower side of the
mount.
Install the control unit
X On the left side of the handlebar
1. Position the rubber spacer (F)
to the right of the brake handle.
2. Install the control unit on the
rubber spacer. Make sure that
the installation position is
correct: opposite the brake
handle, at thumb level while
riding.
X Allen key size 3
X Phillips screwdriver size PH02
X Torque wrench
Work steps (identical for both the Intuvia and Nyon) Tool
X Fastening of on-board com-
puter to the mount (Phillips
screwdriver size PH02): 1 Nm
X Clamping the mount to the
handle bar (Allen key size 3):
1 Nm
X Clamping the control unit to the
handlebar (Allen key size 3):
1 Nm
Tightening
torques
6.3 On-Board Computer
and Control Unit
Retrofitting from Intuvia to Nyon
(Nyon Retrofit Kit: Order number 0.275.007.818)
1. Update software of eBike with Intuvia (see p. 106)
2. Replace control unit and mount
3. If needed, execute a separate update of Nyon (see p. 107)
4. Use DiagnosticTool to save map material on the Nyon (see p. 113)
5. Perform offline registration of the rider (see p. 18)




 To Next Page