A
DBC
202
6.10 Installing Drive Unit (BDU250C/255C)
Information about the mounting plate screw connection
X New drive units do not include threads in the mount-
ing for the mounting plate screws when delivered
from the factory. The threads must first be produced
by using self-tapping screws.
Always make sure that the screws are correctly
seated and that the specified tightening torque
is used.
X If the threads are damaged: Repair is possible using
a thread insert. For instructions, see e.g.:
&
boellhoff.de → Products and Services → Special
fasteners → Thread inserts for metals HELICOIL® →
Downloads → HELICOIL® Plus – Repairing of dam-
aged threads
Fastening the drive
unit with screws
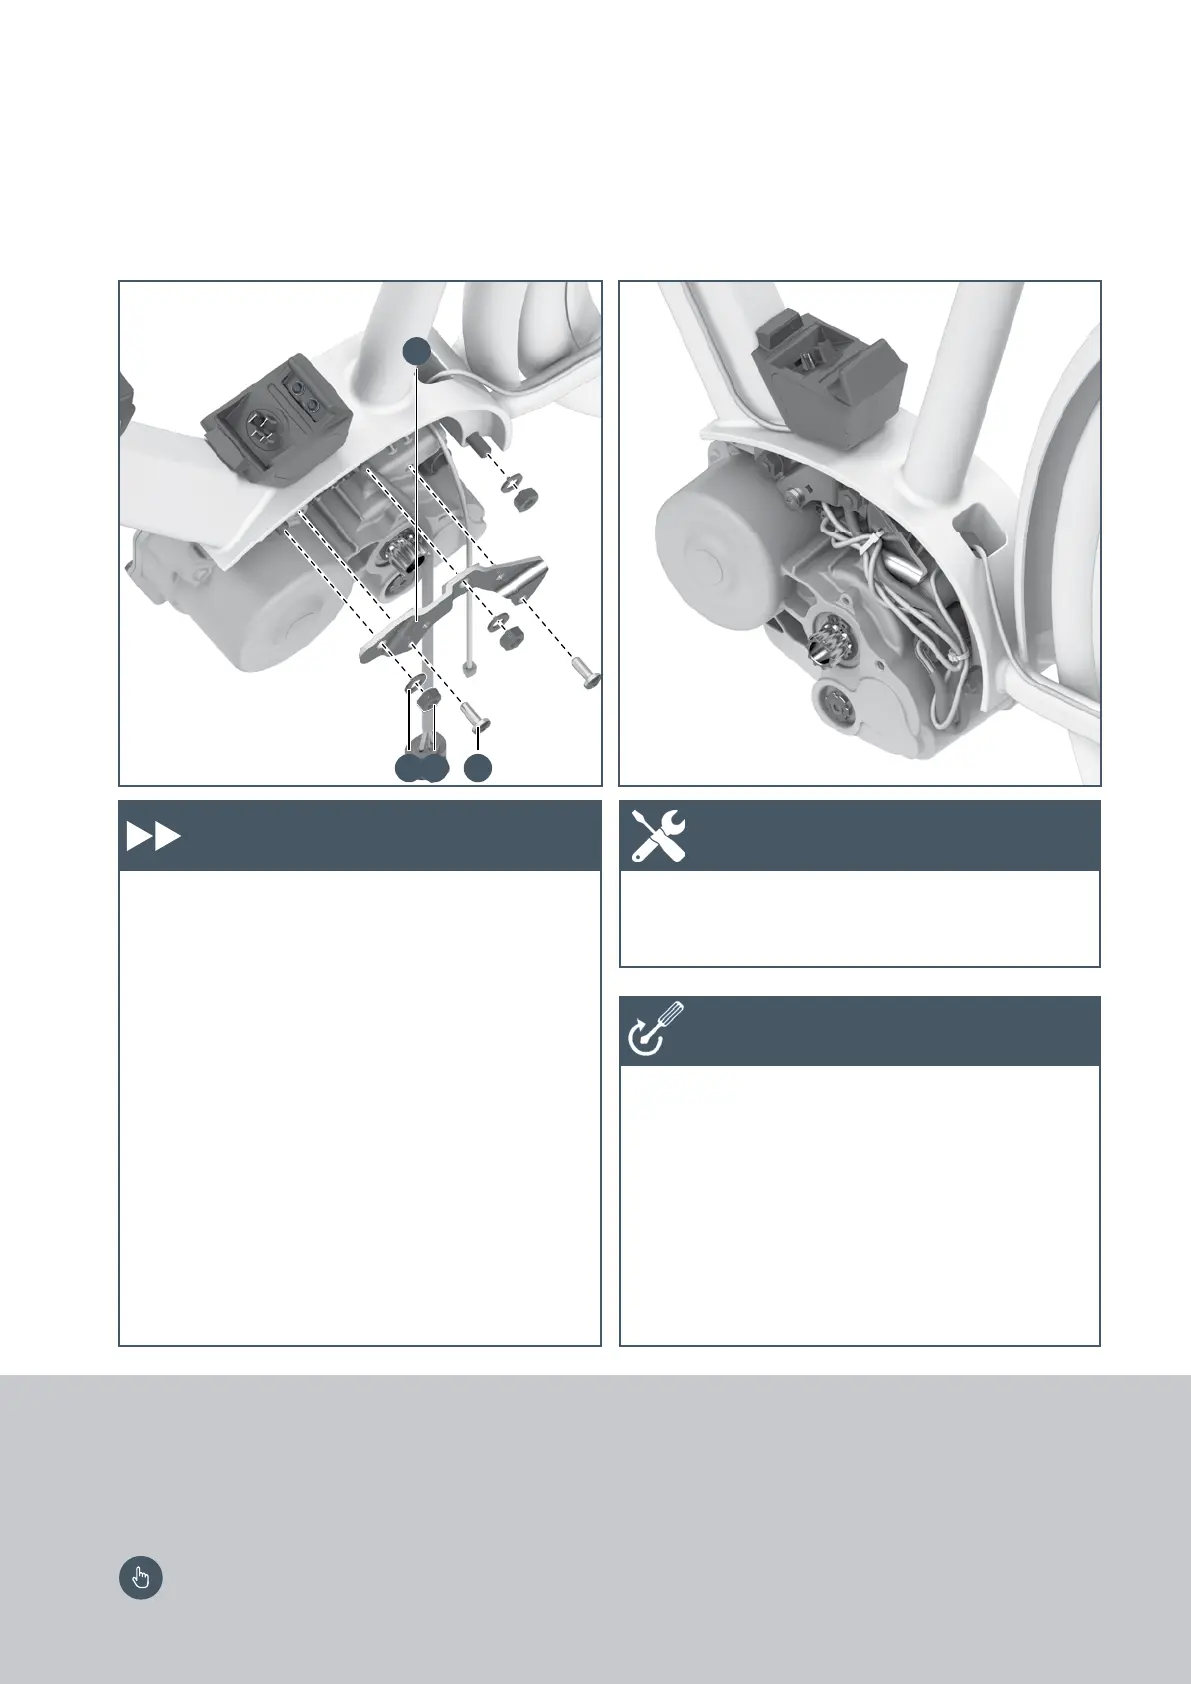
1. Insert the mounting plate (A).
2. Lightly screw in the three nuts (B) with washers
(C), but do not tighten.
3. Screw down the mounting plate on the drive unit
with two screws (D) (M6 x 16).
4. Tighten the three nuts (B).
5. Connect the cable connections.
Cable routing
X Fix excessive cable lengths using cable ties. Use
the holes in the adapter plate for this purpose.
X Torx wrench T30
X Socket wrench insert size 13
X Torque wrench
X Drive unit on the frame interface (size 13):
25-30 Nm
X Mounting plate on the drive unit (Torx T30,
self-tapping screws):
– Initial assembly (self-tapping):
13-15 Nm
– Subsequent assemblies (thread already exists):
9–11 Nm (for drive units up to and including
model year 2014: 6 Nm)
Work steps Tool
Tightening torques
6.10 Installing Drive Unit
(BDU250C/255C)









 To Next Page