1 689 975 233 2018-05-08| Robert Bosch GmbH
Repair | EPS 708 | 23 en
6.5 Replacing the quantity meter
6.5.1 Removing the quantity meter
458863-09_Ri
2
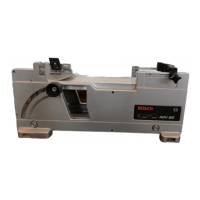
Fig. 34: Quantity meter 1687234011
i Get a cloth ready for catching and mopping up
calibrating oil.
1. Turn off the EPS 708 at the master switch.
2. Secure the master switch so that it cannot be
switched back on.
3. Unplug the mains plug or disconnect from mains
electricity.
4. Check that there is no power.
5. Remove the cover of the hydraulics chamber.
6. Identify the quantity meter (see Fig. 10, item 3).
7. Remove the cover of the electronics compartment.
8. Slacken the hoses on the quantity meter
1687234011 (see Fig. 34, item 3).
9. Unplug the 6-pin blade terminal in the electronics
compartment, on the opposite side from the
quantity meter bracket.
10. Slacken the Torx screws on the quantity meter
(item 2).
! When removing the quantity meter, take care not to
damage the PCB and the ribbon cable.
11. Remove the quantity meter (item 1). Catch and mop
up any calibrating oil residues with a cloth.
6.5.2 Installing the quantity meter
! During installation, make sure that hoses are
securely fitted.
¶ Install the quantity meter in the reverse order.
6.5.3 Entering calibration values
A note containing the calibration values is enclosed
with the spare part. These values must be transferred
to the software.
1. Switch on the test bench via the master switch.
2. Start the EPS945 system software.
3. In the "Injection component test main menu" start
screen, select <F7>.
A password request appears.
4. Enter the password in the input line: 1958
5. Confirm your entry with <F12>.
6. Select the "Calibration >> Quantity measuring
cells" menu item, and continue with <F12>.
7. Select measuring cell number "1" and enter the
serial number.
8. Enter the supplied calibration values in the software.
9. Continue with <F4>.
10. Confirm the dialog with <F4> and continue with
<F12>.
The calibration values are saved and the
calibration date is displayed next to the
measuring cell number.
11. Continue with <F12>.
12. Back with <F11>.
 Loading...
