1 689 975 233 2018-05-08| Robert Bosch GmbH
46 | EPS 708 | Repairen
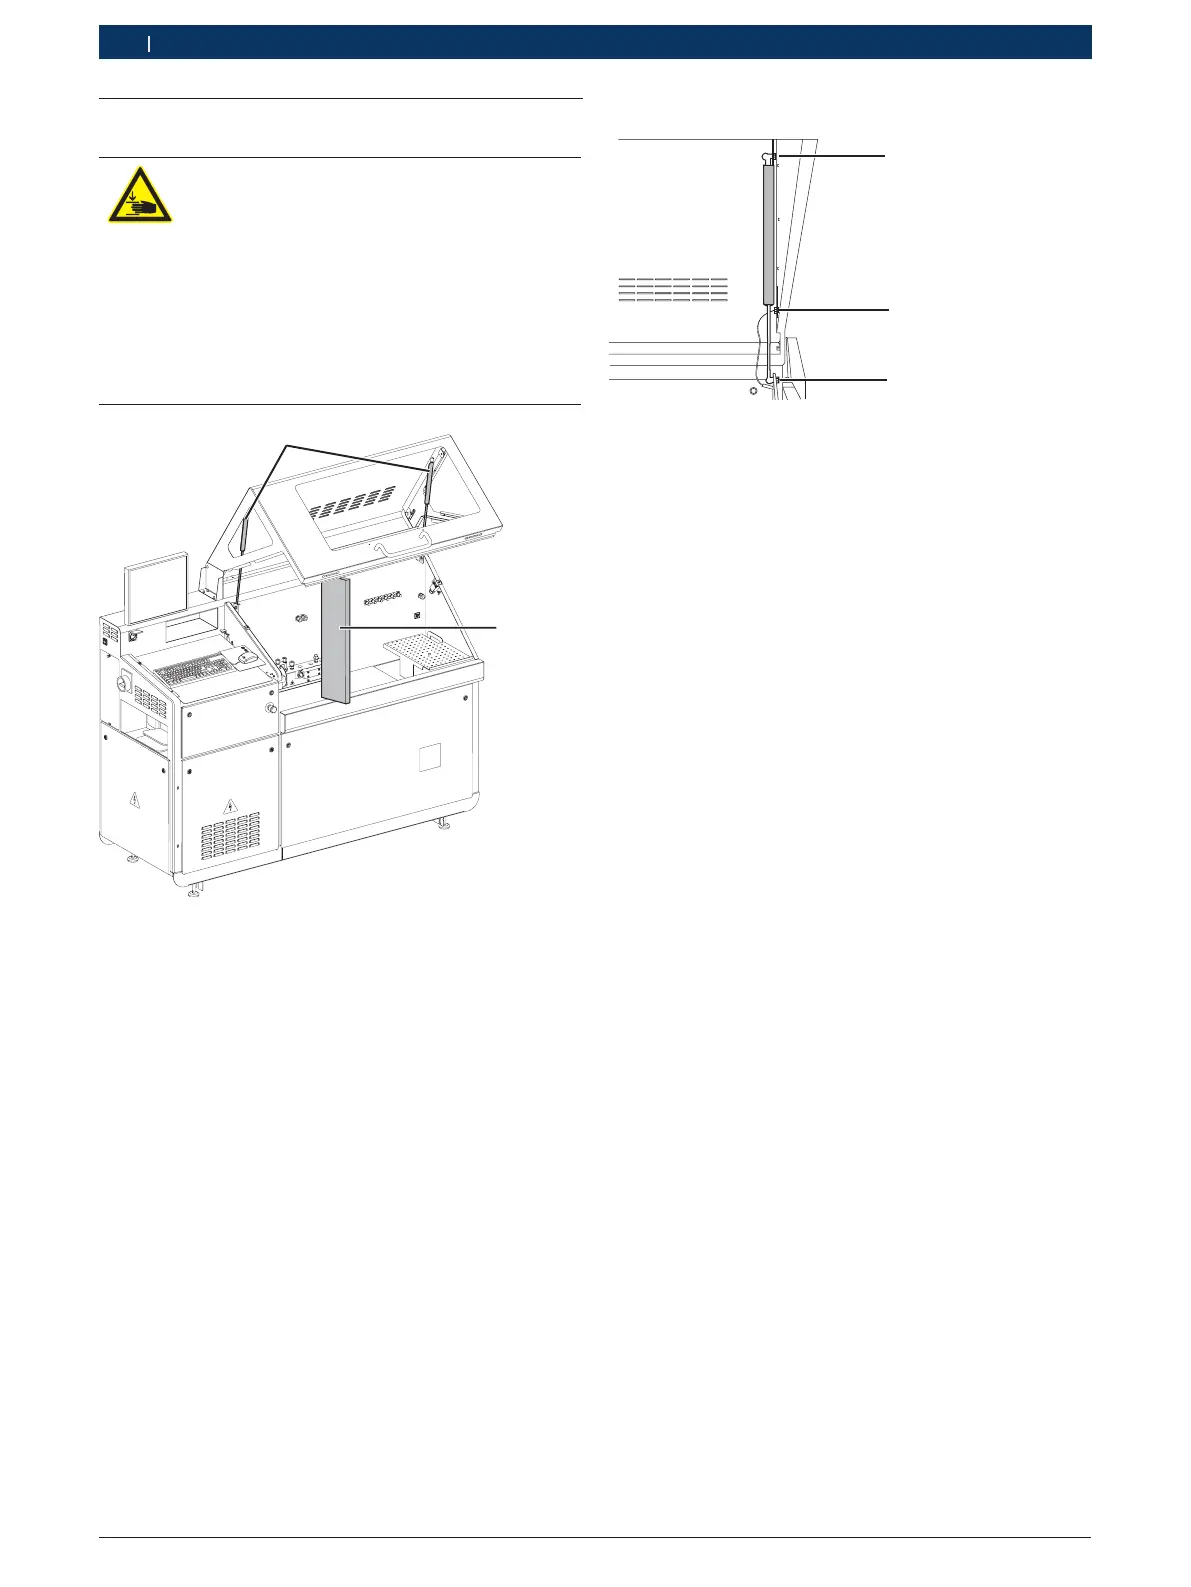
6.18 Replacing the pneumatic springs
WARNING - Risk of getting trapped by fal-
ling protective hood!
There is a risk of getting trapped if the pro-
tective hood is not secured.
¶ Always secure the protective hood with
the aid of another person.
¶ Always secure the protective hood with an
additional support.
¶ Only remove one pneumatic spring at a time.
458863-20_Ri
Fig. 75: Replacing the pneumatic springs
1 Pneumatic springs
2 Support
6.18.1 Removing the pneumatic springs
1
Fig. 76: Pneumatic spring
1. Identify faulty pneumatic springs.
2. Detach the steel wire (Fig. 76, item 2) from the
protective hood and open the hood as far as
possible.
3. Affix the support (see Fig. 75), making sure that it is
securely held.
4. Slacken the self-locking nuts on the upper and lower
ball joints (see Fig. 76, items 1 and3).
5. Remove the self-locking nut and shim.
6. Take the pneumatic spring out of the bracket and
remove from the test bench.
6.18.2 Installing pneumatic springs
¶ Install pneumatic springs in the reverse order.