TT100 In-Line Viscometer Installation, Operation, Maintenance and Service Instructions
P/N M/97-520 6-7
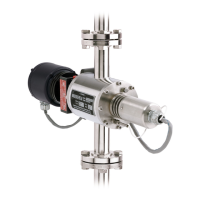
Figure 6-4: Removing the Armature Clamping Nut
10. Loosen and remove the three hex head cap screws, as shown in
Figure 6-4, which secure the Microsyn housing to the insulator.
CAUTION
Be careful not to break the sapphire jewel within the Microsyn housing
when performing step 11.
11. Carefully slide the Microsyn housing off the center wire of the
torsion element.
12. Clean and inspect the center wire as follows:
a. Using contact cleaner or other non-residue cleaner, gently
clean the length of the center wire.
b. Inspect the surface of the center wire that contacts the jewel.
If this area is scored, viscometer reproducibility problems
may occur. Refer to Appendix A and contact Brookfield
Engineering Laboratories, Inc. for a replacement torsion
element.
USE THE
9/32 INCH WRENCH
TO LOOSEN AND
TIGHTEN THE
ARMATURE
CLAMPING NUT.
USE THE
TT100-1T WRENCH
TO HOLD THE
ARMATURE
HEX HEAD SCREW
MICROSYN HOUSING