2 - 46
Upper shaft unit
Main unit
5
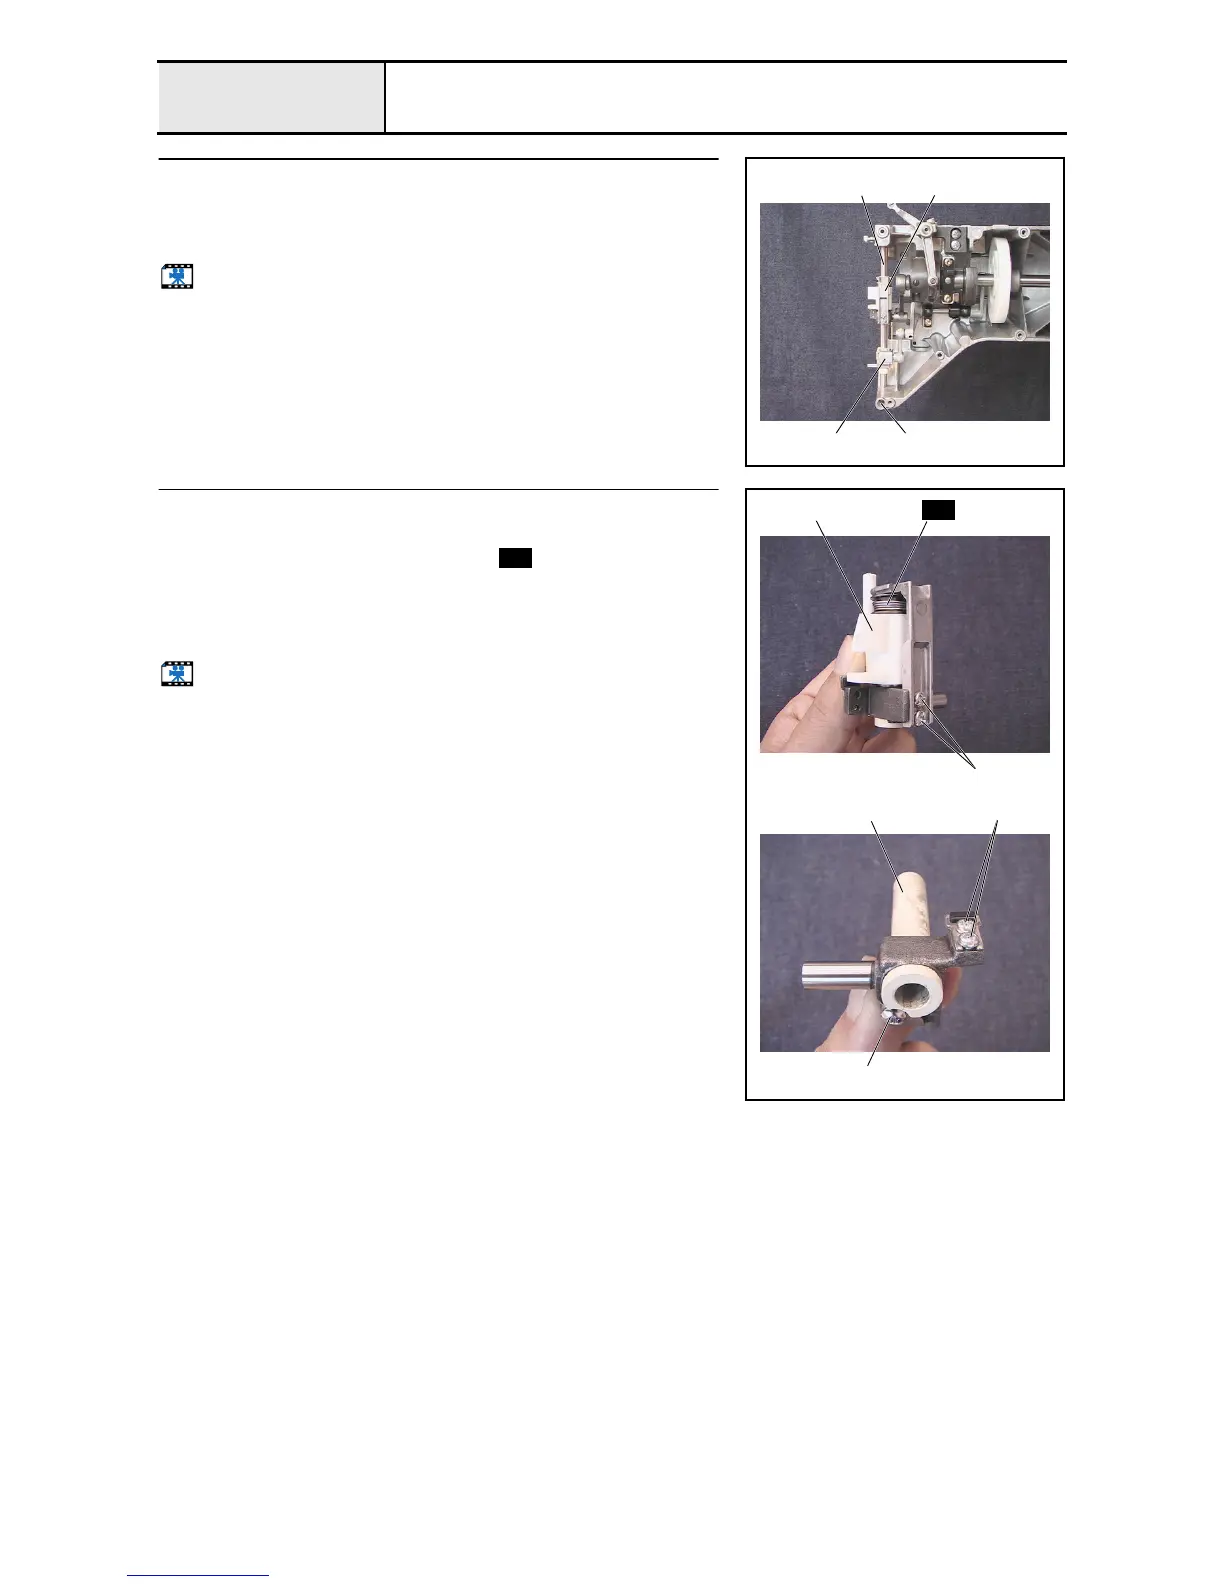
Base needle bar removal
1. Remove the screw 1, and then remove the J-clamp final assembly 2 and
the presser foot vertical base assembly 3 while pulling the base needle bar
1 upward.
Start movie clip (CD-ROM version only)
1
1
2
3
6
J-clamp disassembly
1. Remove the 2 screws 1, and then remove the J-clamp.
2. Remove the J-spring collar and the spring .
3. Remove the thrust washer, jump bracket 1, and thrust washer.
4. Remove the screw 2, and then remove the J vertical bush 2 from the J
bracket assembly.
5. Remove the 2 screws 3, and then remove the J cushion base.
Start movie clip (CD-ROM version only)
1
1
S45
2
3
2
S45