367
TRIM AND TILT
TROUBLESHOOTING
13
STEP 3
Go to TILT/TRIM RELAY TEST on p. 151 to
determine if problem is power supply.
STEP 4
Remove trim motor and check condition of drive
coupling. If coupling is damaged, replace it.
STEP 5
Temporarily install a known good pump manifold
assembly and retest. If symptoms remain, original
assembly is not the problem. Reinstall original
assembly.
If symptoms disappear, the original pump mani-
fold assembly was faulty. Remove temporary
assembly and replace it with correct one.
STEP 6
Install replacement pump manifold assembly and
retest. If all symptoms are not corrected, recon-
sider the problem using the new symptoms.
STEP 7
Install O-ring kit. Look for any cylinder damage.
Look for chips in fluid or impact valves. Look for
other abnormal conditions. If all symptoms are not
corrected, reconsider the problem using the new
symptoms.
Pressure Leakdown Test
Before servicing a hydraulic unit, it should be
pressure tested to determine the unit's malfunc-
tion. This test must be performed with the hydrau-
lic unit removed from the outboard and mounted
in a vise or holding fixture.
Power Trim/Tilt Service Kit, P/N 434524, allows
testing of trim/tilt operation and component condi-
tion.
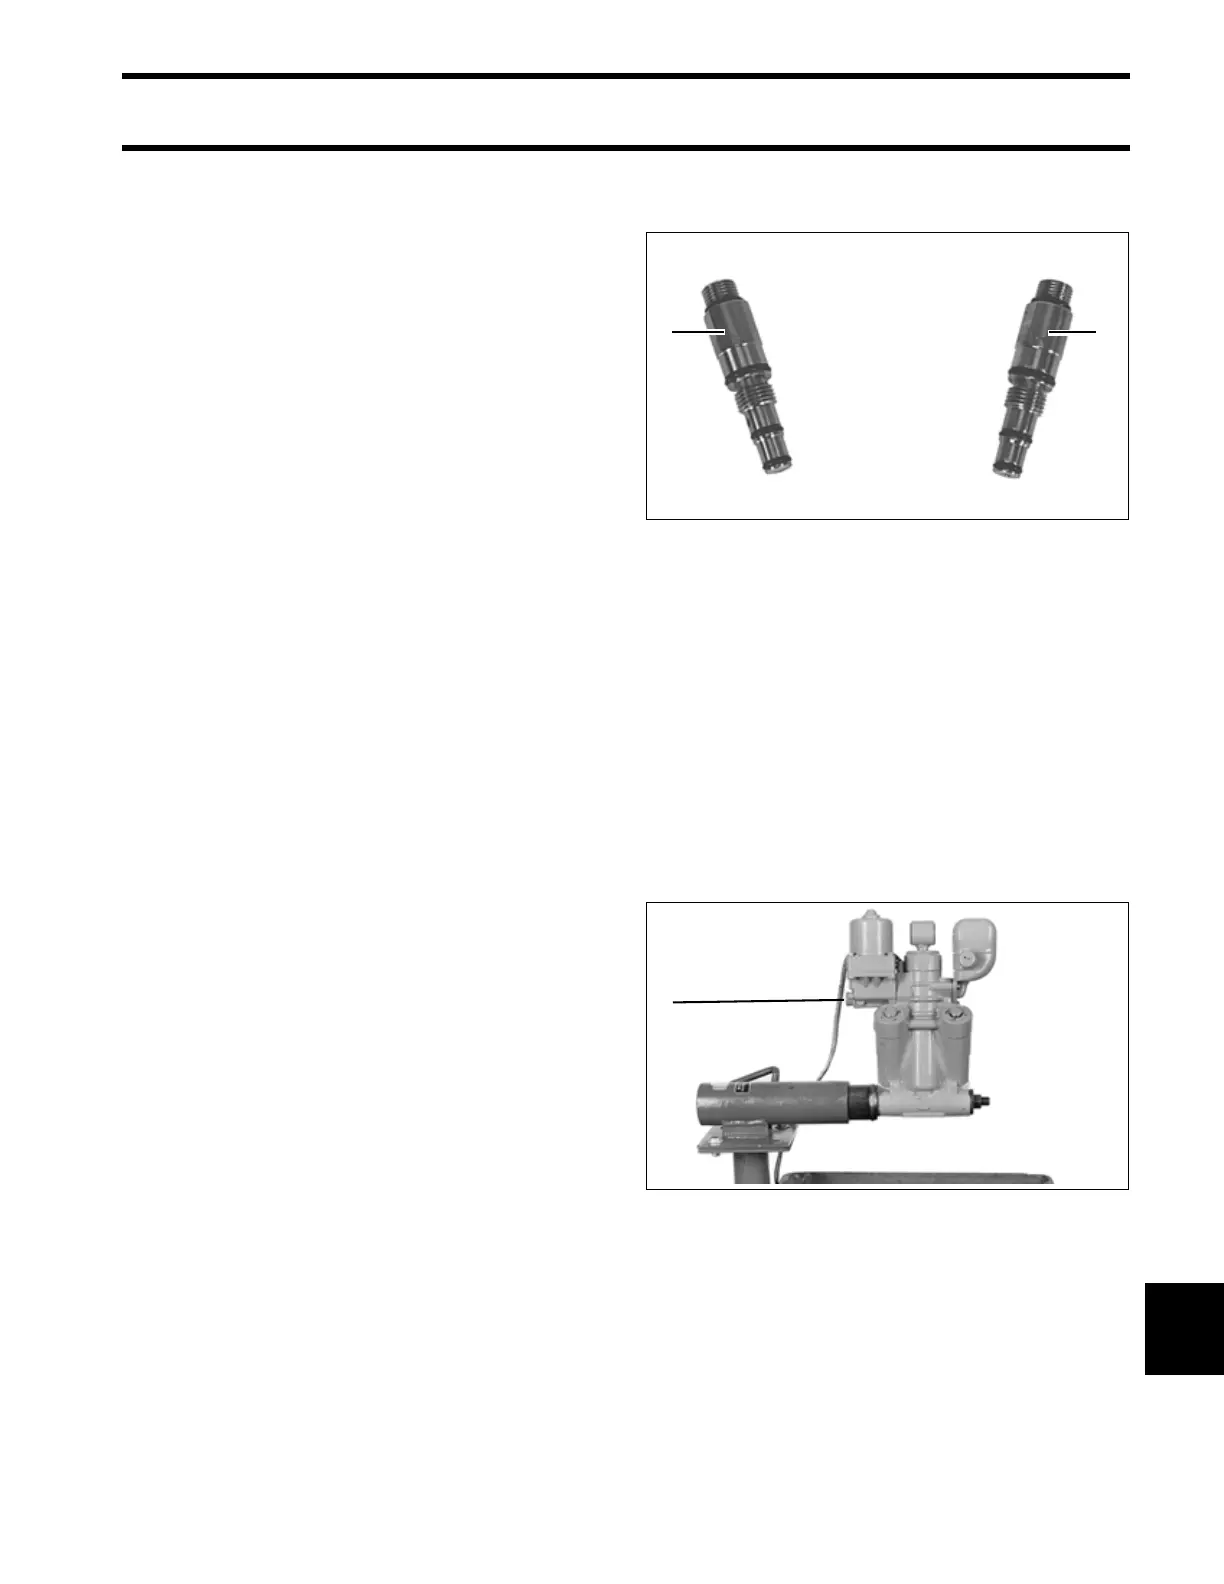
• The “A” adapter, P/N 336658, checks operation
of the UP circuit.
• The “B” adapter, P/N 336659, checks operation
of the DOWN circuit.
This kit does not include a gauge and collar
assembly. Gauge and collar assembly shipped
with Power Trim/Tilt Service Kit, P/N 390010, will
work. Gauge and Collar Assembly, P/N 983975, is
also available.
Be sure to use a fully charged battery.
STEP 1
Screw the manual release valve in the hydraulic
unit until it is seated. Place a large drain pan
under the unit to catch hydraulic fluid.
Operate the unit to the full UP position, then run
the unit down momentarily to reduce pressure.
Loosen the reservoir cap one full turn. Loosen the
manual release valve three turns. Some fluid will
1. A Adapter
2. B Adapter
27340
1. Manual release valve 41736
21
1