EasyManuals Logo

Bruker minispec User Manual

Bruker minispec
82 pages
To Next Page IconTo Next Page
To Previous Page IconTo Previous Page
Page #35 background imageLoading...
Page #35 background image
Safety Barrier Assembly Installation (Optional)
H148850_3_003 35
Step 6: Affix the four mounting brackets to the autosampler’s base using 10-32x.75 FHPH
screws, Bag G, two on each side. Make sure the recessed holes for the two screws are
facing out.
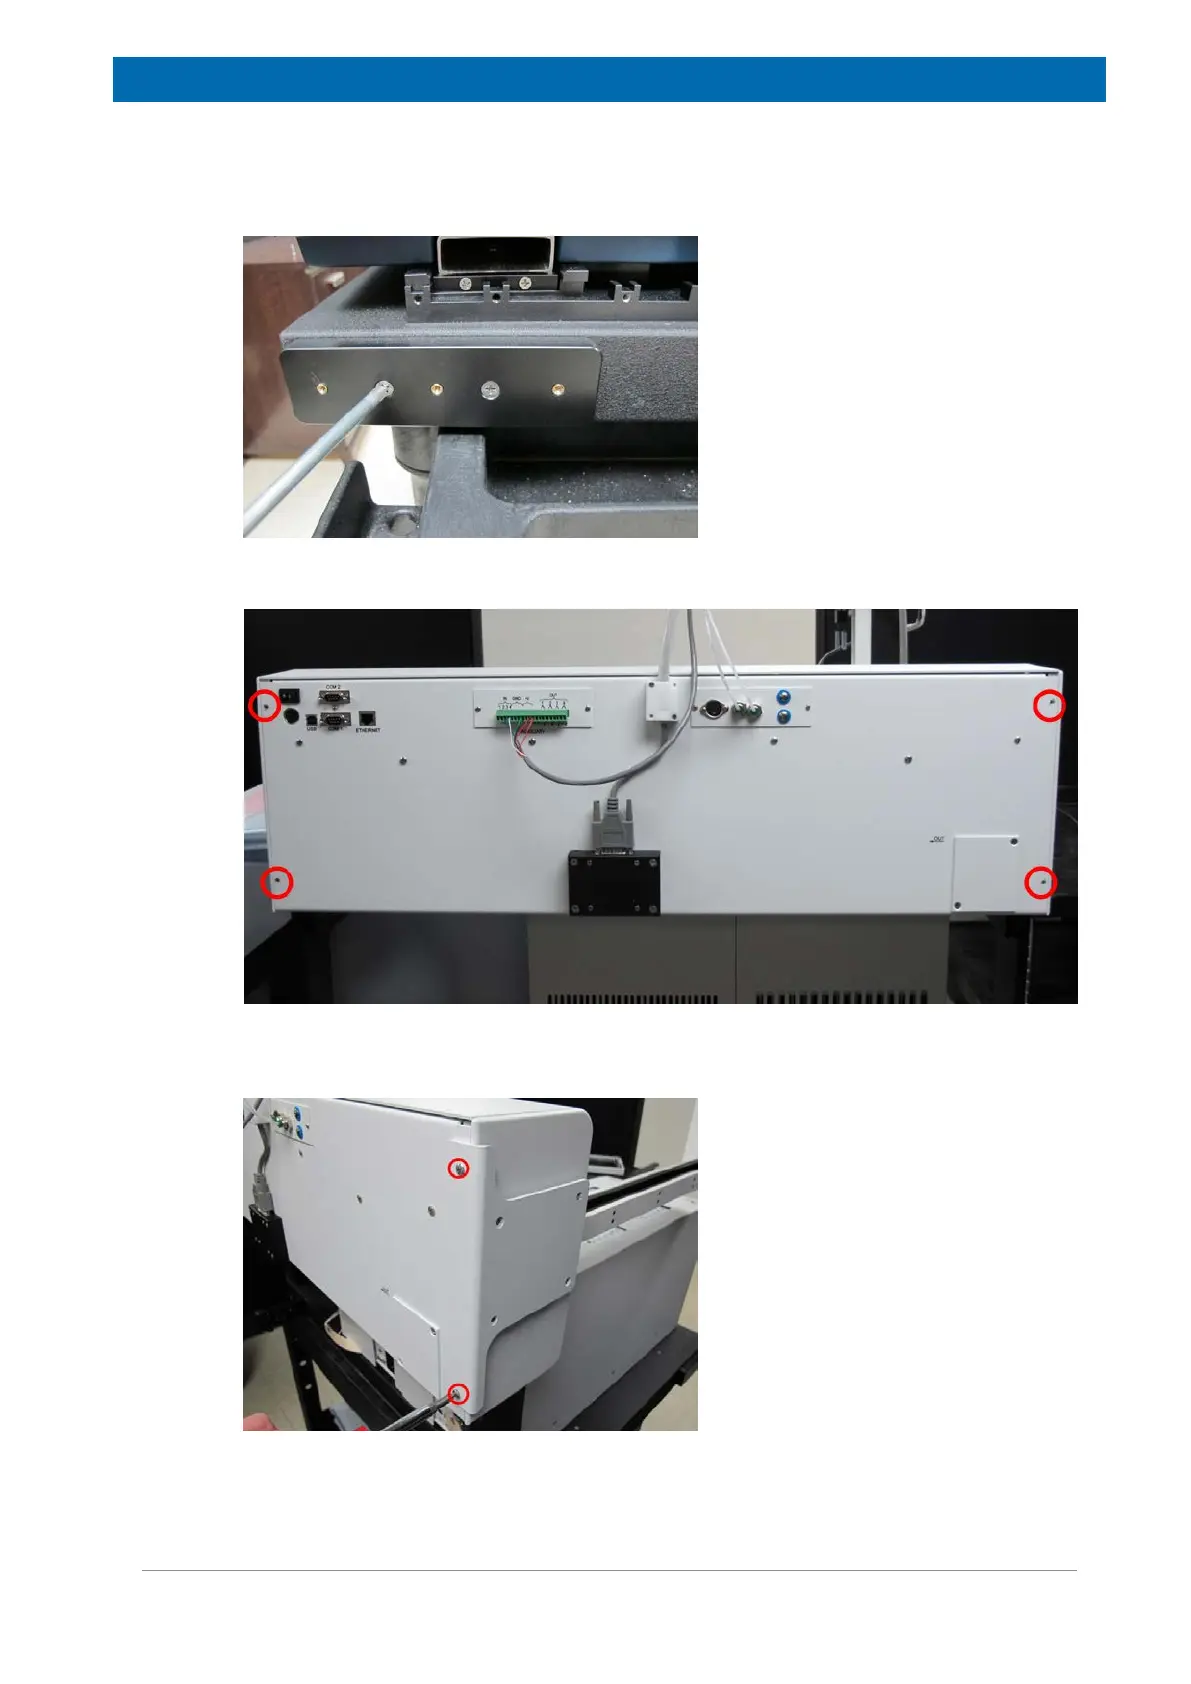
Step 7: Remove the four screws holding the back panel of the instrument.
Step 8: Install the mounting bracket on the left side of the autosampler as viewed from the
front using the two screws that were removed previously.

Table of Contents

Questions and Answers:

Question and Answer IconNeed help?

Do you have a question about the Bruker minispec and is the answer not in the manual?

Bruker minispec Specifications

General IconGeneral
BrandBruker
Modelminispec
CategoryLaboratory Equipment
LanguageEnglish

Related product manuals