91
Onscreen Markers, Zebra Patterns and False Color
Options:
[Center Coordinates], [Upper-left Coordinates]:
Sets the user marker reference coordinates to the center or the upper-left.
[Centering (User Marker 1)], [Centering (User Marker 2)]:
Aligns the center with that of a user marker. Available options differ depending on the set user
marker.
• Select the input value or setting value according to the selected specification method.
When setting a method relative to other markers, such as [Reference Area] > [Whole Picture] or [Centering (User
Marker 1)] to [Centering (User Marker 2)], you can select the following markers for the reference:
- When [User Marker 1] is set: No reference marker can be selected
- When [User Marker 2] is set: [User Marker 1]
- When [User Marker 3] is set: Either [User Marker 1] or [User Marker 2] can be selected
• You can choose the onscreen display level to turn off all other onscreen displays, leaving only the markers
(A 51).
• If you set an assignable button to one of the [Markers:] settings (A 123), you can press the button to turn the
markers on and off on the corresponding video output.
• In MEDIA mode, you can display the same markers as in CAMERA mode by selecting >
[
A
Assistance Functions] > [Playback Marker Display] > [Enable].
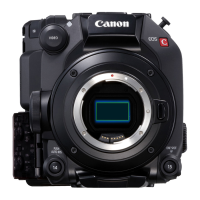
Displaying Zebra Patterns
The camera has a zebra pattern function that shows black and white diagonal stripes over
areas that are overexposed. There are two types of zebra patterns and you can display both
simultaneously. Zebra 1 lets you identify areas within a certain range (±5% of a specified level
from 5% to 95%) while zebra 2 lets you identify areas that exceed a specified level (from 0%
to 100%).
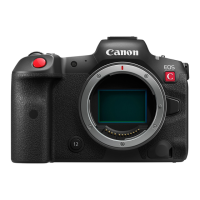
1 Press the ZEBRA button to activate the selected zebra
pattern on all monitoring devices at once.
• You can also use direct touch control (A 54) to turn the
[Zebra: LCD] setting on/off.
• You can turn the zebra pattern overlay on/off from >
[
A
Assistance Functions] > [Zebra:] > Desired option.
• Alternatively, you can press an assignable button set to one of
the [Zebra:] settings (A 123), to turn the zebra pattern overlay
on and off on the corresponding video output.
2 Select > [
A
Assistance Functions] > [Zebra] > Desired option.
3 Select > [
A
Assistance Functions] > [Zebra 1 Level] or [Zebra 2 Level] > Desired option.
• [Zebra: SDI] cannot be displayed under the following conditions.
- When [Sensor Mode] is set to [Full Frame] or [Super 35mm (Cropped)], the frame rate exceeds 60P, [SDI
Output Signal] is [3840x2160] or higher, and [Peaking: SDI] is set to [On].
- When [OSD Output: SDI] is set to [Off (Clean)].
• [Zebra: HDMI] cannot be displayed under the following conditions.
- When [OSD Output: HDMI] is set to [Off].