COPYRIGHT
©
1999 CANON INC. CANON GP160 REV.0 FEB. 1999 PRINTED IN JAPAN (IMPRIME AU JAPON)
CHAPTER 13 TROUBLESHOOTING
13-9
B. Electrical System
Adjustment items for the electrical system include automatic shading correction and
image positioning adjustment. When the main parts listed for each below are replaced,
perform adjustments.
• When the scanning lamp is replaced: automatic shading adjustment
• When the CCD unit is replaced: automatic shading adjustment
• When the image processor circuit board is replaced: image positioning adjustment,
automatic shading adjustment
1. Automatic shading adjustment
1) Open the 3 covers of the control panel’s one-touch panel. Set the slide switch ON
2) Enter the service mode and select TEST MODE. (See page 13-111)
3) Press 2 on the control panel’s numeric keypad. (TEST MODE”: CCD will be select-
ed.)
4) When you press 8 on the numeric keypad, automatic shading adjustment will start.
5) When OK is displayed on the display, the adjustment is finished.
6) After pressing the control panel stop key, press the clear key. (To exit TEST MODE.)
7) Turn the control panel slide switch OFF.
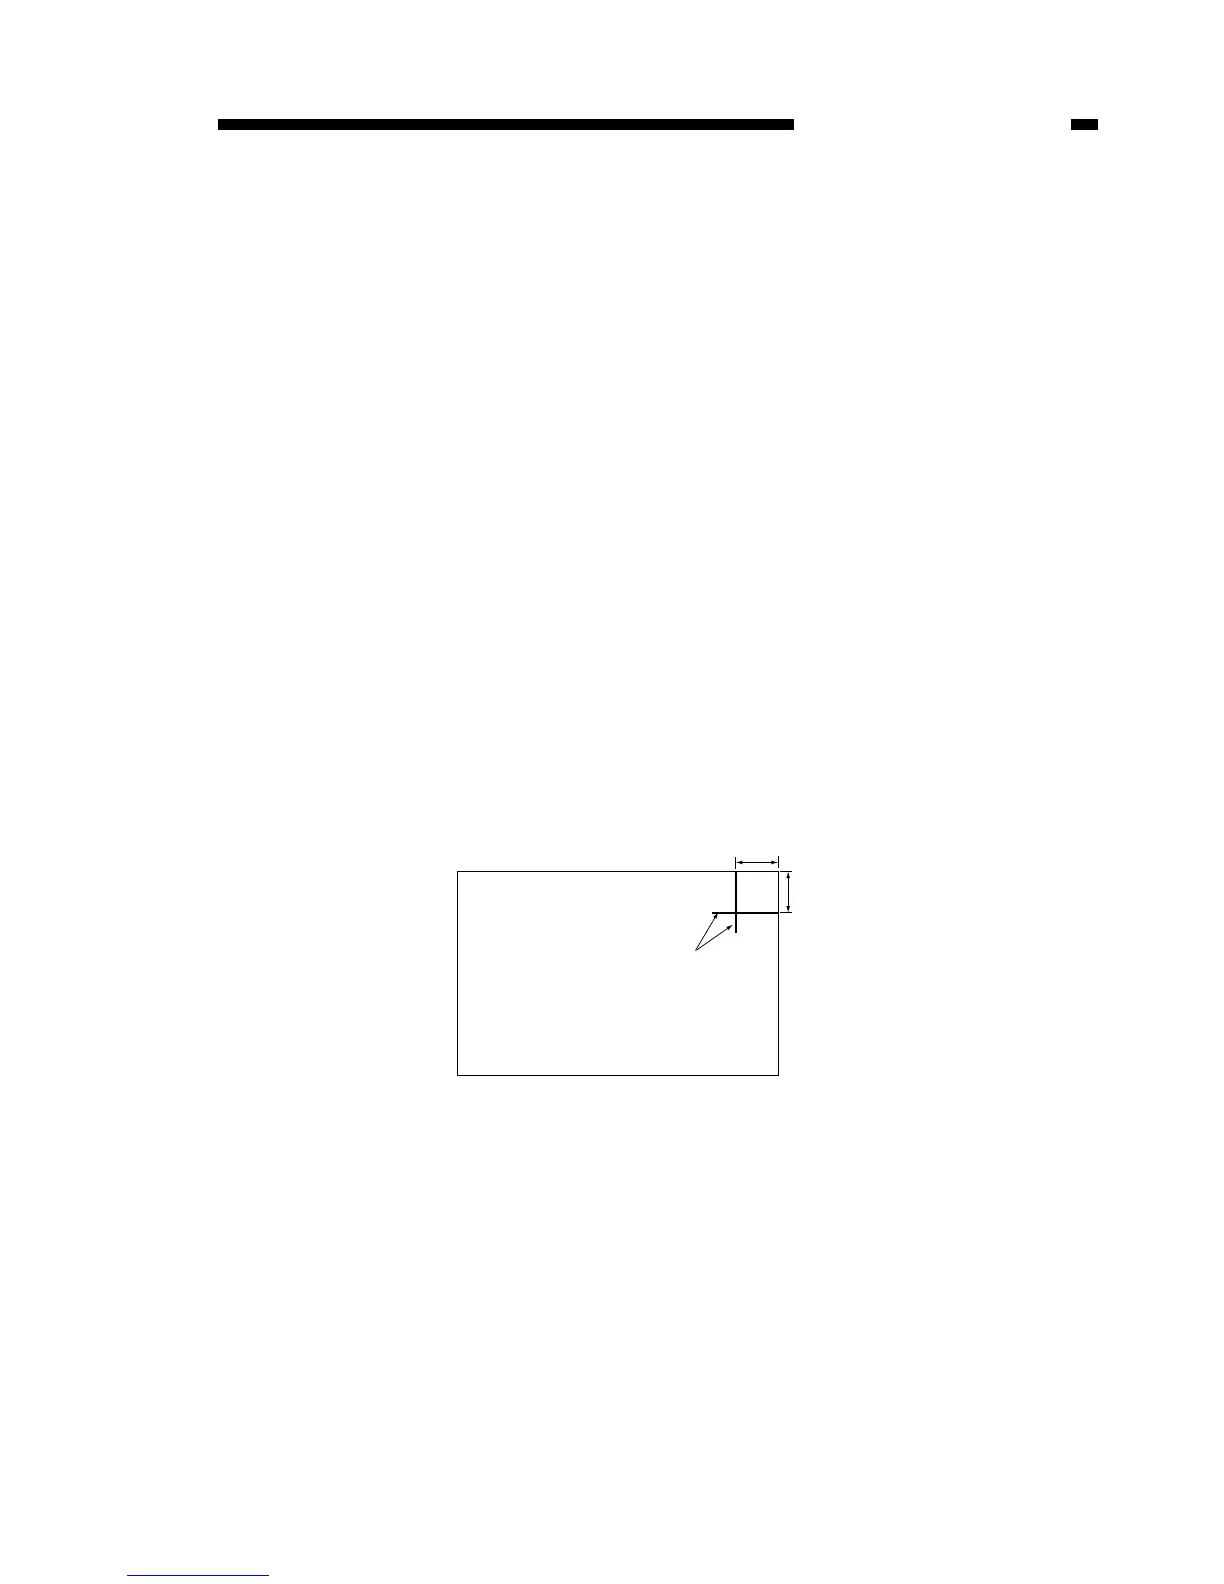
2. Image positioning adjustment
1) Make a test chart with marks every 1cm from the leading and left edges of the page,
as shown in the figure below.
Figure 13-112