COPYRIGHT
©
1999 CANON INC. CANON GP160 REV.0 FEB. 1999 PRINTED IN JAPAN (IMPRIME AU JAPON)
CHAPTER 3 EXPOSURE SYSTEM
3-8
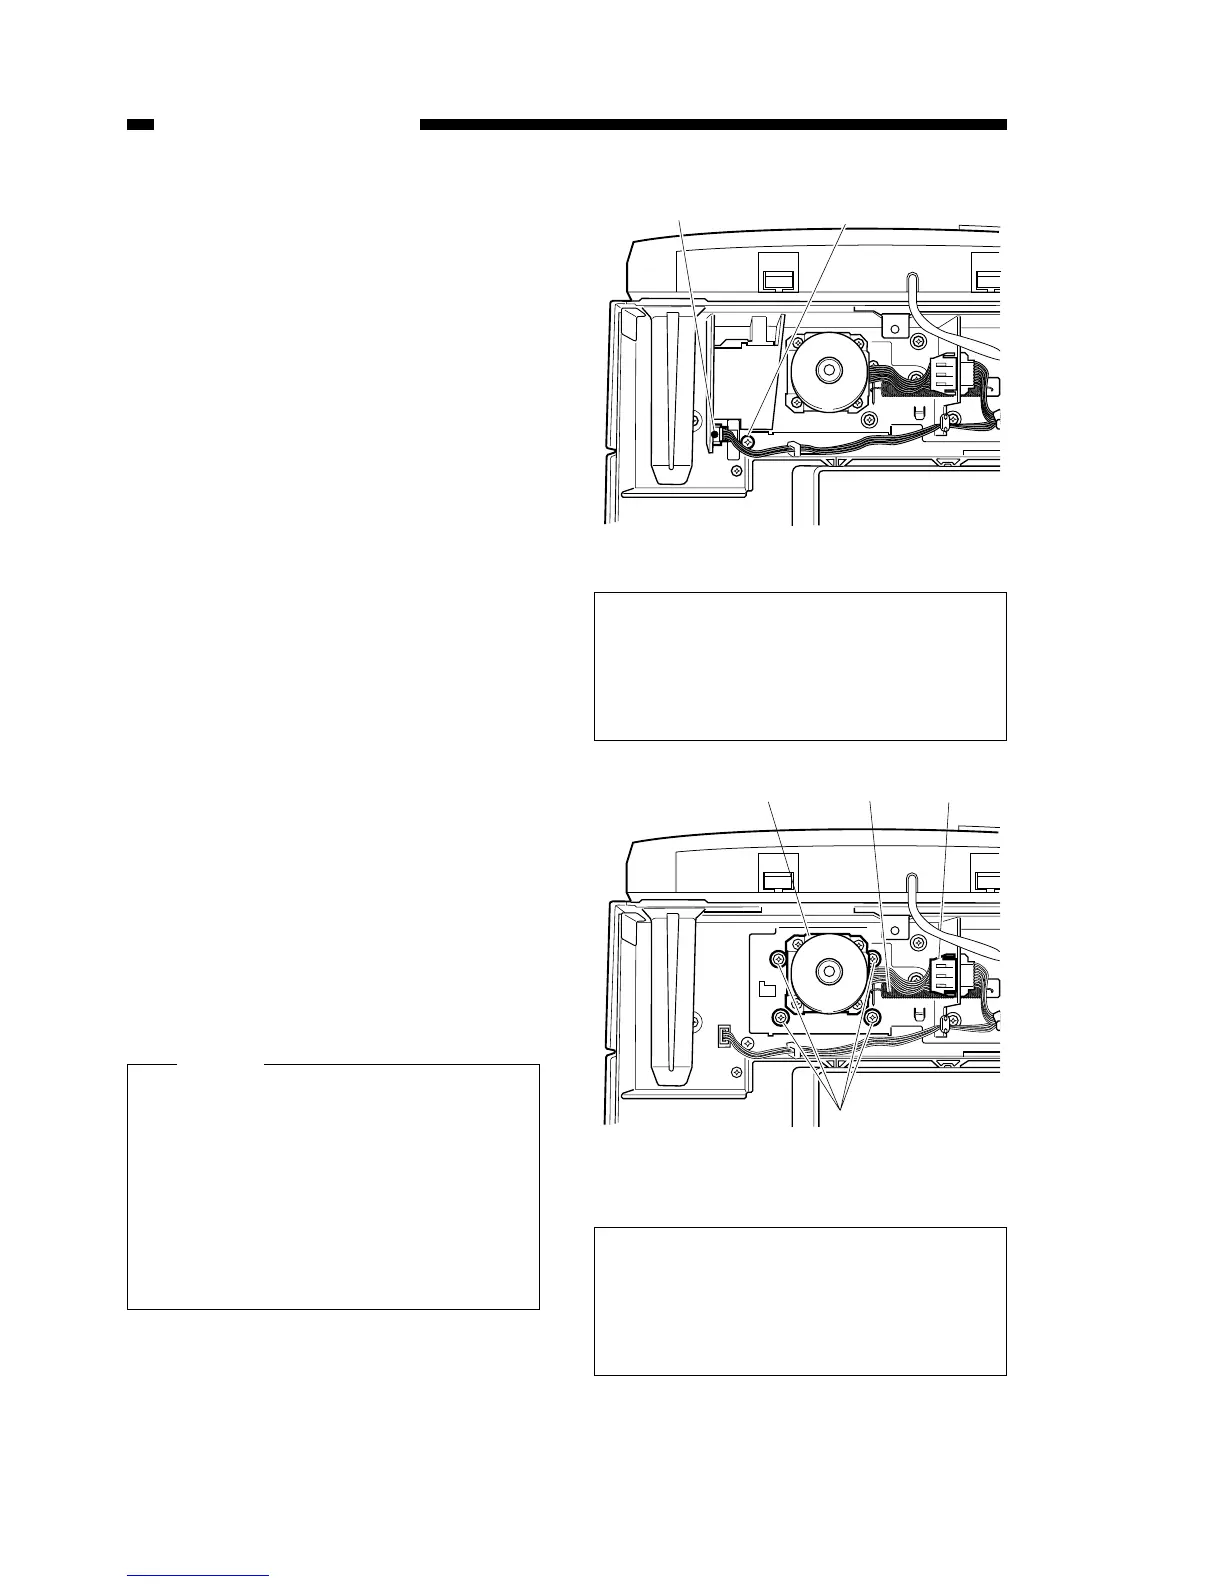
B. Document scanning
motor
1) Remove the 4 installation screws and
remove the main unit’s rear cover.
2) Remove the copyboard cover open /
shut sensor’s connector [1]
3) Remove the installation screw [2],
and remove the copyboard cover
open / shut sensor together with the
sensor holder.
4) Remove the document scanner
motor’s [3] connector [4].
5) Remove the 4 installation screws [5].
6) Remove the tension spring [6], and
while removing the drive belt from the
motor gear, remove the document
scanner motor together with the sup-
port plate.
Figure 3-305
Figure 3-306
When installing the document scanner
motor, lock in position with a installa-
tion screw after pulling the tension
spring between the motor and the
main unit. If the spring is locked in
position before it has been stretched,
the drive belt will not have the correct
tension which could lead to faulty
operation of the scanner.
Caution:
The above diagram shows the config-
uration of units equipped with an ADF.
The configuration of the main unit is
also the same for units which are not
equipped with an ADF.
The above diagram shows the config-
uration of units equipped with an ADF.
The configuration of the main unit is
also the same for units which are not
equipped with an ADF.