5- 40
NetWare Settings (Windows)
トップ
Chapter 3
Printing by Objective
Chapter 4
Maintenance
Chapter 5
Using the Printer
in a Network
Environment
Chapter 6
Troubleshooting
Chapter 7
Operating the
Function Menu
Index
TOP
Contents
Chapter 2
Using Various Media
Chapter 1
Basic Use
Setting NetWare Protocol
The printer protocol settings can be configured from a
computer using a web browser (Remote UI). First set the
printer IP address. (→ P. 5- 7 )
Configuring the Protocol Using a Web
Browser (Remote UI)
Important
z
You can use Netscape Navigator/Communicator 6.0 or later,
or Internet Explorer 5.01 or later for the web browser.
z You cannot connect to the printer via a proxy server. In
an environment that uses a proxy server, add the
printer IP address to Exceptions (addresses that do
not use a proxy) in the web browser proxy server
settings. (These settings vary depending on the
network environment.)
z Enable the JavaScript and Cookies settings in the web
browser.
z If multiple remote UIs are run at the same time, the last
setting to be made will be used. It is recommended
that you only run one remote UI at a time.
Note
z When the Remote UI is started using the printer name,
make sure that the DNS settings for the DNS
environment and board have been set up correctly.
z If Remote UI is started and the print history is
displayed as RPrinter/NPrinter, the document name
and user information cannot be obtained.
Consequently, the document name will only be
displayed as “unknown”, and the user will only be
displayed as “RPRINTER/NPRINTER”.
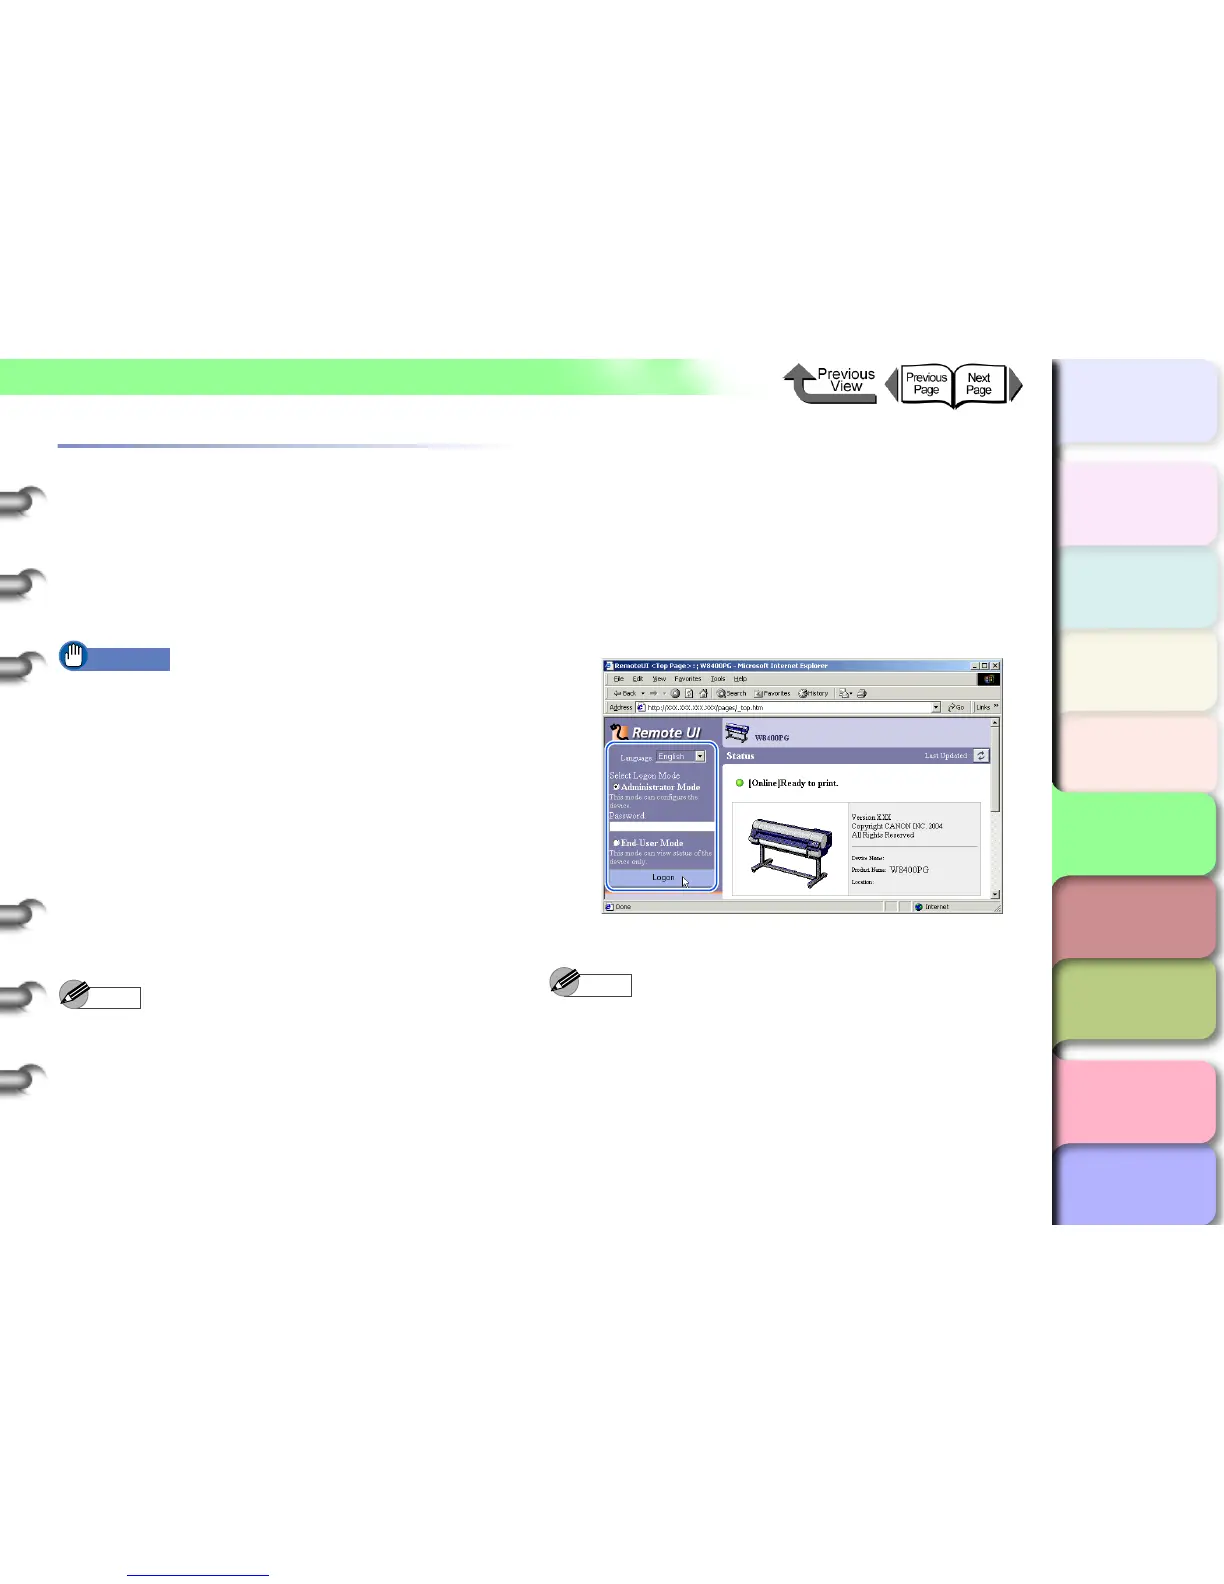
1 Start the Web Browser and enter the
following URL in the Location or Address
box, then press the Enter key.
http:// <Printer IP Address or name> /
Sample: http://XXX.XXX.XXX.XXX/
2 Select Administrator Mode and then click
the Logon button.
Remote UI starts.
Note
z If a password has been setup on the printer, enter the
password and then press the Logon button. If a
password has not been setup, you do not need to
enter a password.
 Loading...