Define the settings of an automated workflow
NOTE
It is not mandatory to define all the settings. When you put a check mark in front of a setting,
that setting and its values become enabled.
[General] settings Description
[Queue name] You can enter a distinguishing name for the automated workflow
(maximum 25 characters). This name is also used as a label on the
control panel. This helps the operator to identify certain jobs on
the control panel. In this way, the operator can identify from which
LPR queue or workflow the job has arrived. Different LPR queues
can have the same label if the operator chooses to do so. In that
case, the operator cannot distinguish from which specific queue a
job has arrived. The LPR queue name is not displayed on the con-
trol panel.
[Description] You can enter a description of maximum 200 characters.
[Overrule job ticket] When this settings is enabled, then the settings of the automated
workflow will be used.
When this setting is disabled, then the settings of the job ticket
will be used.
[Note for operator] You can create a note, for example a print or finishing instruction,
for the operator.
[Number of sets] You can indicate how many sets of a job must be printed.
[Sorting] You can indicate whether the jobs must be sorted [By Set] or [By
Page].
[Variable data job (pages
per record)]
Use this function to indicate that the job is a variable data job. En-
ter the number of pages that composes a record.
[Media] settings Description
[Media] You can enter the media that must be used.
[Fit to media size] You can indicate whether every page must be scaled to the media
size.
[Layout] settings Description
[Print sides] You can indicate whether the jobs must be printed one-sided or
two-sided.
[Orientation] You can indicate whether the prints must be [Portrait] or [Land-
scape].
[Rotate 180 degrees] You can indicate that the prints must be rotated 180 degrees.
4
Define the settings of an automated workflow
78 Chapter 5 - Prepare the print system
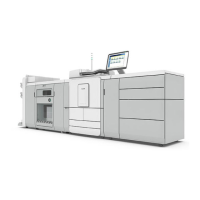
Canon varioPRINT 140 series

 Loading...