CG Drives & Automation 01-5980-01r2 Getting started 39
5. Getting started
This chapter is a step by step guide that will show you the
quickest way to get the motor shaft turning. We will show
you two examples: with remote control and control panel
operation.
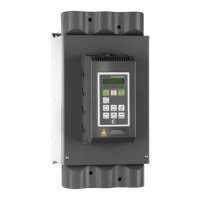
5.1 Check list
• Check that the motor and supply voltage corresponds to
the values on the rating plate of the softstarter.
• Mount the softstarter (Chapter 2. page 9 ).
• Connect the 3-phase mains supply cables to the connec-
tions on top of the softstarter (section , page 16).
• Connect the motor cables to the connections in the
bottom of the softstarter.
• Connect control supply voltage.
• Ensure that the installation complies with the
appropriate local regulations.
Remote (I/O) operation:
• Connect the I/O control cables (section 3.3, page 22).
• Switch on the 3-phase mains supply voltage and control
supply voltage.
• Select language (menu [211], section 8.2.1, page 69).
• Set the motor data (menu [220] - [227], section 8.2.3,
page 73).
• Check / Set real time clock (menu [740], section 8.7.4,
page 134)
• Perform a test run with external I/O start signal.
Control panel operation:
• Switch on the 3-phase mains supply voltage and control
supply voltage.
• Select language (menu [211], section 8.2.1, page 69).
• Set the motor data (menu [220] - [227], section 8.2.3,
page 73).
• Check / Set real time clock (menu [740], section 8.7.4,
page 134)
• Select keyboard control (menu [2151], section 7.1.1,
page 49).
• Perform a test run from the control panel.
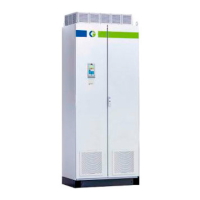
5.2 Mains and motor
connection.
Connect the softstarter
between the 3-phase mains supply and the motor. For the
respective connections, see the table below).
Dimension the mains and motor cables according to local
regulations. The cables must be able to carry the motors load
current (see “Technical data” on page 157).
5.2.1 Connect the mains cables
The connection of the mains cables is shown in section 3.1,
page 15.
5.2.2 Connect the motor cables
The connection of the motor cables is shown in section ,
page 16.
5.2.3 Connect the control supply
voltage
The control supply voltage is connected to the terminals
marked N and L on the power board (Chapter 3.2 page 20).
WARNING!
Mounting, wiring and setting the device into
operation must be carried out by properly
trained and qualified personnel.
WARNING!
Motor may start instantly!
Please verify that parameter settings and
I/O connections are according to desired
function before connecting mains supply.
Table 16 Mains and motor connection
L1, L2, L3
PE
Mains supply, 3-phase
Protective earth
T1, T2, T3
Motor output, 3-phase
Motor earth
WARNING!
In order to work safely the mains earth must
be connected to PE and the motor earth to
.
 Loading...