Using the SPA932 Attendant Console
Connecting the SPA932 Attendant Console to the SPA525G IP Phone
Cisco Small Business Pro IP Phone SPA525G (SIP) User Guide 102
6
Connecting an Additional SPA932
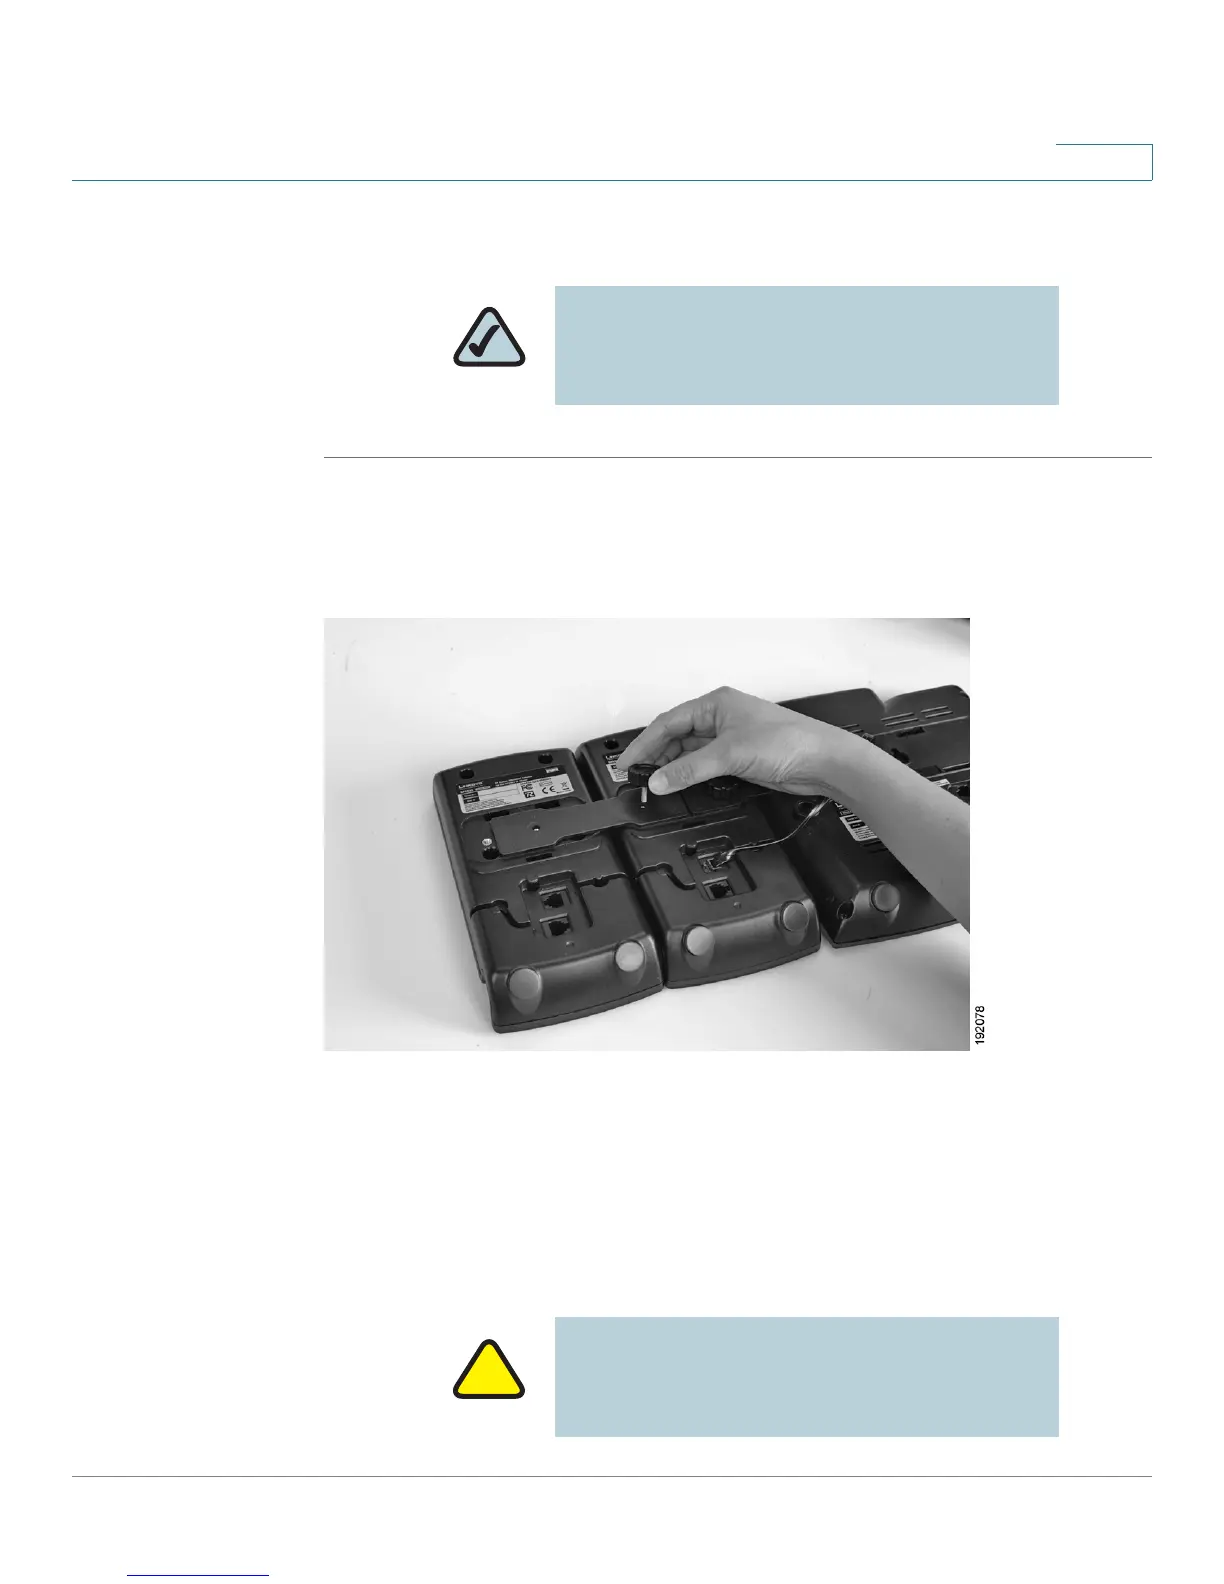
STEP 1 Align the hole in the first SPA932 alignment recess with the hole on the attachment
arm.
STEP 2 Using the attachment arm screw, secure the attachment arm to the first SPA932.
STEP 3 Align the hole in the second SPA932 alignment recess with the hole on the
attachment arm.
STEP 4 Using the attachment arm screw, secure the attachment arm to the second
SPA932.
STEP 5 Locate the AUX OUT port on the back of the first SPA932. Connect one end of the
auxiliary cable to this port.
NOTE: A maximum of two SPA932 Attendant
Consoles can be connected to a SPA525G.
IMPORTANT: Do not plug a telephone line cord
into an AUX port. Use only the auxiliary cable
provided with the SPA932.