P/N 80679, Rev. 10 Page 37
3.7.1 Setup overview for the OD mount machine
To set up the FF6300 OD mount, follow the process below. For details on these steps,
see Section 3.7.2 on page 37 through Section 3.7.5 on page 41.
1. Remove the OD mount from its shipping/storage crate.
2. Position the turning and counterweight arms for the FF6300.
3. Set the OD mount on top of the FF6300 main body and secure it.
4. Set the legs of the OD mount to the approximate mounting dimension.
5. Attach the vertical legs and leveling feet.
6. Secure the OD mount to the workpiece.
7. Center and level the OD mount.
3.7.2 Assembling the OD mount
The FF6300 OD mount ships in a wooden crate separate from the base machine.
1. Using the three lifting eyes on the OD mount, remove the OD mount from the
shipping crate.
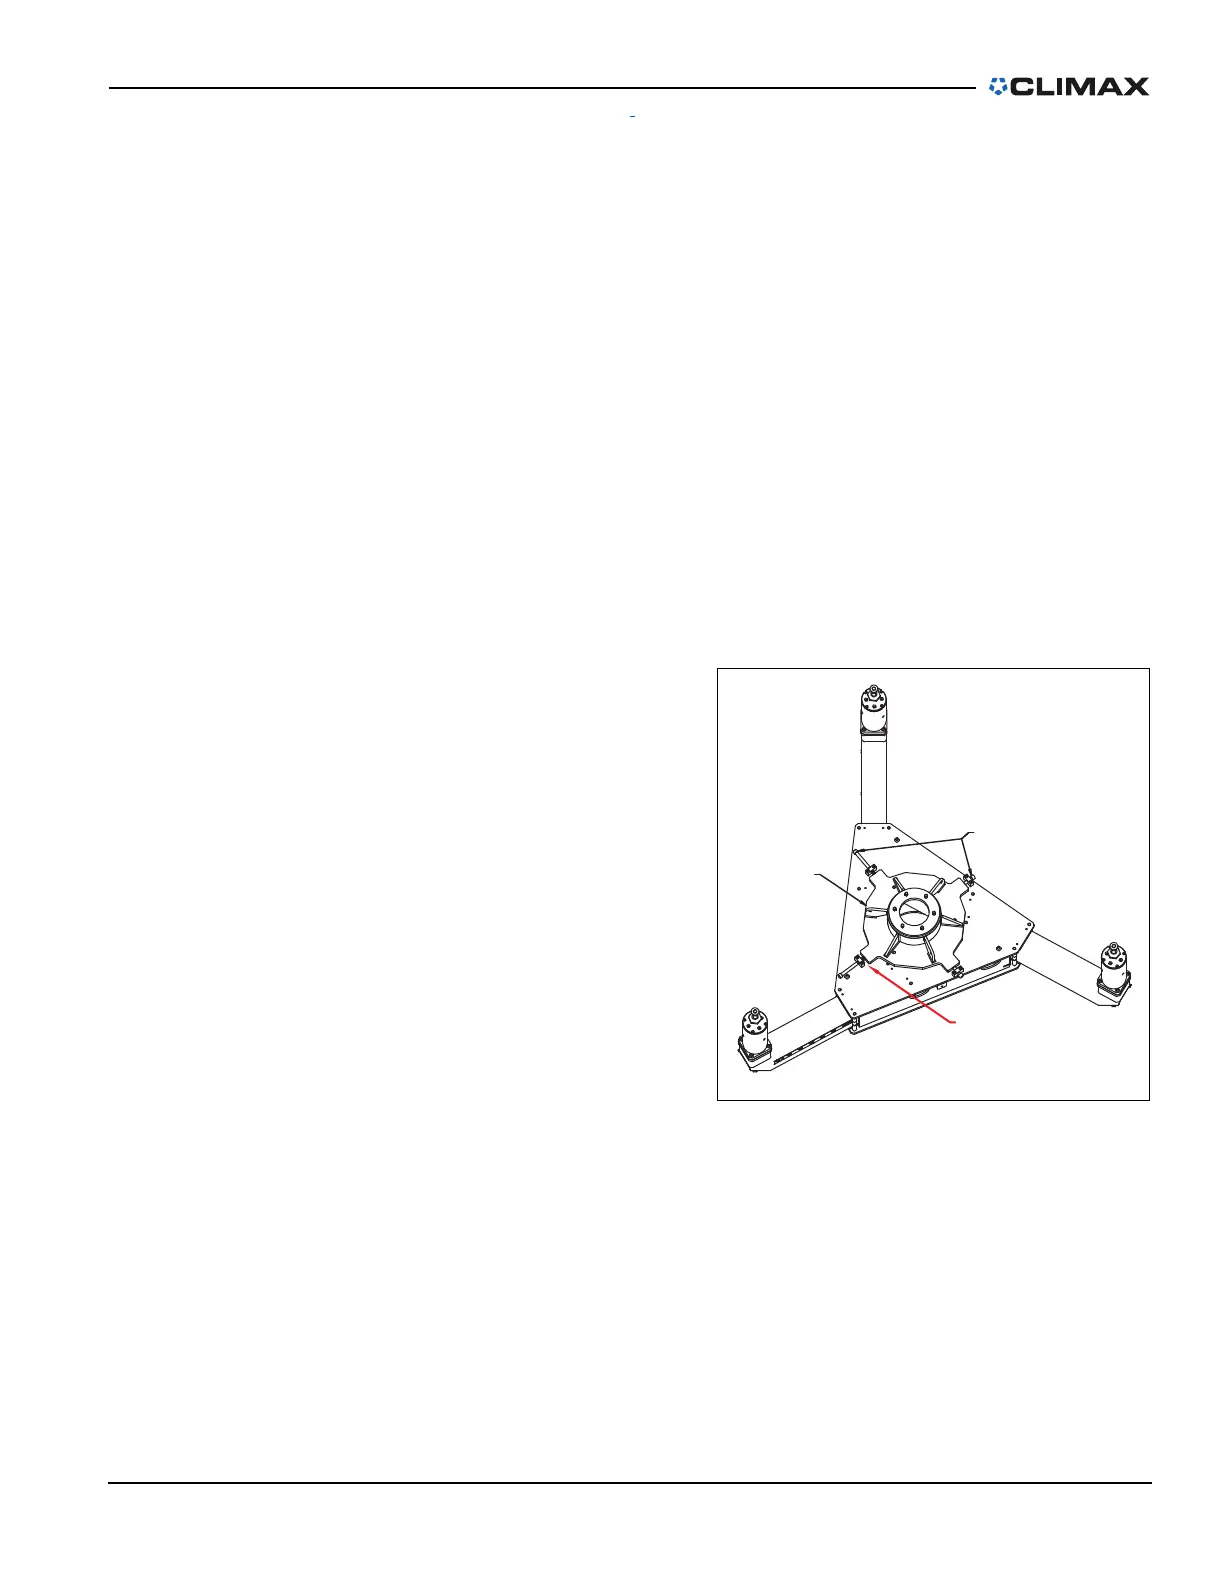
2. Check that the centering plate
is roughly centered to maxi-
mize the centering adjustment.
To center the centering plate,
adjust the centering screws
until the gap marked in red in
Figure 3-17 is equal for all four
screws.
3. Apply any anti-seize com-
pound (provided in the tool kit)
to the threads and contacting
faces of each leg section
(Figure 3-12 on page 34).
4. Assemble the OD mount legs,
end cap, and leveling foot.
5. Adjust the turning arm and
counterweight arm on the main
machine before installing the
OD mount. See Section 3.9 on page 44 and Section 3.10 on page 45.
6. Remove the ID chuck.
CENTERING
PLATE
CENTERING
SCREW 4X
EQUAL SPACE HERE
FIGURE 3-17. CENTERING PLATE