Installation
2023-05 D111XXXXXX | 05 53
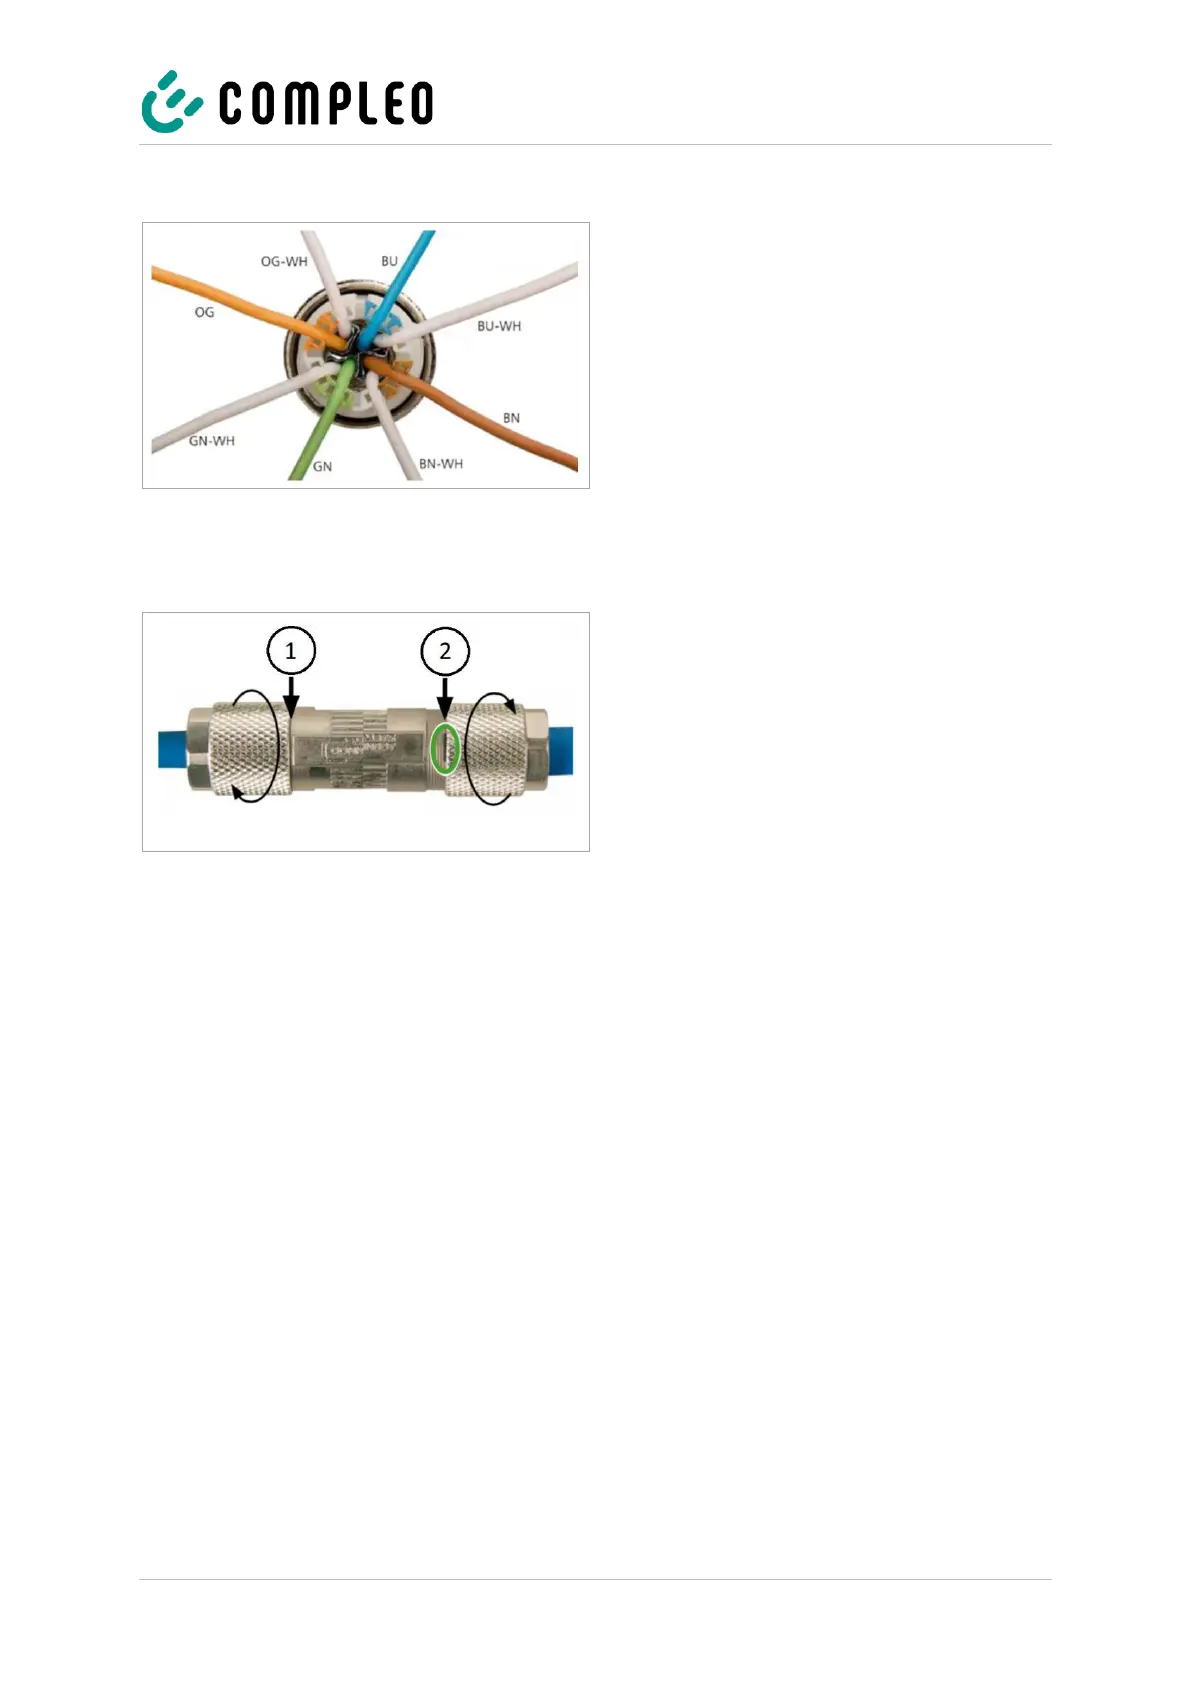
6. Connect the individual wires of the cable
as shown in the adjacent figure.
7. Cut the wires with an electric cutter flush
with the housing.
8. Screw the connecting piece to the cable
connector.
– How far the connecting piece has to
be screwed onto the cable
connector depends on the diameter
of the network cable used on the
network side.
Fig. 26: Screwing on the connecting piece
– For diameters up to 9 mm, the cable
connector must be completely
closed (1).
– - For diameters between 9.1 mm and
9.7 mm, close the screw connection
up to the vertical marking of the
cable connector (2).
Fig. 27: Closing the screw connection