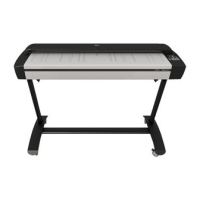
iJET Panel Quick Reference Guide 11-10
Printer Setup ->
Color Printer ->
Printer Model ->
Custom Setup
And …
Printer Setup ->
B&W Printer ->
Printer Model ->
Custom Setup
To set the printer parameters for
your printer model.
Recommended parameters for
specific models can be viewed
on the scanner manufacturer’s
website. The list contains printer
models that are considered to
be compatible based on their
similarity to a printers that have
actually been tested.
The list will be updated as new
models are tested and enter the
market.
If your printer is not named on
the website list, you can try to
use the printer’s documentation
to determine the right settings.
Please note however that
unlisted printers may not be
compatible with the scanner.
Command Set,
Ctrl. Language,
Orientation
Scalable,
Resolution,
Printer Size,
Render Type,
Use Inked Area
Command Set - This is the printer’s format
language – choose RTL or PCL3GUI
Ctrl. Language - The control language is
used by the system when it applies some of
the others settings, such as resolution, size,
etcetera. Select None or HP PJL.
Orientation – The feeding orientation for
printer. On most large format printers this
will be landscape while on some of the
narrower models it will be Portrait.
Scalable - ‘No’ means that the scanner will
take care of scaling before sending data to
the printer. ‘Yes” means that the printer will
take care of scaling.
Resolution –This is the the printer’s fixed
resolution.
Printer Size - The printer is defined to be of
a certain max standard size - A0, A2
etcetera.
Render Type - Scan to print data protocol.
See the lists to find the right selection for
your printer.
Use Inked Area – ‘Yes’ means that the
printer will cut the output by looking at the
area that was actually printed. ‘No, means
to use the whole paper size to determine the
place to cut.
Network Setup ->
Network Setup ->
DHCP Setup
To determine if the scanner is to
be recognized on the network
through DHCP or manually.
Yes,
No,
Default: Yes
Select Yes if your network support DHCP
and if you want to automatically assign an IP
address for the copy scanner.
Select No to assign an IP address manually
(see next three options).
Network Setup ->