Configuration and Setup 3-6
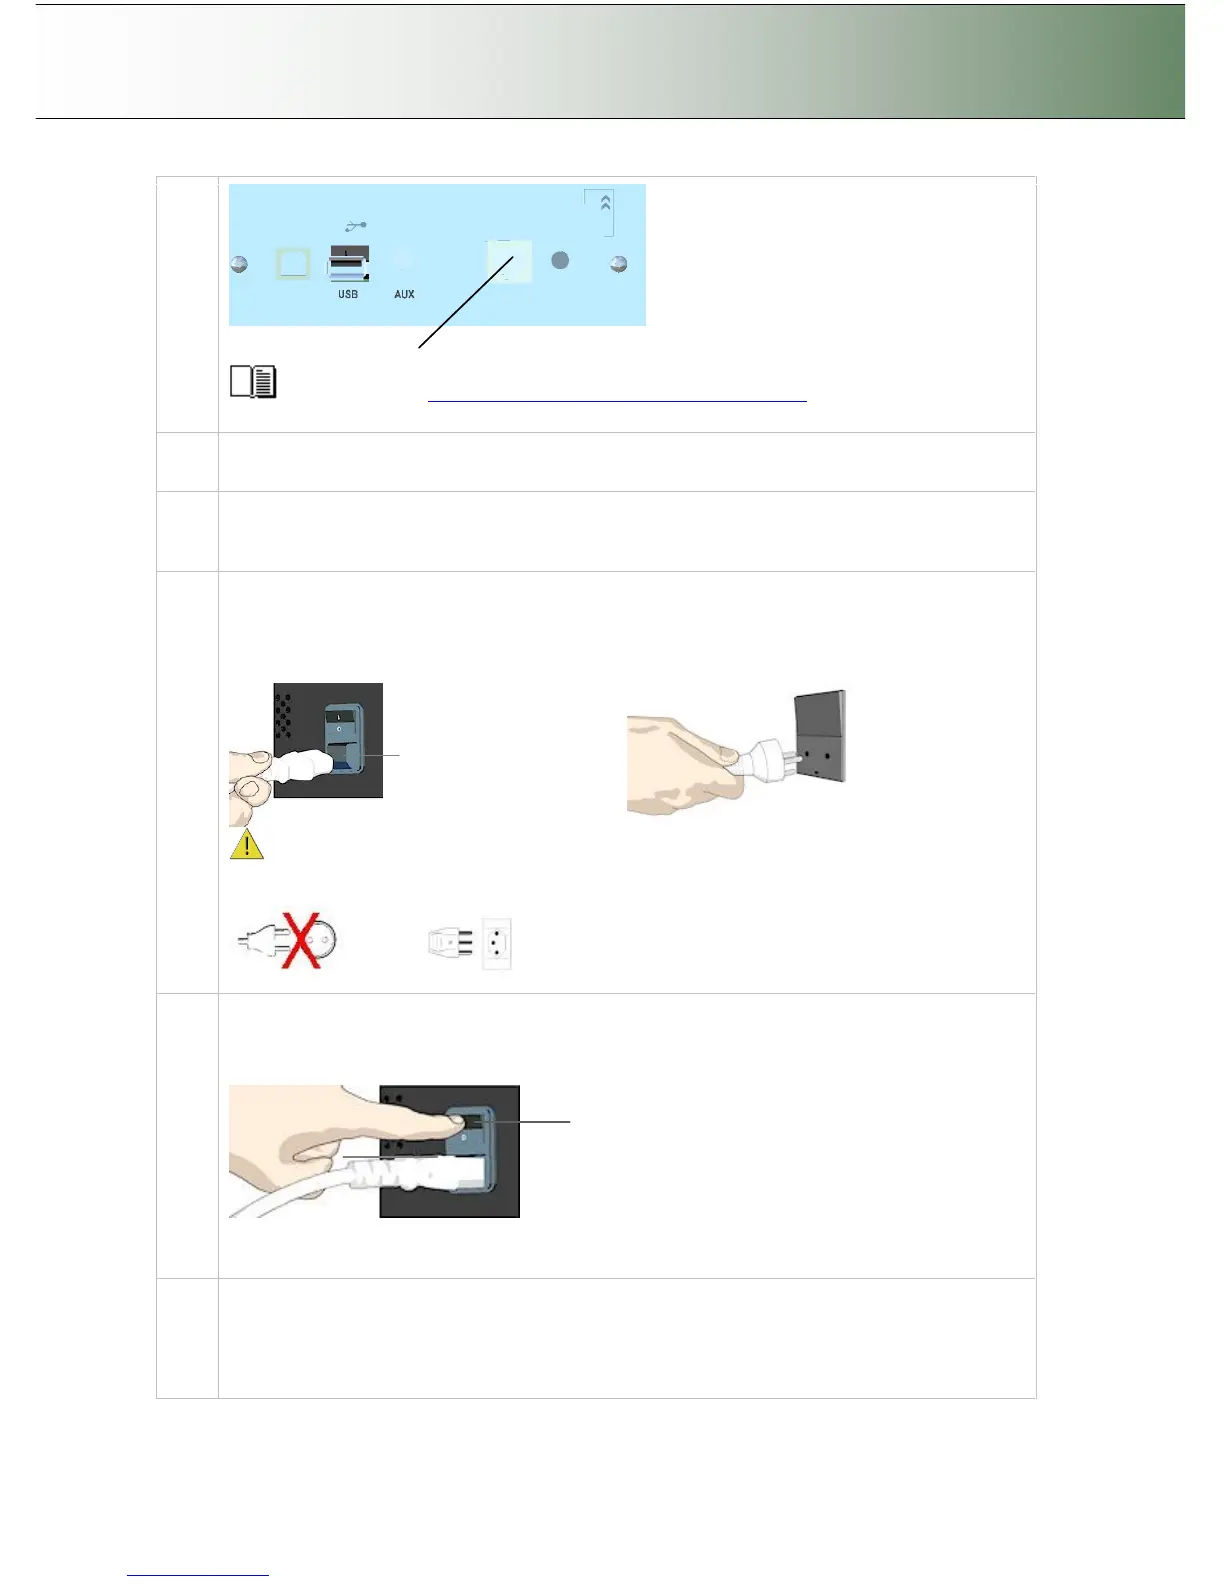
LAN port
See the section “Locating the Interface Cable Connector Panel” for instructions regarding
your specific scanner model.
3
Connection – network end.
Connect the other end of the LAN cable to the network or switch.
4
Quick clean for dust
Clean your scanner’s surface so dirt and dust are not dragged into the scan area with the original.
Wipe the glass with a dry cloth to remove any dust in the scan area.
5
Connect scanner power cable
At back of the scanner, you will find the scanner-end power cable socket, just below the Main Poer
Switch. Connect the cable to the scanner plug socket and then the other end to your grounded
power source.
Scanner-end power socket
Plug-
Caution: The scanner is equipped with a three-wire (pin) grounding type plug. If you cannot
insert the plug into your outlet, contact your electrician to replace the outlet and ensure a
grounded power connection. Do not try to defeat or ignore the purpose of the grounding-type plug.
6
Turn (power) on the scanner and the printer
To turn on the scanner - at back of the scanner, above the scanner-end power cable plug you will
find the main power switch. Flip the main power switch to ON (marked “I”). The scanner starts the
init and self test sequence and you must wait until these are finished.
Main Power switch
Press the
“I” to turn on.
See your printer’s documentation for instructions on connecting power cables to the printer and
switching the printer ON.
Perform Preliminary Maintenance – Calibration
You will have to use a PC with WIDEsystem and Scanner Maintenance software installed. To run
scanner maintenance.
Use a local USB connected PC or a LAN connected PC with WIDEsystem and Scanner