12. First tests
12.1 Checking the input signals
Before starting the tests in motion, you should
first verify the main input signals, such as:
• Homing sensors – HOME
• Limit switches – LIMIT
• Emergency stop – ESTOP
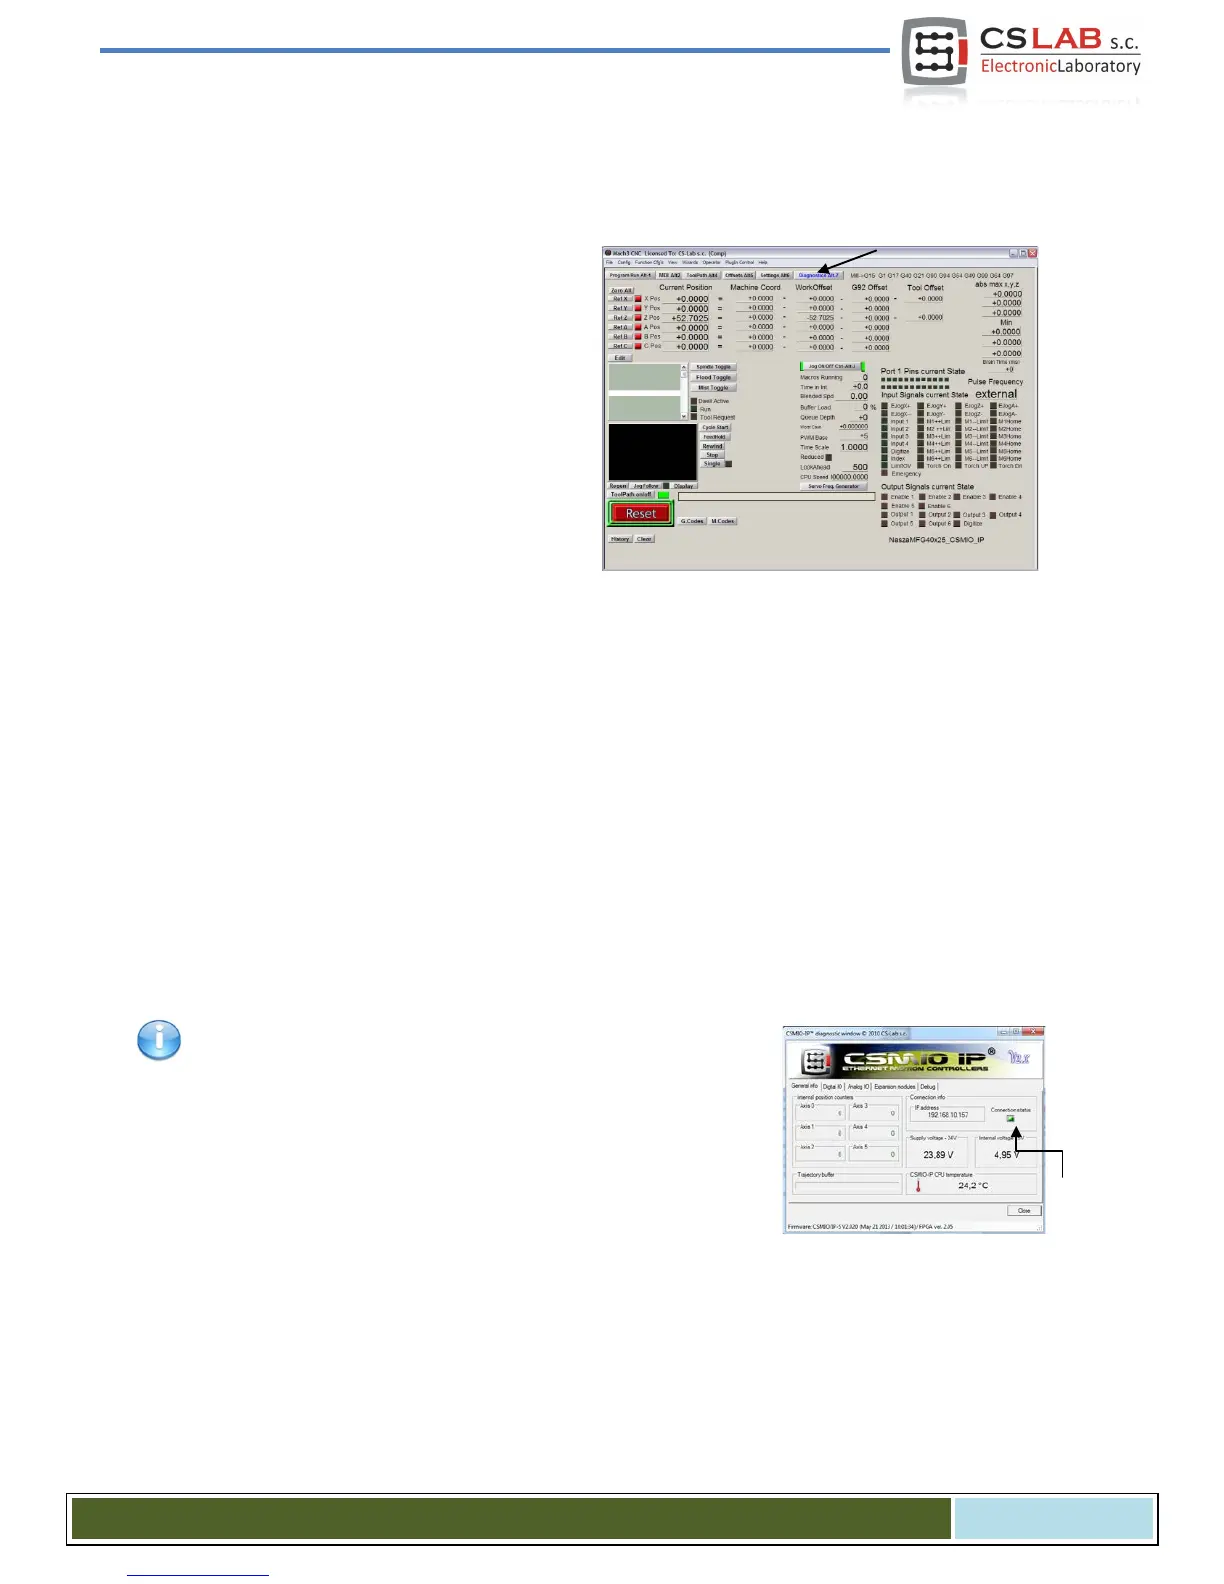
After running Mach3, go to „Diagnostics” tab. In
„Input signals current state” area there are shown
light indicators of the input signals. During the
test, any of axes should not be on a limit switch
or homing sensor. You should manually, sequentially activate the HOME sensors and verify if correct indi-
cators light up. There are axes at the input signals indicators marked as M1, M2, M3, M4, M5, M6 what
corresponds in order to X, Y, Z, A, B, C. After HOME switches verifying you should check LIMIT switches.
Again - manually activate the LIMITs on each axis and check on a screen, if correct indicators light up. If
the light indicators or indicator light up constantly and they turn off after manual LIMIT switch deactiva-
tion - it means wrong polarization – you must change configuration in „Ports and pins” window (see previ-
ous sections).
If on all axes the HOME and LIMIT sensors work fine, it is time to verify an emergency stop signal (here
Emergency) again. After the E-Stop pressing – the indicator should flash red light. When you release it - it
should turn off.
If everything works correctly, press RESET on the screen and go to the next section.
If there is no response for any signals, you should check if program
communicates with the CSMIO/IP-A controller correctly. In the diagnos-
tics window (in „PlugIn ControlCSMIO_IP_Plugin” menu) you can
check the connection status. If the control light is red you can try to
quit and run Mach3 again. If it does not help see again the sections
about configuration and installation.
CS- Lab s.c. – CSMIO/IP- A - CNC controller
Page 89