12.2 Verification of axes scaling and motion directions
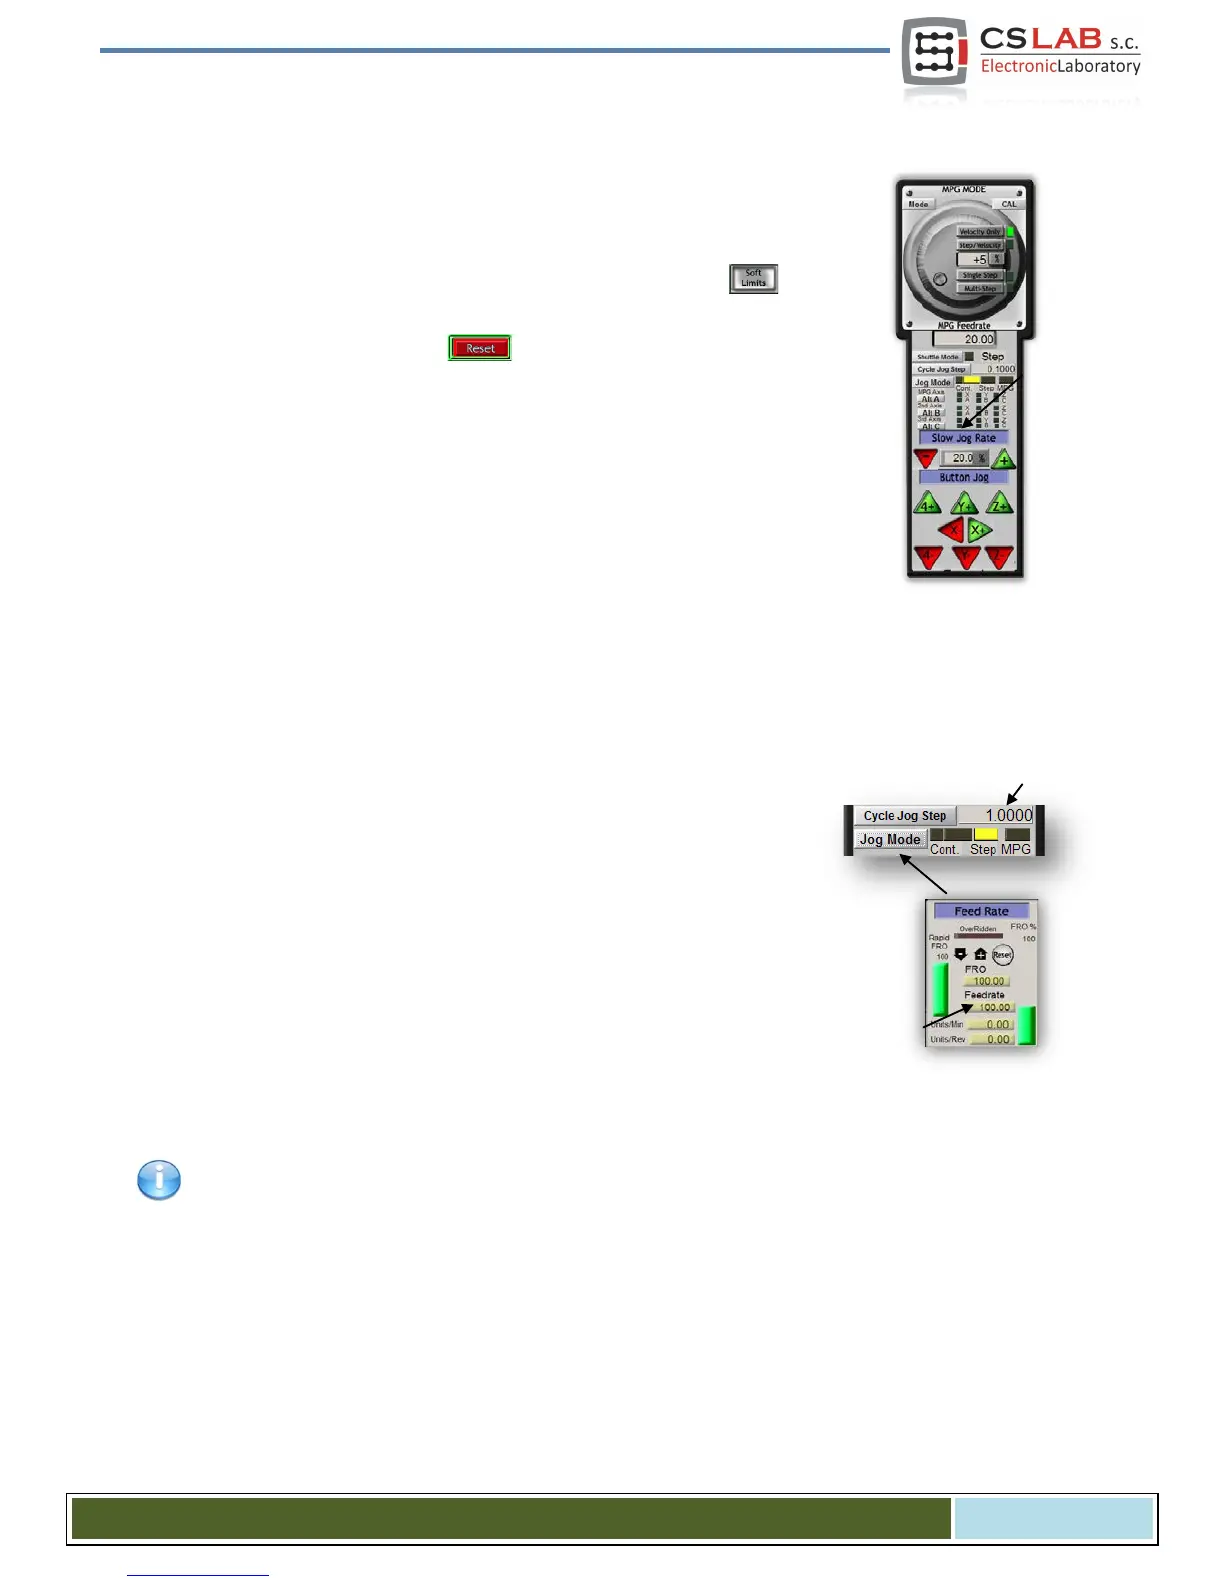
First motion control should be made at low speed. After pressing Tab key on a key-
board – manual feed rate panel should open. In „Slow Jog Rate” enter e.g. 10%. It
means that the motion will have 10% of maximum speed, defined in Motor Tuning.
SoftLimit switches should be disabled for these tests. Find the button on
Mach3 main screen – if there is a green light around it then click this button to
switch it off. If necessary press on the main screen, Mach3 program will be
in standby mode. There should be green light around the button.
You can control XY-axes by arrow keys on a keyboard, Z-axis by „Page Down” and
„Page Up”. You can also use the buttons from manual feed rate window.
You should check each axis if:
• Motion direction is changing. If not, it may mean incorrect connection
of DIR Signal to a drive.
• Directions are not changed. If so, you should change an axis direction
in „ConfigHoming/Limits” menu.
When all axes have their motion directions configured correctly – you can specify homing directions
(sides). For 3-axis machine XYZ - most common configuration is homing of XY-axes in negative direction
and Z- axis in positive direction. In „Config/Home/Limits” for Z axis there should be „Home Neg” selected.
Before further tests, you should check axes scaling. The best is to use dial gauge or other precise meas-
urement tool.
In manual feed rate panel set the Jog Mode and 1mm step size. „Slow Jog
Rate” does not apply to motion in positional mode (step motion) so speed is
set on the main screen in „Feedrate” area. For this test, you should enter low
value e.g. 100mm/min. Now, after pressing e.g. right arrow on the keyboard the X-axis
goes 1mm right. You should go this way at least 10mm (each axis), verifying with dial
gauge the distance actually made by the axis. The dial gauge should be reset after
1mm. If you see clear difference between the positions (requested and actual), it
means that that the „Steps Per” parameter in the Motor Tuning window is set incor-
rectly. You should go back to the sections about configuration and verify your set-
tings.
Always approve your settings on Mach screen by pressing ENTER. Otherwise the value will not be saved.
CS- Lab s.c. – CSMIO/IP- A - CNC controller
Page 90