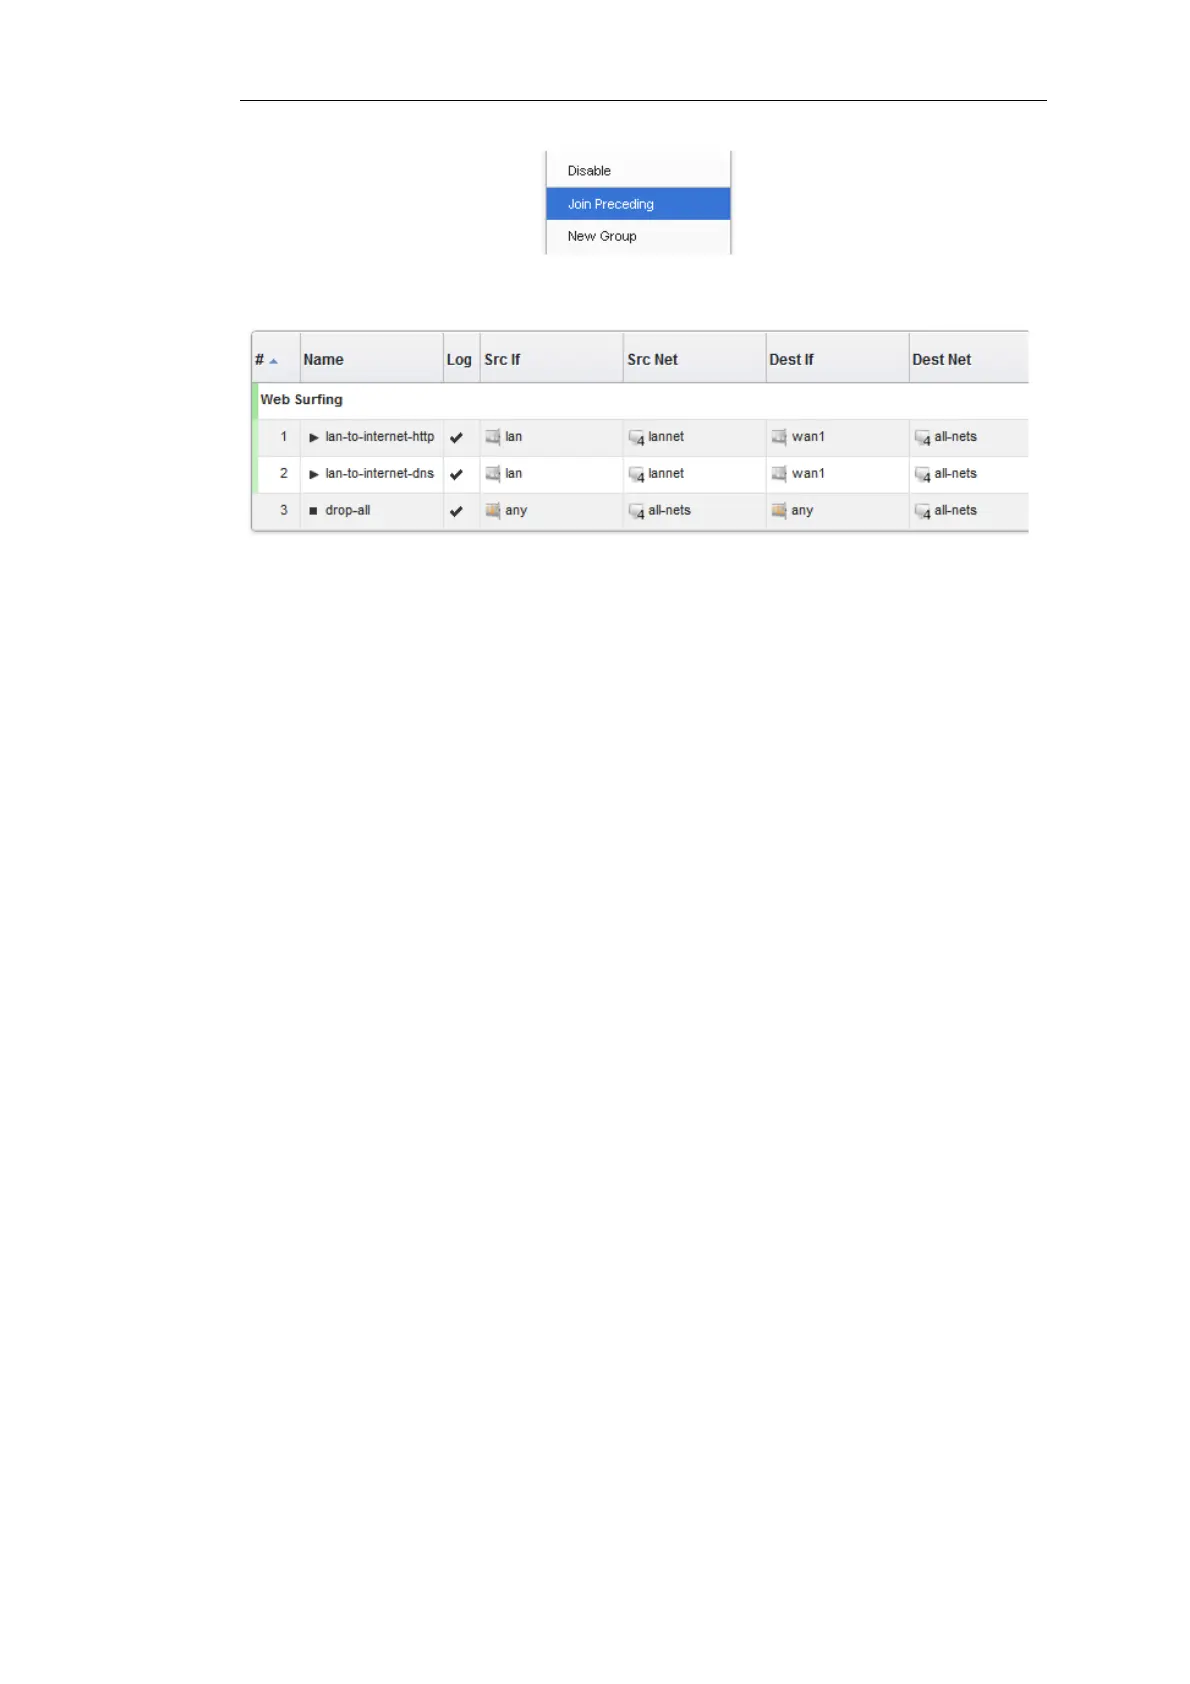
Once we do this for the second IP rule in our example then the result will be the following:
To add any object to the group we must first position it immediately following the group and
then select the Join Preceding option. This is explained in more detail next.
Adding Preceding Objects
If an object precedes a group or is in any position other than immediately following the group,
then this is done in a multi-step process:
i. Right click the object and select the Move to option.
ii. Enter the index of the position immediately following the target group.
iii. After the object has been moved to the new position, right click the object again and select
the Join Preceding option.
Moving Group Objects
Once an object, such as an IP rule, is within a group, the context of move operations becomes the
group. For example, right clicking a group object and selecting Move to Top will move the
object to the top of the group, not the top of the entire table.
Moving Groups
Groups can be moved in the same way as individual objects. By right clicking the group title line,
the context menu includes options to move the entire group. For example, the Move to Top
option moves the entire group to the top of the table.
Leaving a Group
If an object in a group is right clicked then the context menu contains the option Leave Group.
Selecting this removes the object from the group AND moves it down to a position immediately
following the group.
Removing a Group
By right clicking on a group title, the displayed context menu includes the Ungroup option. This
removes the group, however all the group's member objects remain. The group title line
Chapter 3: Fundamentals
244