• New IP Address: 10.10.10.5
4. Click OK
Then create a corresponding Allow rule:
1. Go to: Policies > Firewalling > Main IP Rules > Add > IP Rule
2. Specify a suitable name for the rule, for example Allow_HTTP_To_DMZ
3. Now enter:
• Action: Allow
• Service: http-all
• Source Interface: wan
• Source Network: all-nets
• Destination Interface: core
• Destination Network: wan_ip
4. Click OK
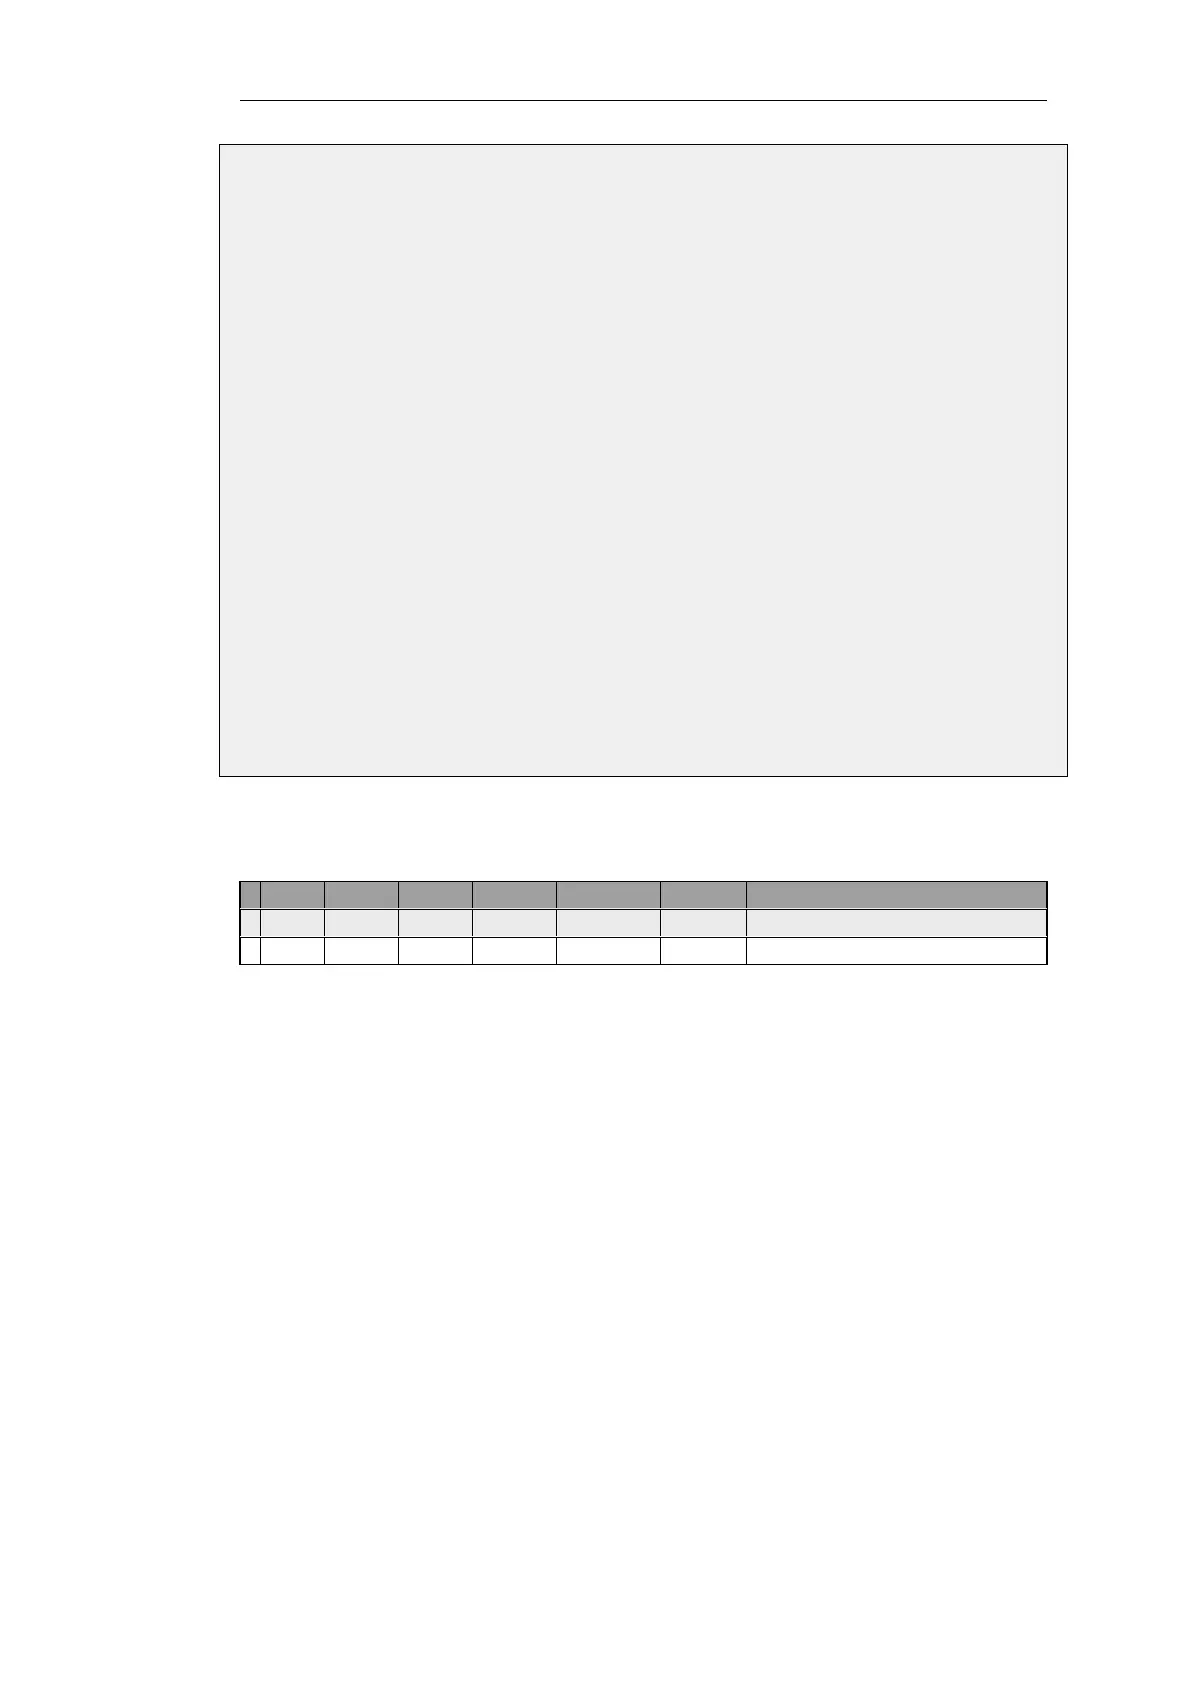
The example above results in the following two rules being added into the IP rule set called
main:
# Action Src Iface Src Net Dest Iface Dest Net Service SAT Action
1 SAT wan all-nets core wan_ip http-all Destination IP: 10.10.10.5
2 Allow wan all-nets core wan_ip http-all
These two rules allow web server access via the NetDefend Firewall's external IP address. Rule 1
states that address translation will take place if the connection has been permitted, and rule 2
permits the connection. Note that only HTTP traffic will be translated since the service must also
match for the SAT rule to trigger.
The SAT rule destination interface must be core (NetDefendOS itself) because interface IPs are
always routed on core. The scenario is illustrated in the diagram below.
Chapter 7: Address Translation
592