Field Setting SiEN18-622
154 Test Operation
Setting by pushbutton switches
The following settings are made by pushbutton switches on PCB.
(Factory setting)
There are the following three setting modes.
c Setting mode 1 (H1P off)
Initial status (when normal) : Also indicates during “abnormal”.
d Setting mode 2 (H1P on)
Used to modify the operating status and to set program addresses, etc. Usually used in
servicing the system.
e Monitor mode (H1P blinks)
Used to check the program made in Setting mode 2.
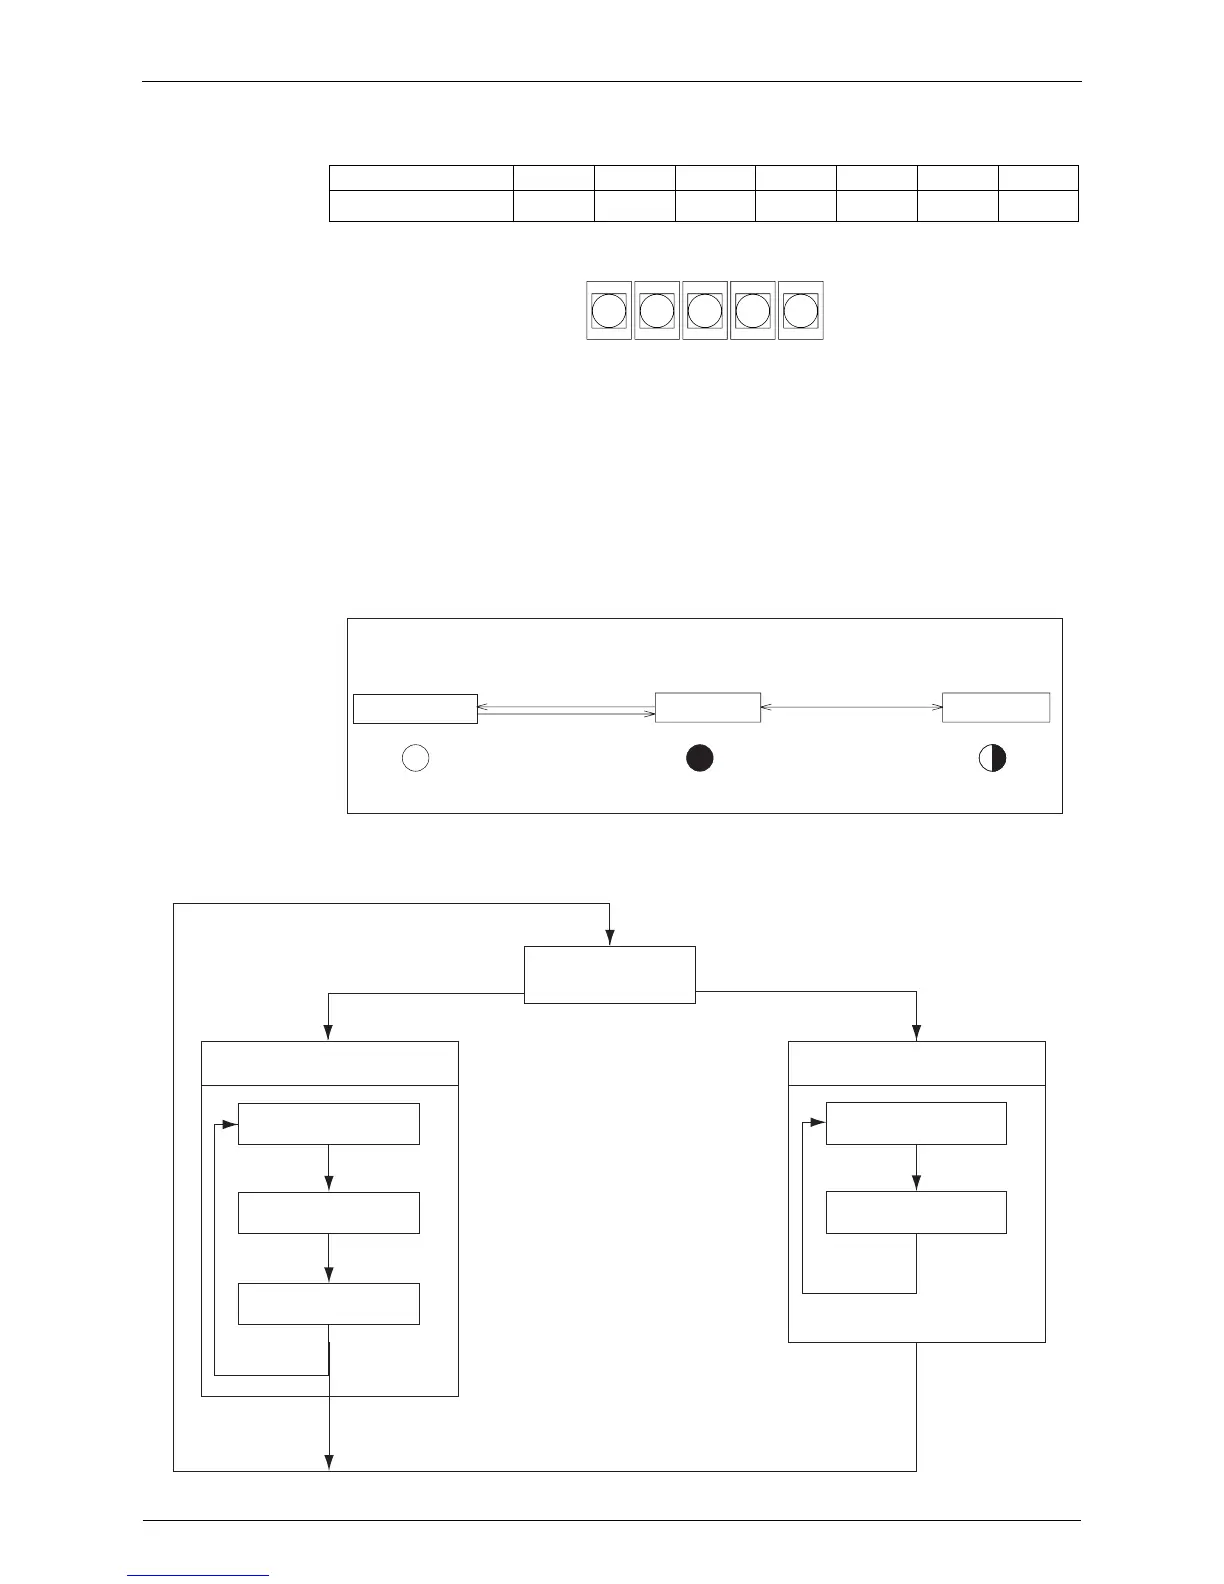
Mode changing procedure
Mode changing procedure
H1P H2P H3P H4P H5P H6P H7P
LED indication
7787777
BS1
MODE
BS2
SET
BS3
RETURN
BS4
TEST
BS5
RESET
(V2760)
Setting mode 1
Monitor mode
H1P
Blinking
MODE MODE
Off
H1P
Setting mode 2
MODE
On
H1P
Push the BS1(MODE button) one time.
(Normal)
(V2761)
Push and hold the BS1
(MODE button) for 5 seconds.
Push the BS1(MODE button)
one time.
Using the MODE button, the modes can be changed as follows.
Check item selection (Set)
Contents display
Monitor mode
Press BS3
(RETURN button).
Press BS3
(RETURN button).
Setting item selection (Set)
Setting mode 2
(Set): Select mode with BS2 (SET button) in each selection step.
Setting condition
selection (Set)
Setting condition
(Contents) display
Press BS3
(RETURN button).
Press BS3
(RETURN button).
Press BS3
(RETURN button).
Press BS1
(MODE button).
Press BS1
(MODE button).
Press BS1(MODE button).
Press BS1 (MODE button) for more than 5 sec.
(V2762)
Setting mode 1
(Initial condition)