Technical Specifications
28
Arex™ 400
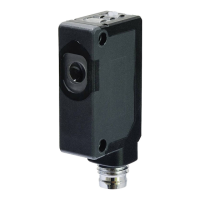
Command Box (Laser Control)
Control rack back panel connector
Socket Sub-D, 25 pins, female.
Figure 8: Command Box connector, female panel socket (front view)
PIN SIGNAL TYPE (***) DESCRIPTION
1 24V_ENABLE_B Output power supply Auxiliary 24V DC power supply available for
EXT_ENABLE_B
(max 125mA)
2 EXT_ENABLE_B Digital Input
Secondary external ENABLE signal:
- HIGH level: contact closed
- LOW level or disconnected: contact opened
3 GOOD/BAD Digital Output
This signal is used to notify a bad marking:
- ON in case of bad marking
4 EXT_24V Output power supply Auxiliary 24V DC power supply available for drive input logical HIGH (max 125mA)
5 EXT_24V Output power supply
Auxiliary 24V DC power supply available for drive input logical HIGH (max 125mA)
6 EXT_24V Output power supply Auxiliary 24V DC power supply available for drive input logical HIGH (max 125mA)
7 24V_ENABLE_A Output power supply
Auxiliary 24V DC power supply available for
EXT_ENABLE_A
(max 125mA)
8 EXT_ENABLE_A Digital Input
Primary external ENABLE signal:
- HIGH level: contact closed
- LOW level or disconnected: contact opened
9 BUSY Digital Output
This signal is used to know if the current
spooler is executing (marking in progress):
- ON during marking process
10 CONNECTOR_PRESENCE Digital Input
This signal is used to check the presence of the Command Box connector:
- HIGH level: normal operation
- LOW level or disconnected: laser marker faulty
11 START_MARKING (*) Digital Input
This signal is used to start to the marking process when a docum
ent or a sequence is run-
ning in AUTO MODE (**) or WORK MODE (**):
- HIGH level pulsed signal start the marking process
12 EXT_KEY Digital Input
External KEY signal:
- HIGH level: contact closed
- LOW level or disconnected: contact opened
13 STOP_MARKING (*) Digital Input
This signal is used to stop the marking process:
- HIGH level pulsed signal stop the marking process
14 RESERVED - DO NOT CONNECT
15 RESERVED -
DO NOT CONNECT
16 RESERVED - DO NOT CONNECT
17 END Digital Output
This signal is used to know if the marking process is finished:
- ON at the end of marking process
18 POWER_ON Digital Output
This signal is used to know if the laser marker is already warmed up:
- ON when the laser is in STAND_BY or READY state
19 GND Ground
Ground reference
20 SYSTEM_ALARM Digital Output
This signal is used to know if the laser marker is in booting up state or in error state:
- ON during BOOTING UP
- ON in case of system error
21 GND Ground
Ground reference
22 ENABLE_OUT Digital Output
This signal is used to know if the laser marker is ready to emit laser radiation:
- ON when the laser marker is in READY state
23 SW_READY (*) Digital Output
Depending on the configuration this signal can be used in different ways:
- COMPATIBILITY: ON when a document or a sequence is running in AUTO MODE (**) or
WO
RK MODE (**) independently from the laser marker state. The signal is ON regardless
of whether the laser marker is ready to start a new marking
- STANDARD: ON when a document or a sequence is running in AUTO MODE (**) or WORK
MOD
E (**) and the laser marker state is READY. The signal is ON regardless of whether
the laser marker is ready to start a new marking
- READY TO MARK: ON only when a document or a sequence is running in AUTO MODE (**)
o
r WORK MODE (**) and the laser marker state is READY. The signal is ON only if the laser
marker is ready to accept a new START_MARKING event (loading/spooling already exe-
cuted)
This signal can also be driven using Lighter™ Script engine "IoPort.setReady (true)" function
24 GND Ground Ground reference
25 GND Ground Ground reference
Table 2: Command Box connector pinout
(*) refers to Lighter™ user's manual “Setting I/O parameters” paragraph to set the signal properties
(**) refers to Lighter™ user's manual
(***) see “Input/Output specifications” on page 34
 Loading...