2 Follow the procedure listed in Before working inside your system.
3 Remove the system cover.
Step
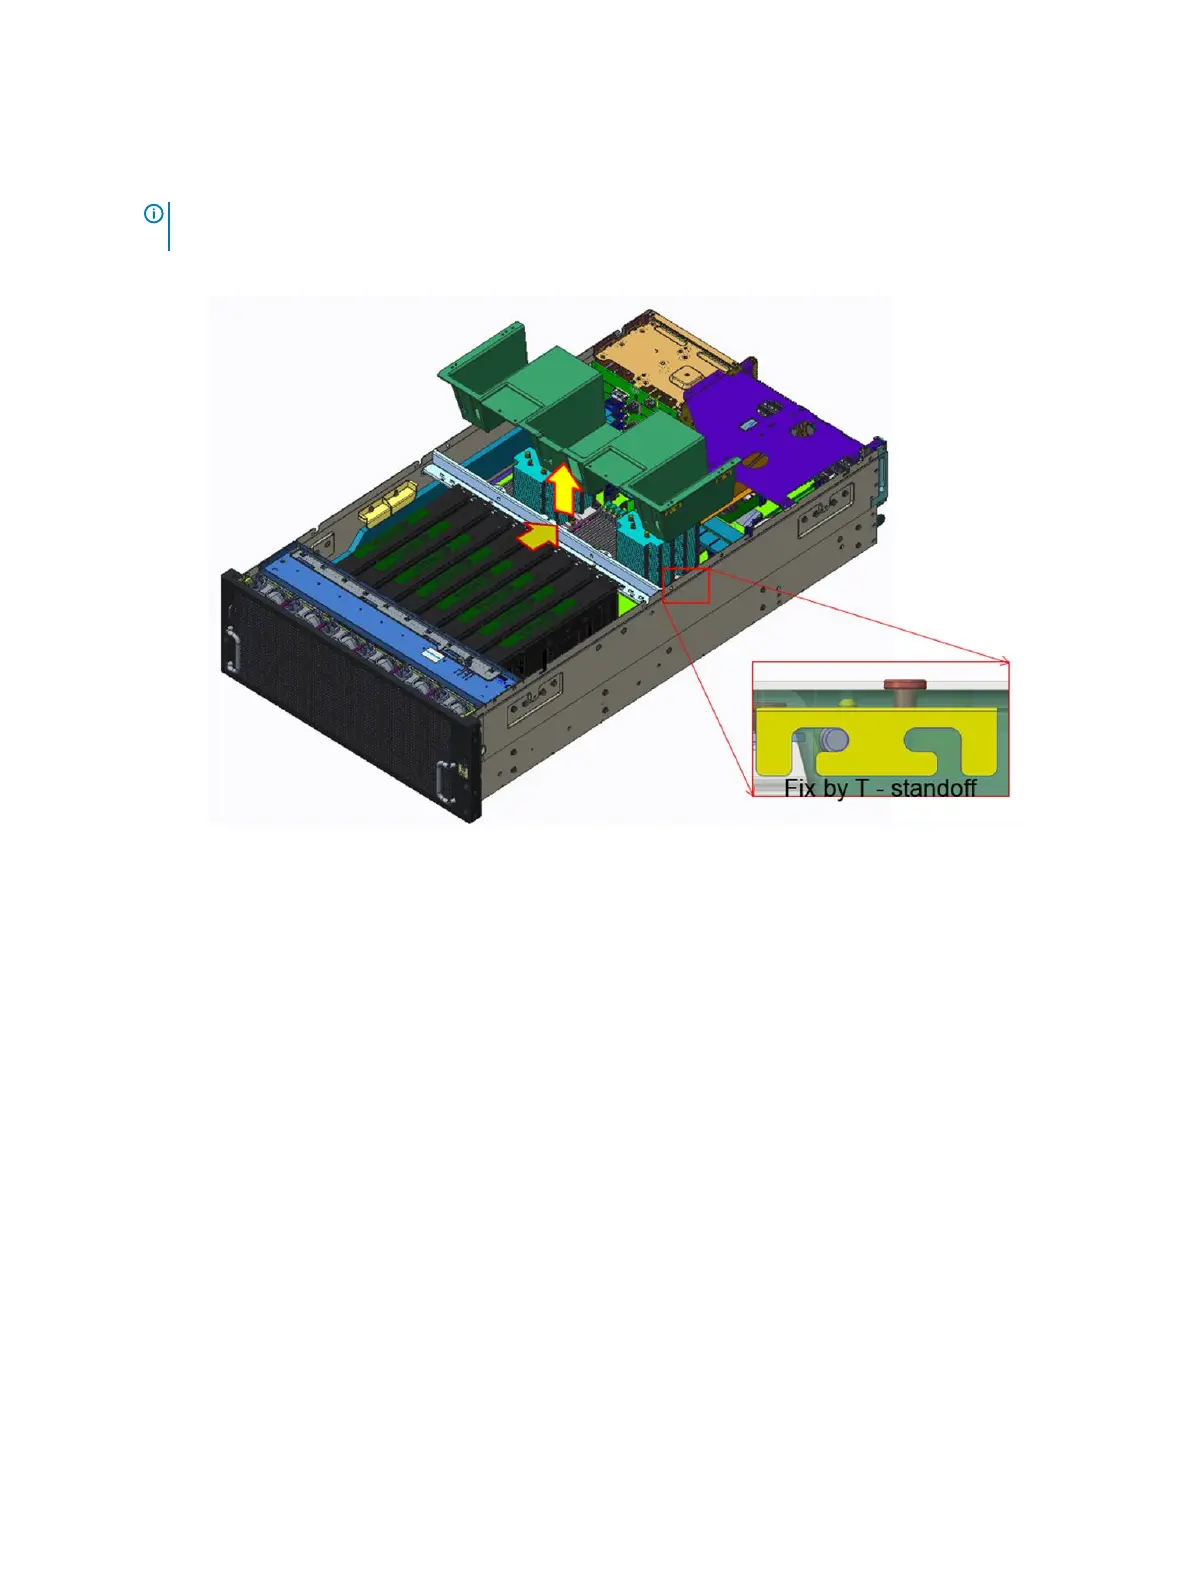
NOTE: The screws on top of the air shroud are meant to secured the T_stando. Do not remove the crews when
removing the air shroud.
Slide the air shroud backward to unlock it from the T_stando and lift the air shroud out of the system.
Figure 14. Removing the air shroud
Next step
1 Installing the air shroud.
Installing the air shroud
Prerequisites
1 Follow the safety guidelines listed in Safety instructions.
2 If applicable, route the cables inside the system along the system wall and secure the cables by using the cable-securing bracket.
Steps
1 Align the slot on the air shroud with the T_stando on the chassis.
2 Lower and slide the air shroud into the system until it is rmly seated.
Installing and removing system components
47