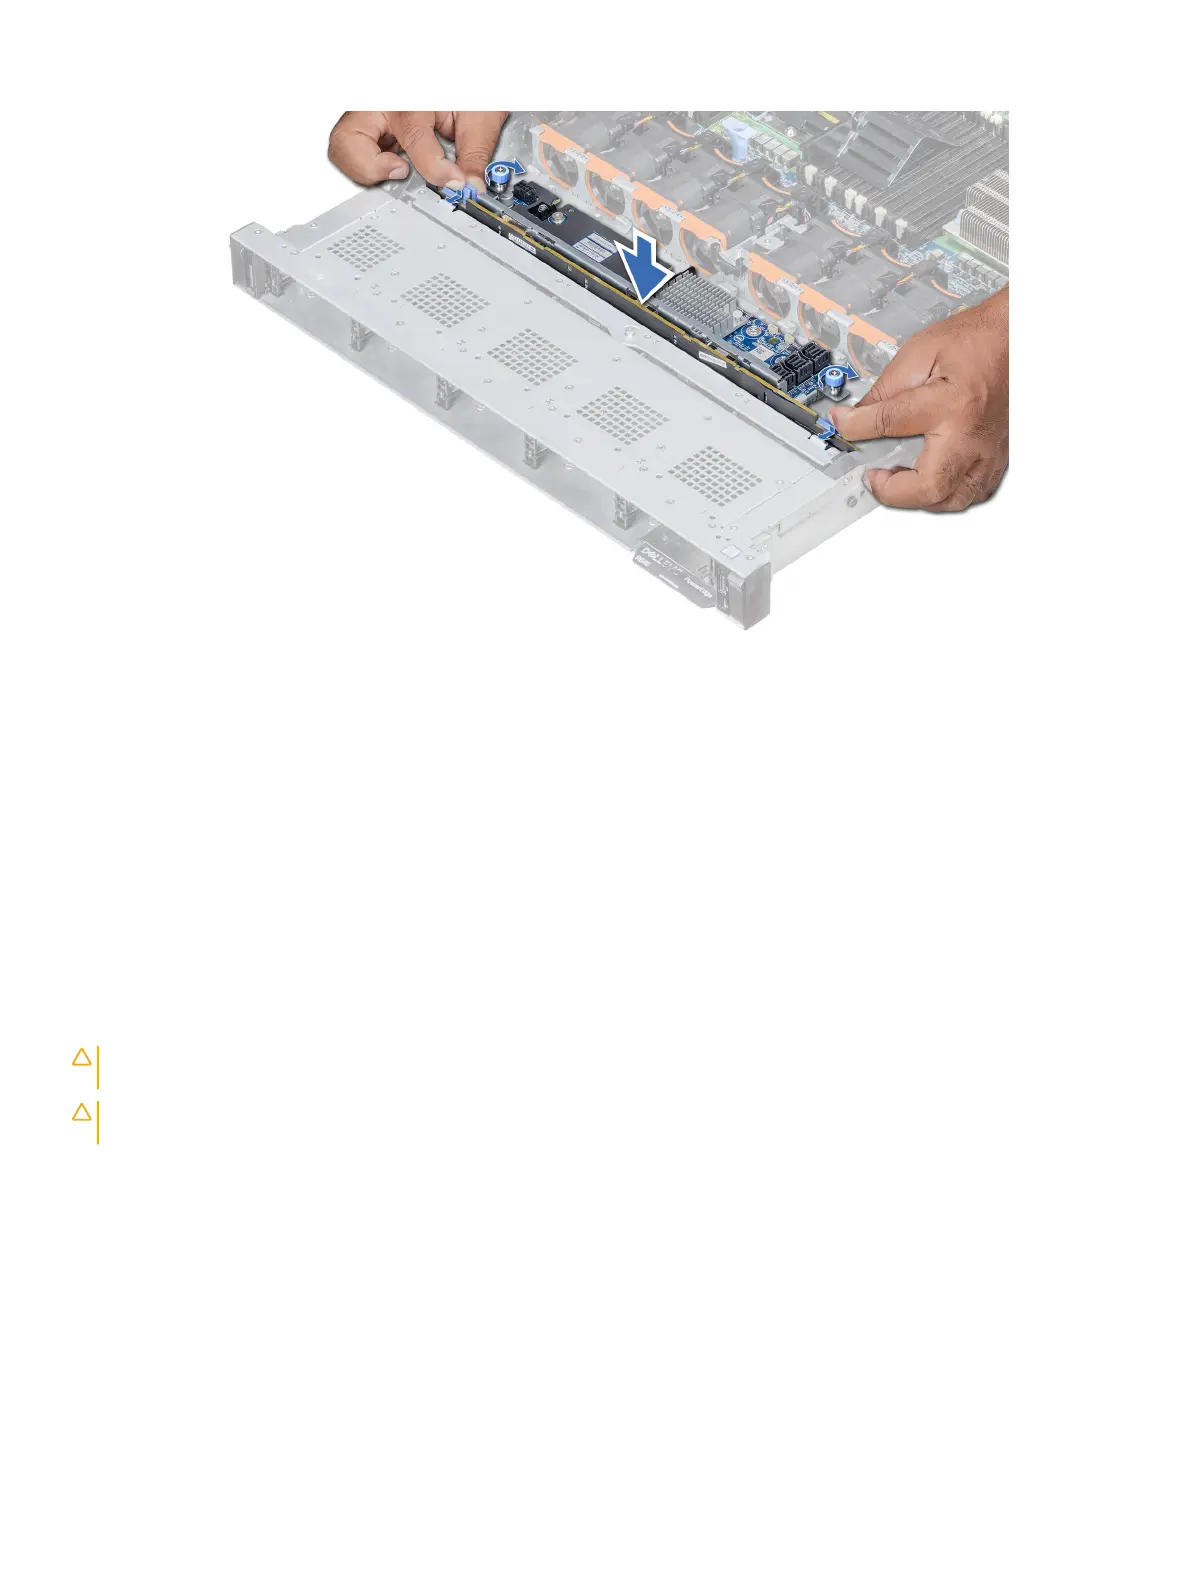
Figure 83. Installing the backplane
Next steps
1 Connect all the cables to the backplane.
2 Install all the drives.
3 Install the backplane cover.
4 Install the air shroud.
5 Follow the procedure listed in After working inside your system.
Removing the 2.5 inch drive rear backplane
Prerequisites
CAUTION
: To prevent damage to the drives and backplane, you must remove the drives from the system before removing the
backplane.
CAUTION: You must note the number of each drive and temporarily label them before removal so that you can replace them in
the same locations.
1
Follow the safety guidelines listed in Safety instructions.
2 Follow the procedure listed in Before working inside your system.
3 Remove all the drives from the rear drive cage.
4 Disconnect all the cables from the backplane.
5 Remove the rear drive cage.
Steps
1 Using Phillips #2 screwdriver, remove the screws that secure the drive backplane to the rear drive cage.
2 Disengage the backplane from the hooks on the rear drive cage, and remove it from the rear drive cage.
Installing and removing system components
133