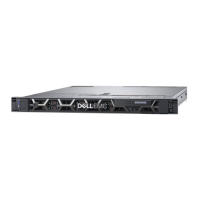
4 Using a Phillips #1 screwdriver, install the screws that secure the control panel to the system.
Figure 114. Installing the left control panel
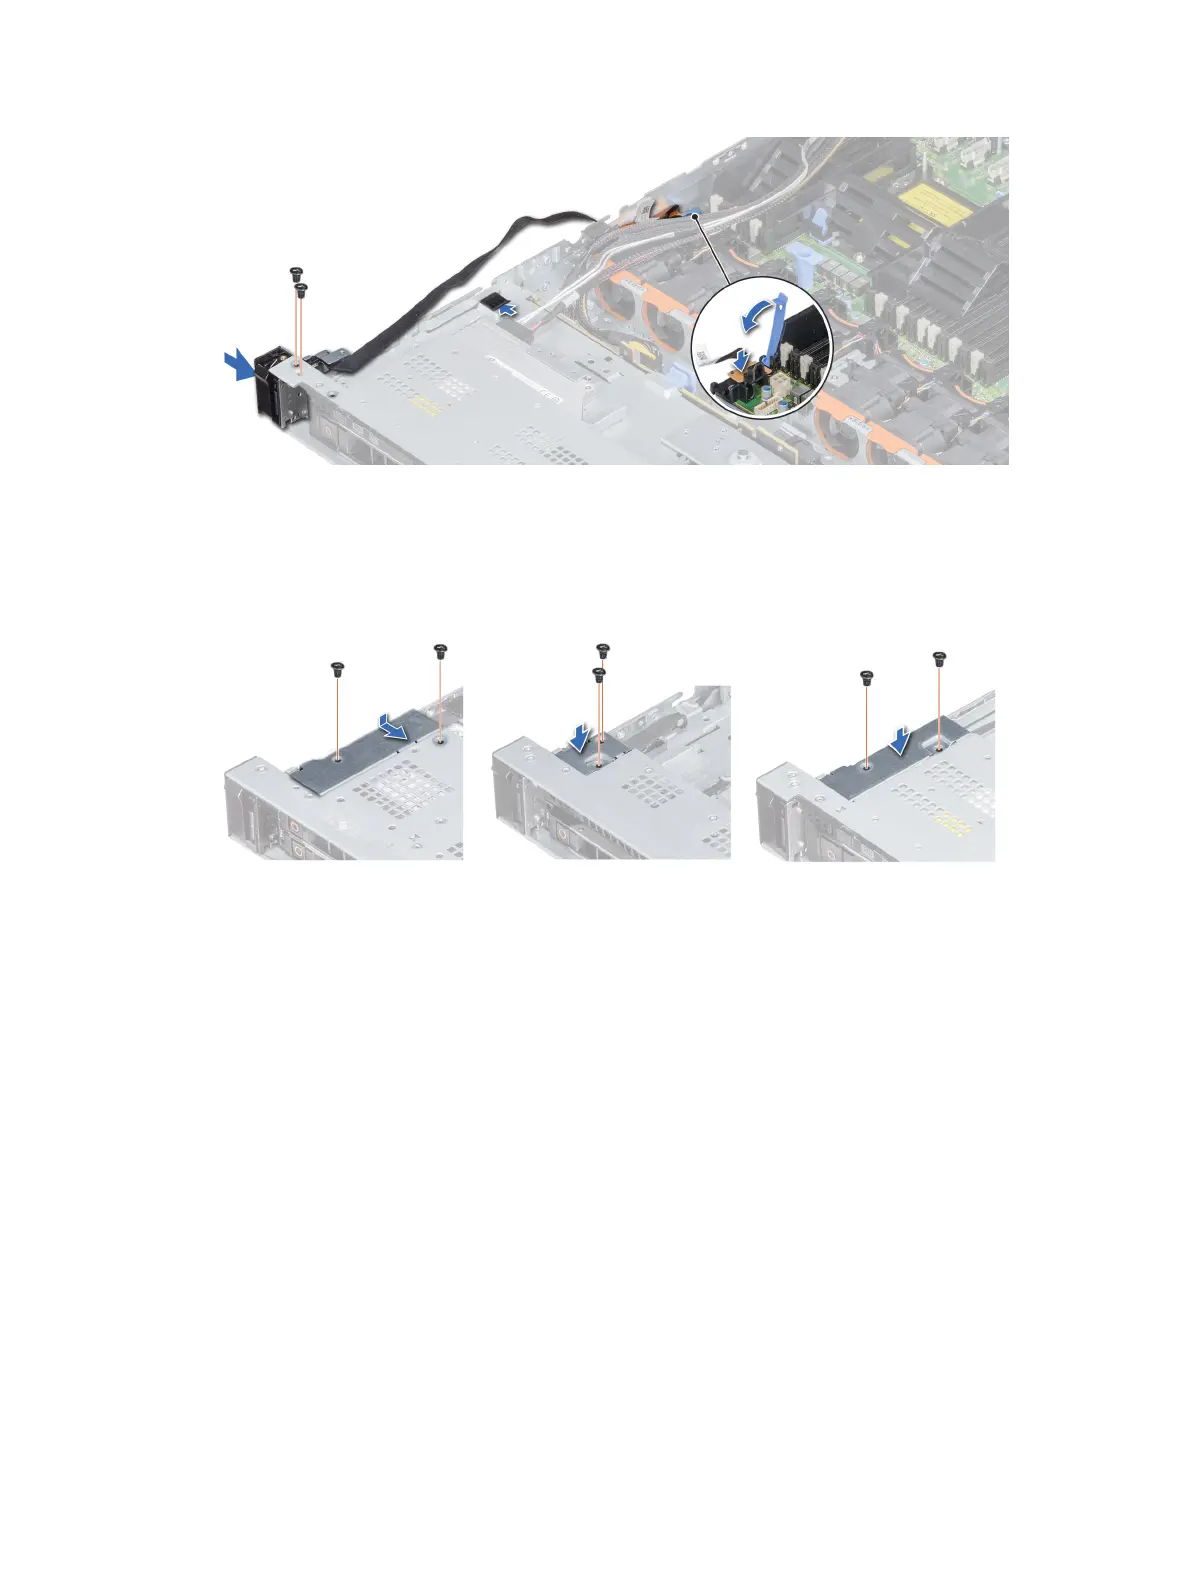
5 Using Phillips #1 screwdriver, install the screws that secure the cable cover to the system.
Figure 115. Installing the cable cover
Next steps
1 Install the air shroud.
2 If applicable, install the cooling fan #1.
3 Follow the procedure listed in After working inside your system.
Removing the right control panel
Prerequisites
1 Follow the safety guidelines listed in Safety instructions.
2 Follow the procedure listed in Before working inside your system.
3 For ease of removal of the right control panel, remove the cooling fan #8 to access the cable latch.
Steps
1 Lift the cable latch and disconnect the control panel cable from the connector on the system board.
Installing and removing system components
165