Next steps
Replace the drive or replace the drive blank.
Installing the drive blank
Prerequisites
1. Follow the safety guidelines listed in the Safety instructions.
2. If installed, remove the front bezel.
NOTE: The procedure to install the drive blank is the same for Rear Accessed and Front Accessed configurations.
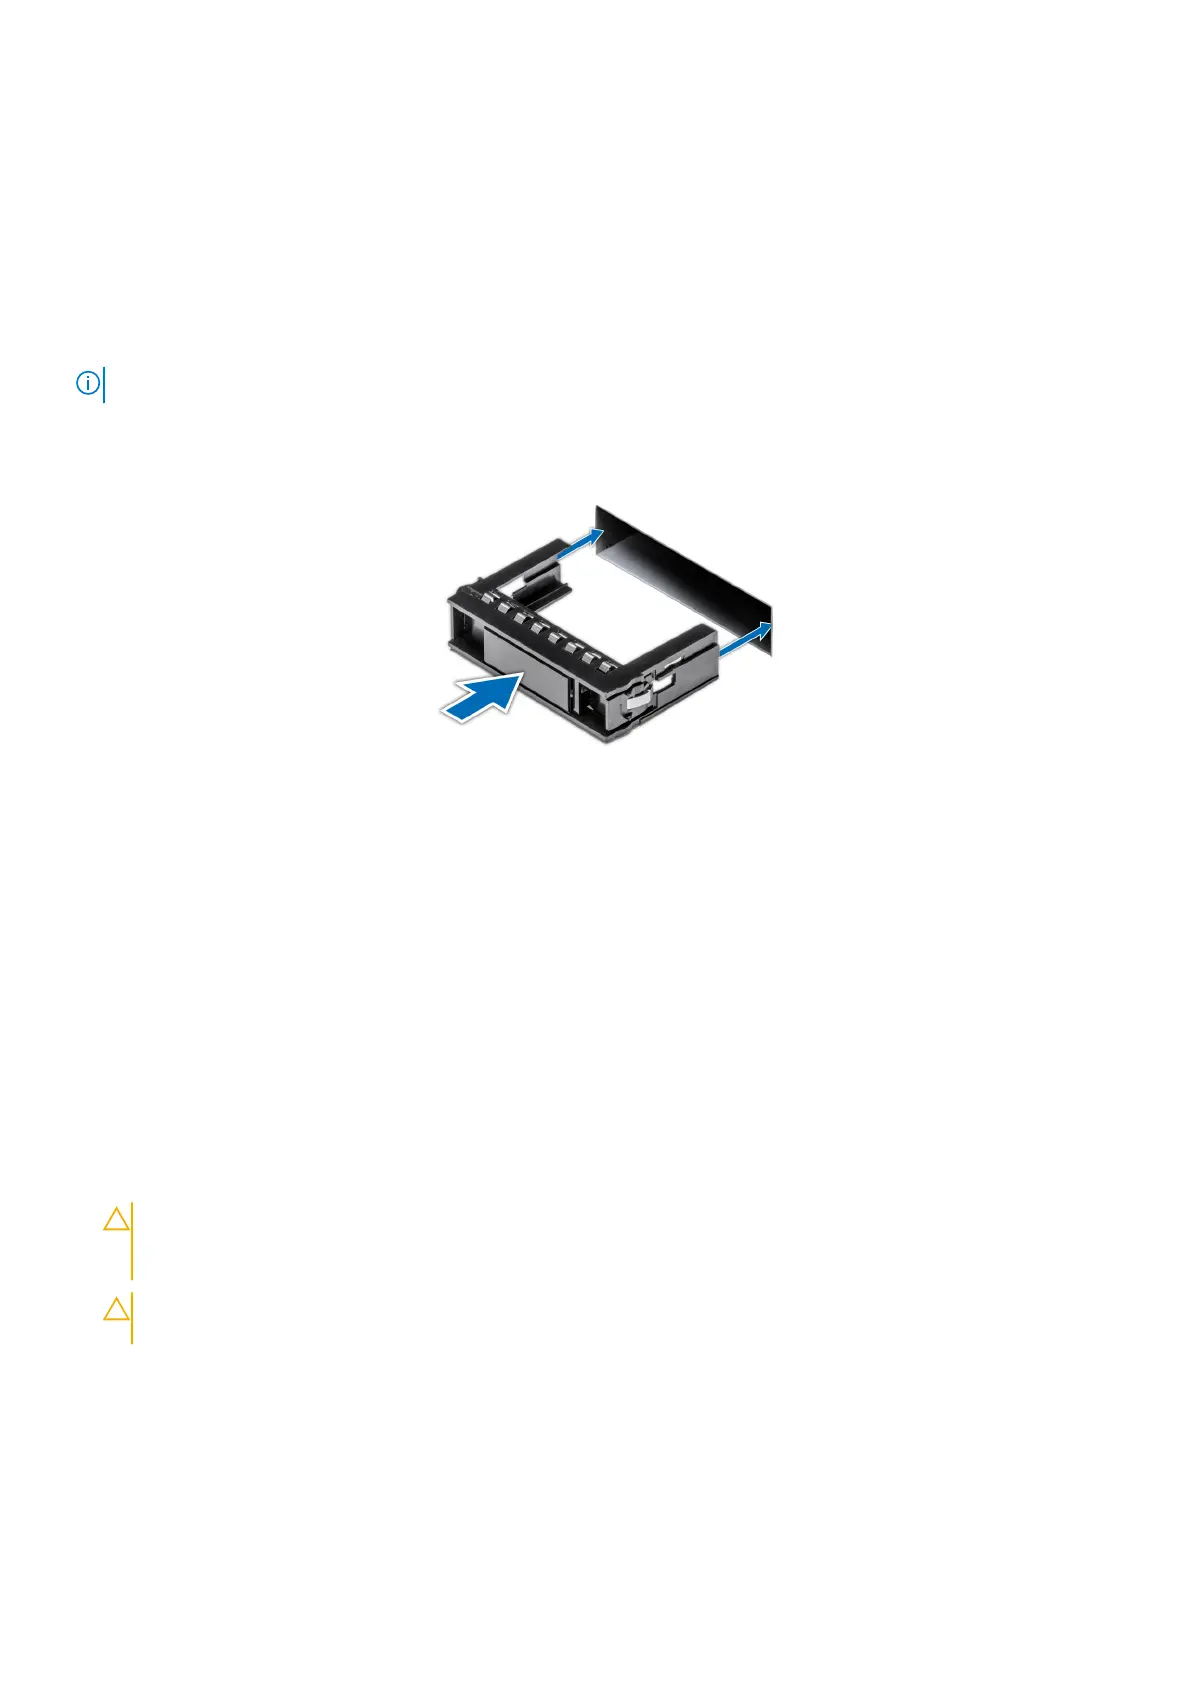
Steps
Insert the drive blank into the drive slot until the release button clicks into place.
Figure 31. Installing a drive blank
Next steps
If removed, replace the front bezel.
Removing the drive carrier
Prerequisites
1. Follow the safety guidelines listed in the Safety instructions.
2. If installed, remove the front bezel.
3. Using the management software, prepare the drive for removal.
If the drive is online, the green activity or fault indicator blinks while the drive is powering off. When the drive indicators are
off, the drive is ready for removal. For more information, see the Storage controller documentation.https://www.dell.com/
storagecontrollermanuals
CAUTION:
Before attempting to remove or install a drive while the system is running, see the documentation
for the storage controller card to ensure that the host adapter is configured correctly to support drive
removal and insertion.
CAUTION: To prevent data loss, ensure that your operating system supports drive installation. See the
documentation supplied with your operating system.
Steps
1. Press the release button to open the drive carrier release handle.
2. Holding the drive carrier release handle, slide the drive carrier out of the drive slot.
42
Installing and removing system components

 Loading...


