Power interposer board
This is a service technician replaceable part only.
Removing power interposer board (PIB)
Prerequisites
1. Follow the safety guidelines listed in the Safety instructions.
2. Follow the procedure listed in the Before working inside your system.
3. Remove the PCI air shroud.
4. Remove both PSUs.
5. Disconnect all the cables that are connected to the system board from the power interposer board (PIB) and the Fan1, Fan 2
and Fan 3 cables connected to power interposer board (PIB).
NOTE: The procedure to remove the power interposer board (PIB) is the same for Rear Accessed and Front Accessed
configurations.
Steps
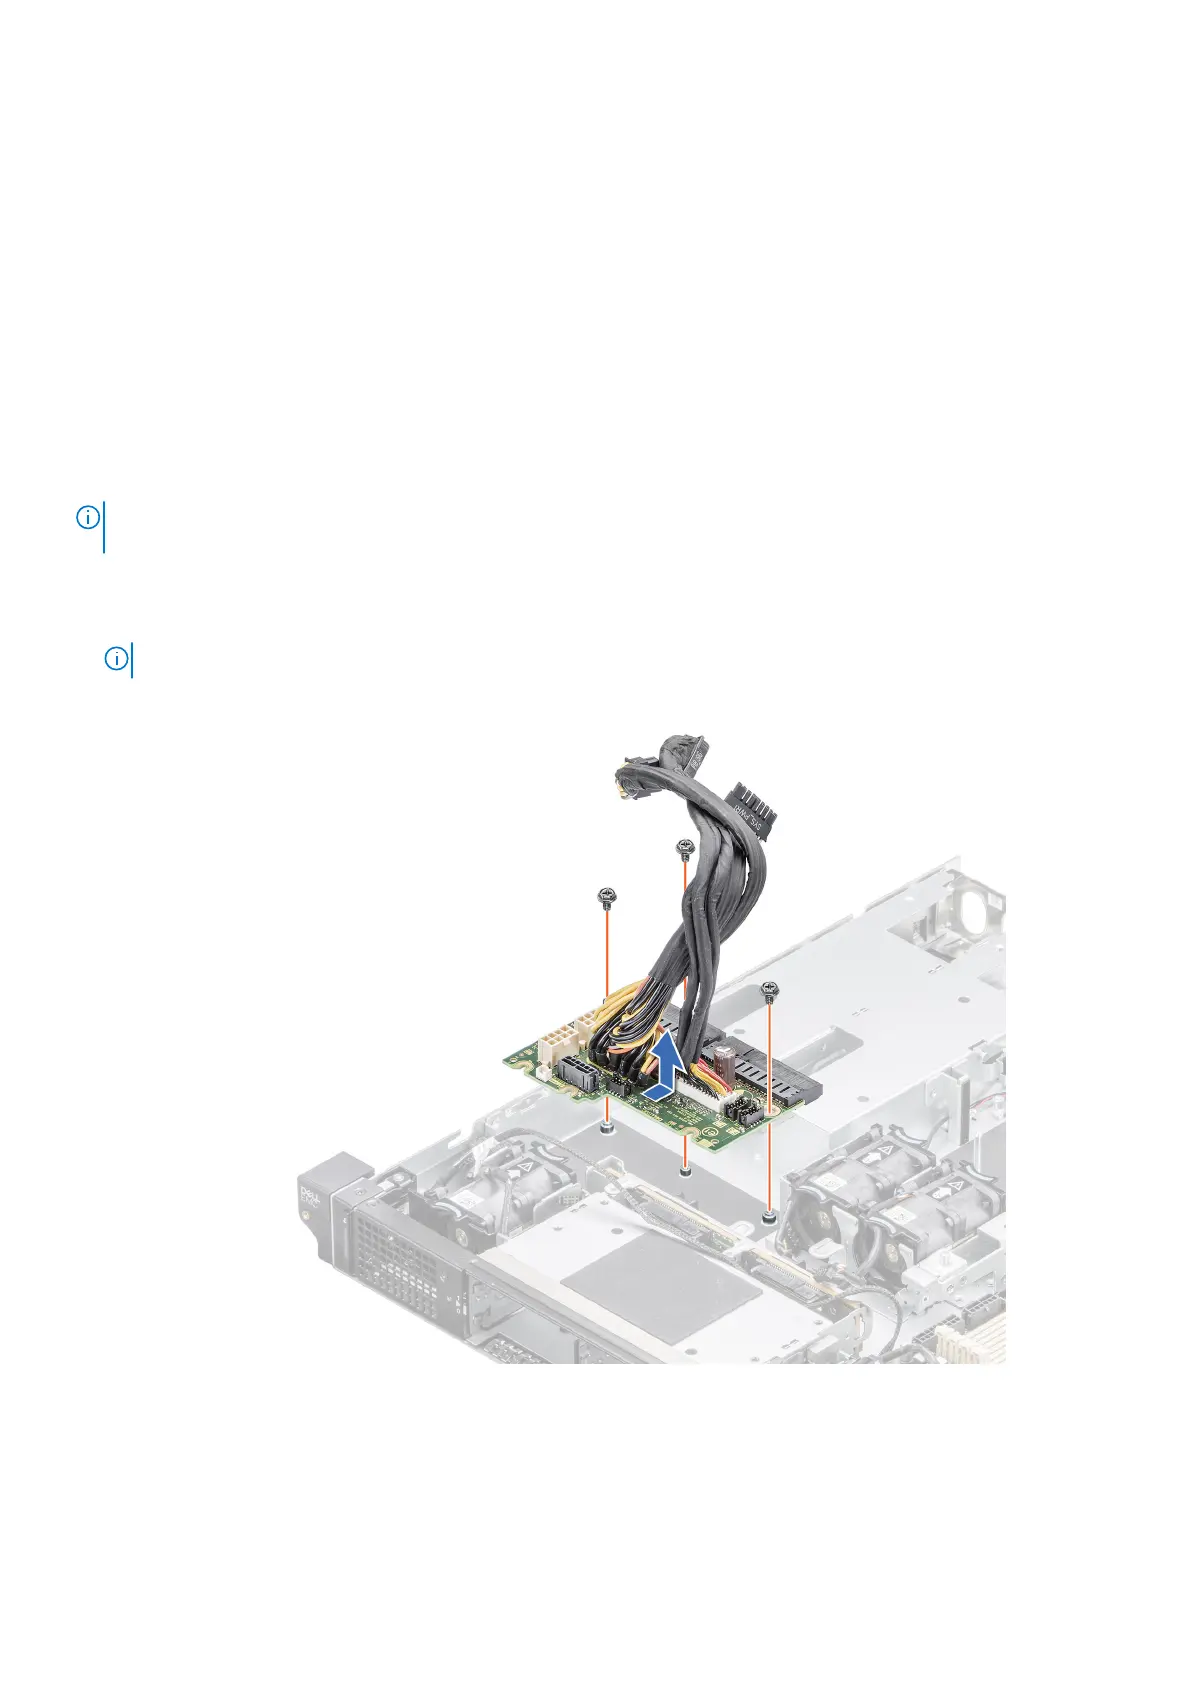
1. Using a Phillips #2 screwdriver, remove the screws securing the power interposer board to the system.
NOTE: Observe the routing of the cables as you remove them from the system.
2. Lift the PIB away from the system.
Figure 89. Removing the power interposer board
Next steps
Replace the power interposer board.
90
Installing and removing system components

 Loading...


