Removing the machine head
–
Remove the covering cap 1.
For this purpose lift the covering cap at the front so that the arrest
is released. Lift the covering cap carefully.
–
Swivel the folding station 3 by 90°.
–
Swing the locking lever 4 upwards.
–
Lift the fabric sliding sheet 6 at the front and swing it to the left.
–
Pull off plug 12.
–
Pull off the main pneumatic hose 11 from the solenoid valve
block 10.
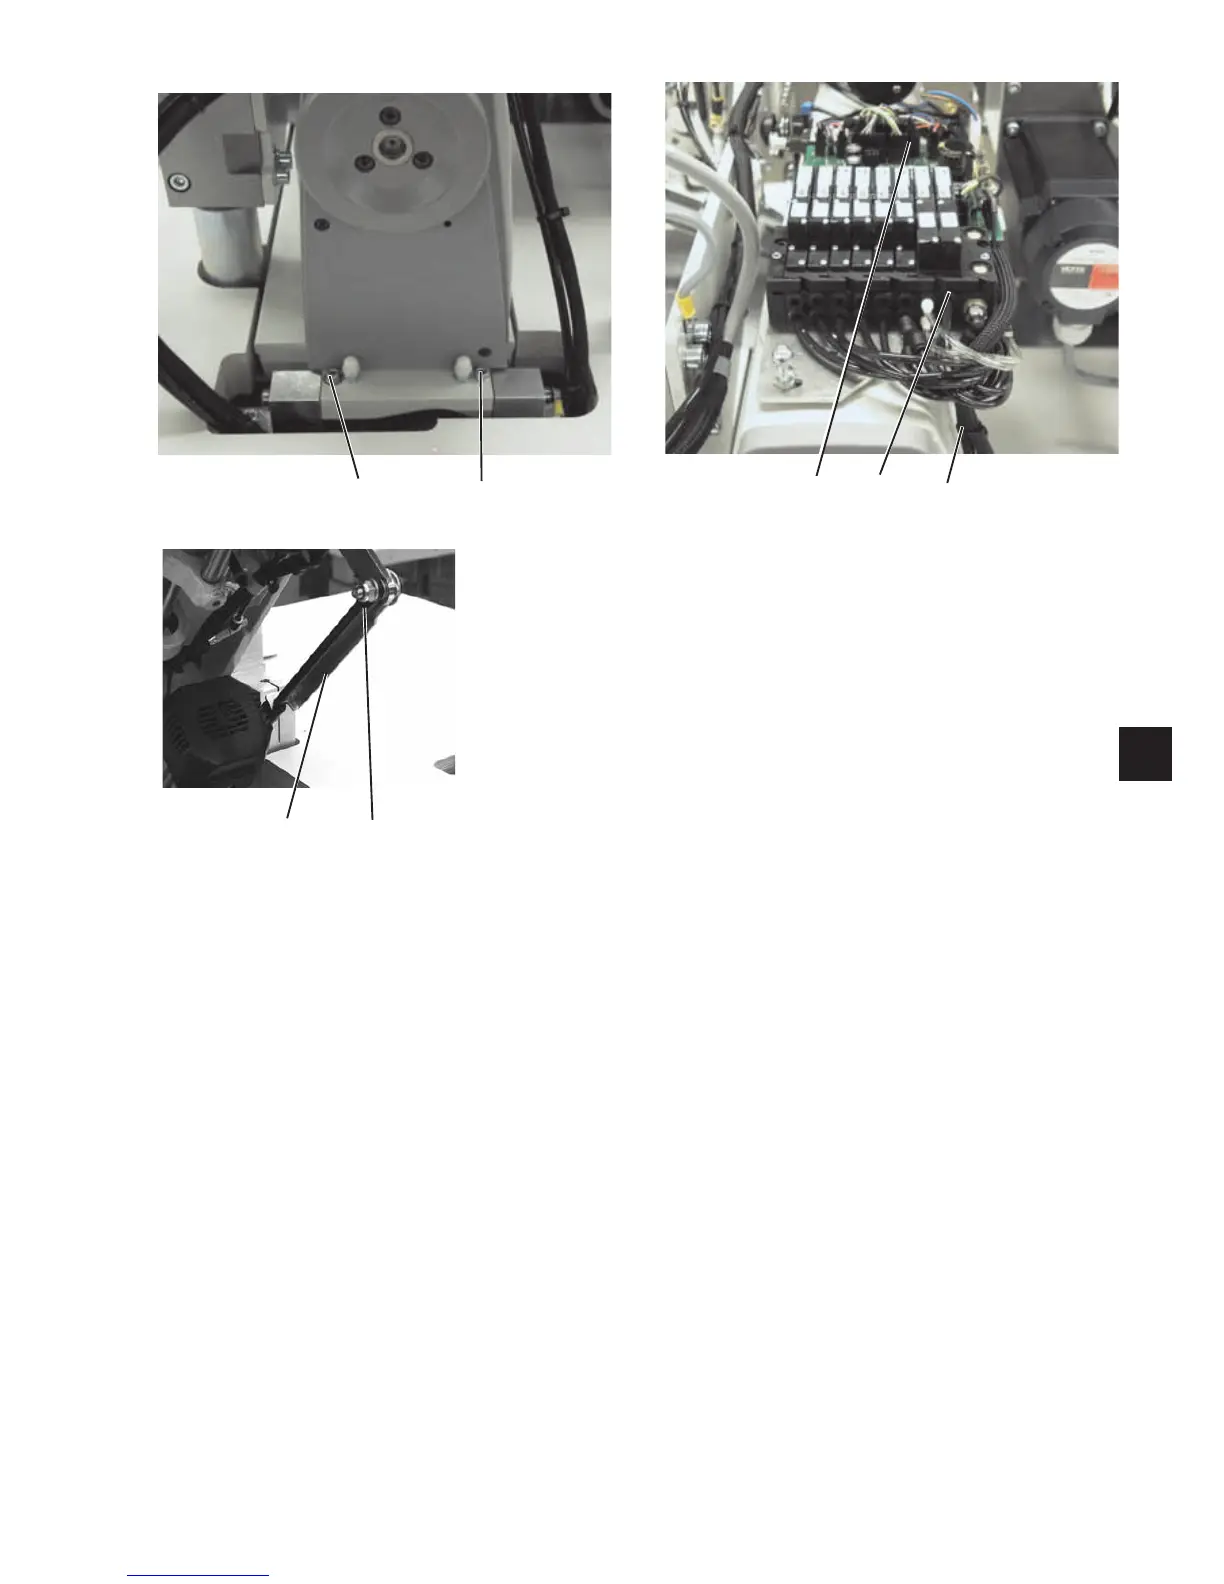
–
Loosen the gas shock absorber connection 2. Take off the locking
bow 13 with spring.
–
Unscrew screws 8 and 9.
–
Lift out the machine head carefully with an appropriate auxiliary
tool.
Installing the machine head
–
Carefully insert the machine head into the cutout for the head
with an appropriate auxiliary tool.
–
Screw the machine head tight with the screws 8 and 9.
–
Re-establish the gas shock absorber connection 2. Reinsert the
locking bow 13 with spring.
–
Connect the pneumatic hose 11 to the solenoid valve block 10.
–
Putonplug12.
–
Insert the fabric sliding sheet.
–
Swing the locking lever 4 downwards.
–
Swing the folding station 3 back and let it catch.
–
Put on the covering cap 1 and let it catch.
11
3
12 10 11
98
13 2
 Loading...


