16.7 Smoother
Caution: Danger of injury !
Disconnect the sewing unit from the pneumatic supply system
before performing any setting work on the smoother.
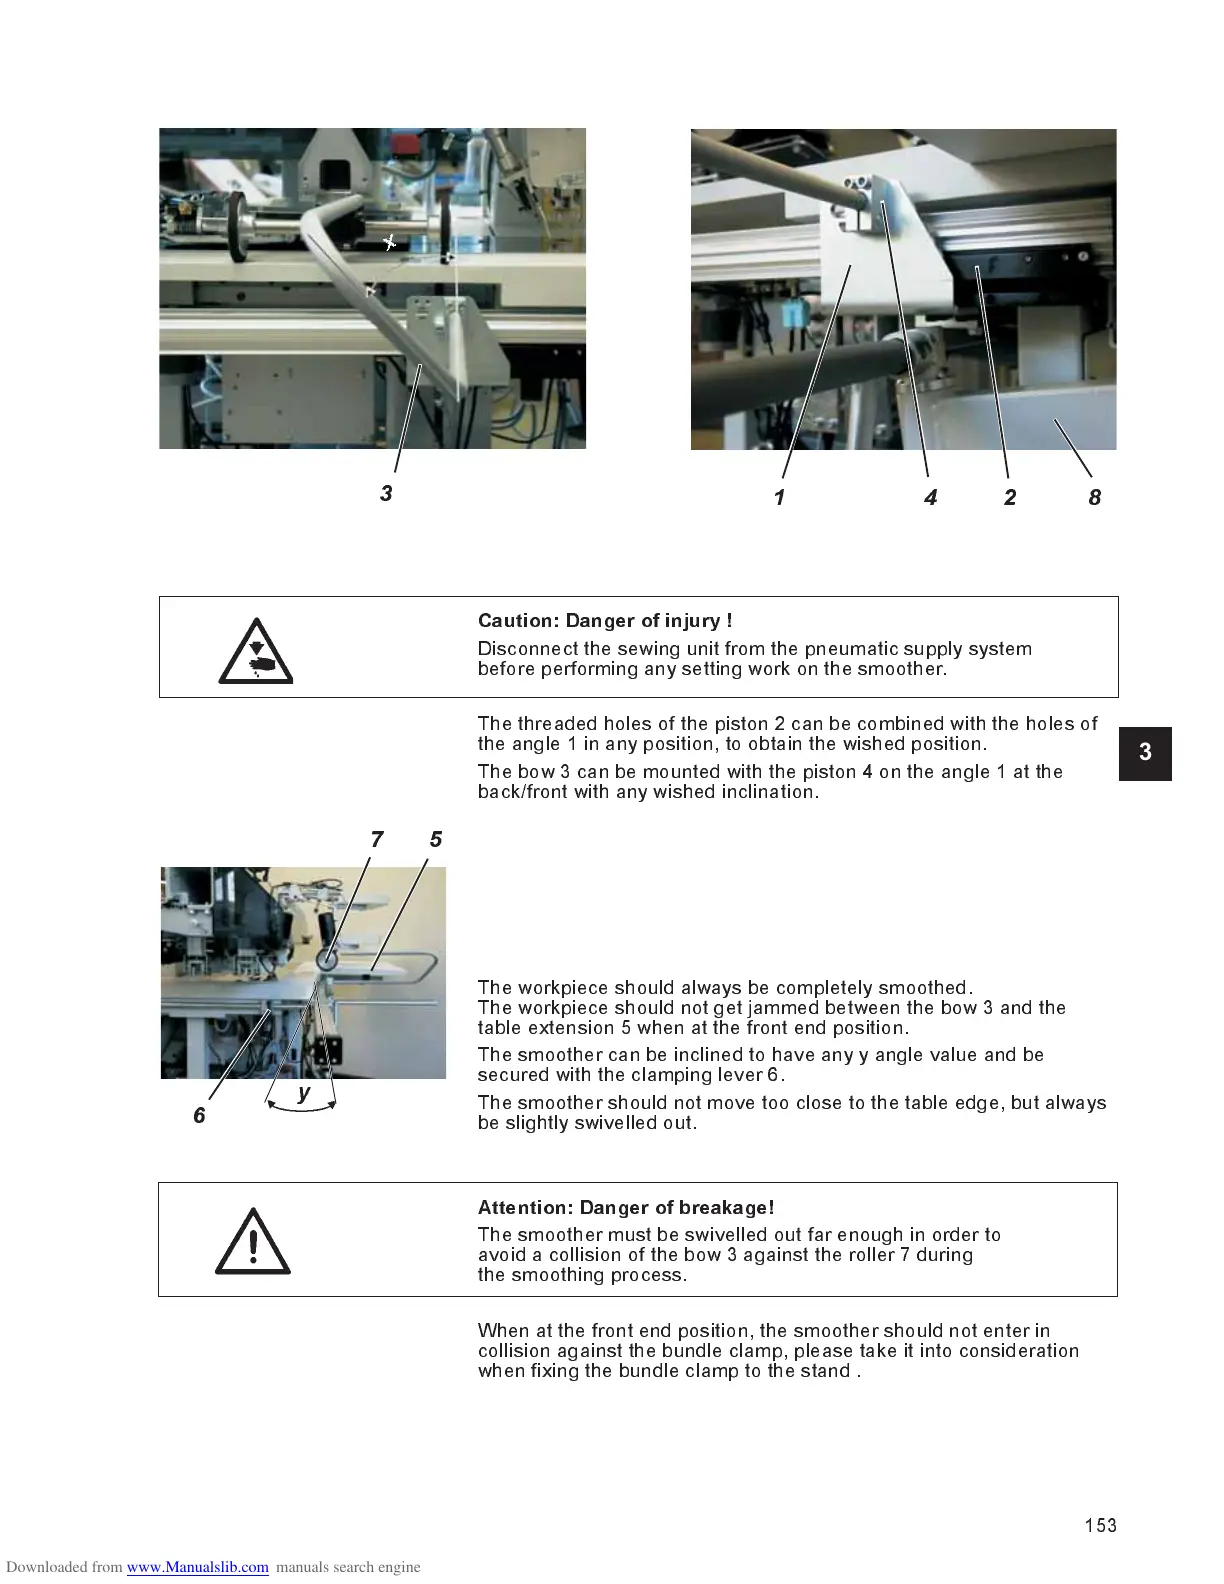
The threaded holes of the piston 2 c an be combined with the holes of
the angle 1 in any position, to obtain the wished position.
The bow 3 can be mounted with the piston 4 on the angle 1 at the
back/front with any wished inclination.
The workpiece should always be completely smoothed.
The workpiece should not get jammed between the bow 3 and the
table extension 5 when at the front end position.
The smoother can be inclined to have any y angle value and be
secured with the clamping lever 6.
The smoother should not move too close to the table edge, but always
be slightly swivelled out.
Attention: Danger of breakage!
The smoother must be swivelled out far enough in order to
avoid a collision of the bow 3 against the roller 7 during
the smoothing process.
When at the front end position, the smoother should not enter in
collision against the bundle clamp, please take it into consideration
when fixing the bundle clamp to the stand .
153
3
1428
3
x
75
y
6
 Loading...


