2.6 Center knife
2.6.1 Removing / Installing the driving motor
Caution: Danger of injury !
Switch off the main switch.
Remove and install the driving motor only with the
sewing unit switched off.
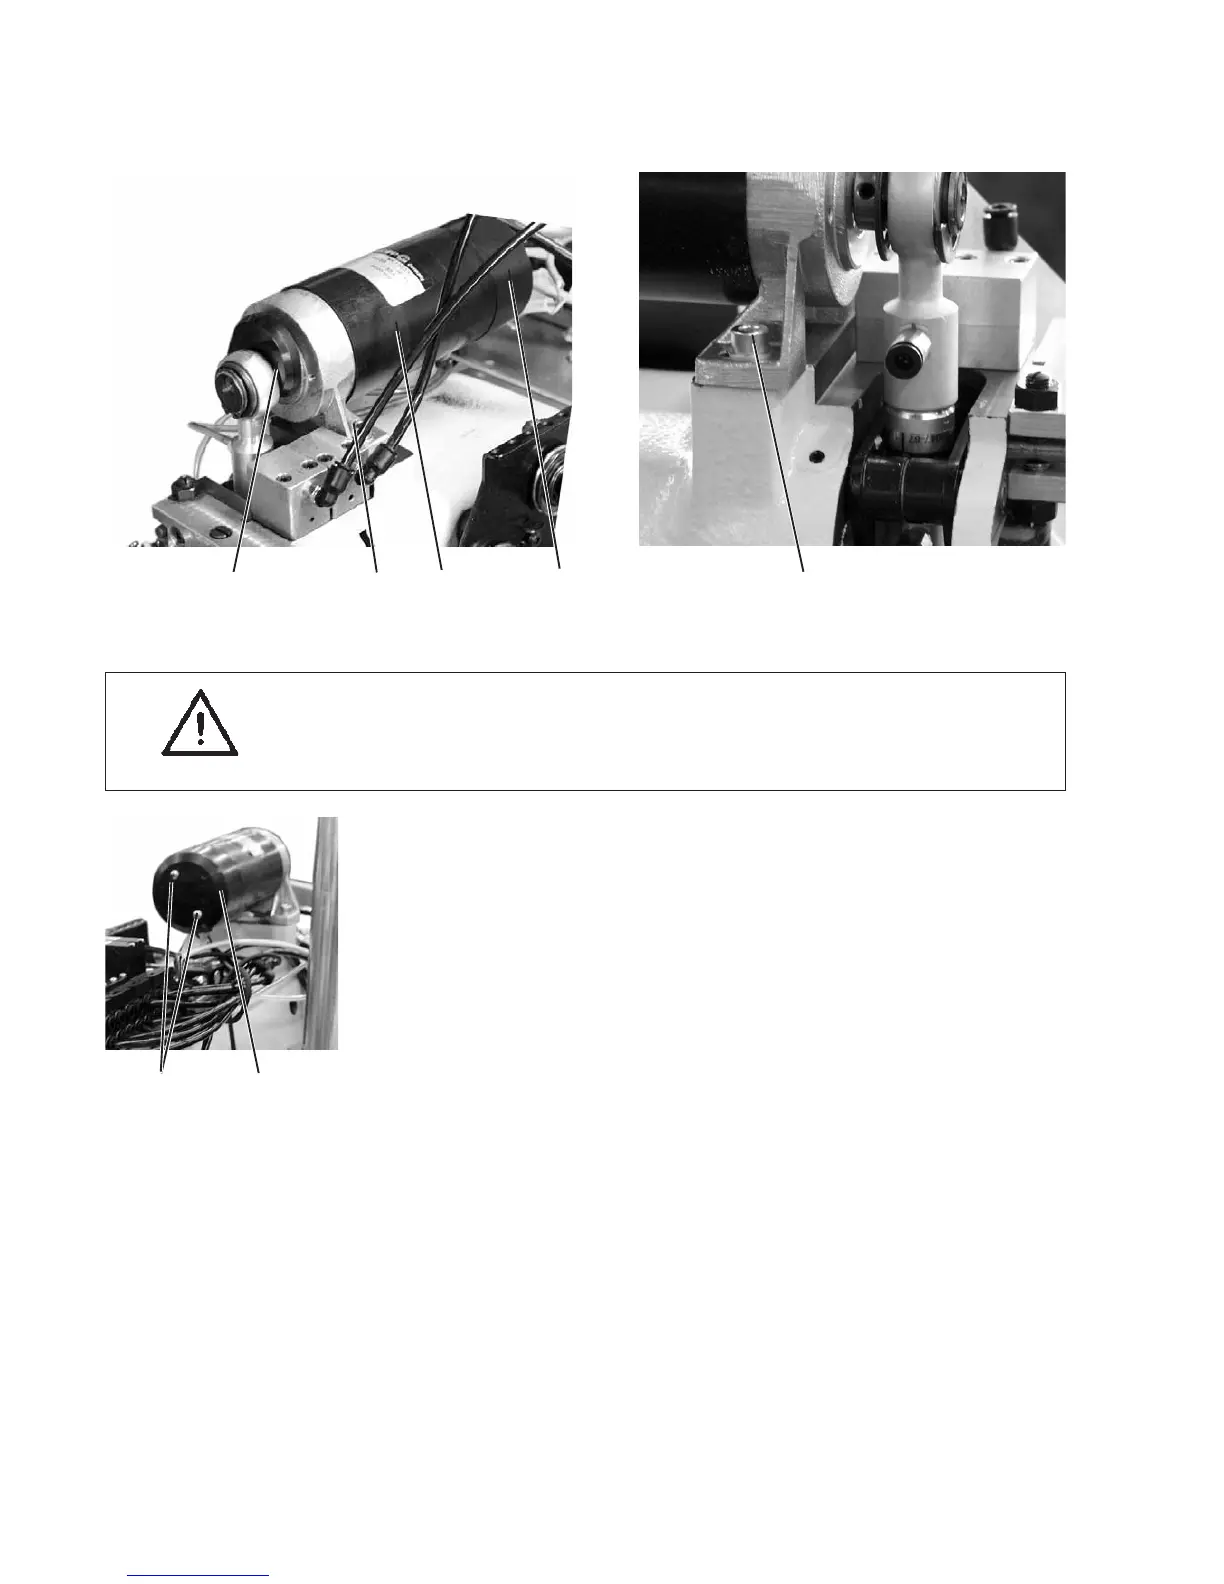
Rem ovin g t he dri ving mo tor
–
Unscrew the screws 6 at the driving motor and pull off cover 1.
–
Loosen the electrical connection at the motor.
–
Loosen the screws at the eccentric 4.
–
Unscrew the motor fastening screws 3 and 5.
–
Pull the driving motor 2 to the back out of the eccentric 4.
Installing the driving motor
–
Push the driving motor 2 into the eccentric 4 (with the shaft to the
front).
–
Align the motor in parallel position to the upper shaft and in central
position to the center knife guide.
–
Screw the motor tight with the fastening screws 3 and 5.
–
Tighten the screws at the eccentric 4 keeping a distance of approx.
0.5 mm between the eccentric and the motor casing. (use a feeler
gauge)
–
Re-establish the electrical connection to the motor.
–
Put on cover 1 and tighten with the screws 6.
40
4321
5
61

 Loading...


