–
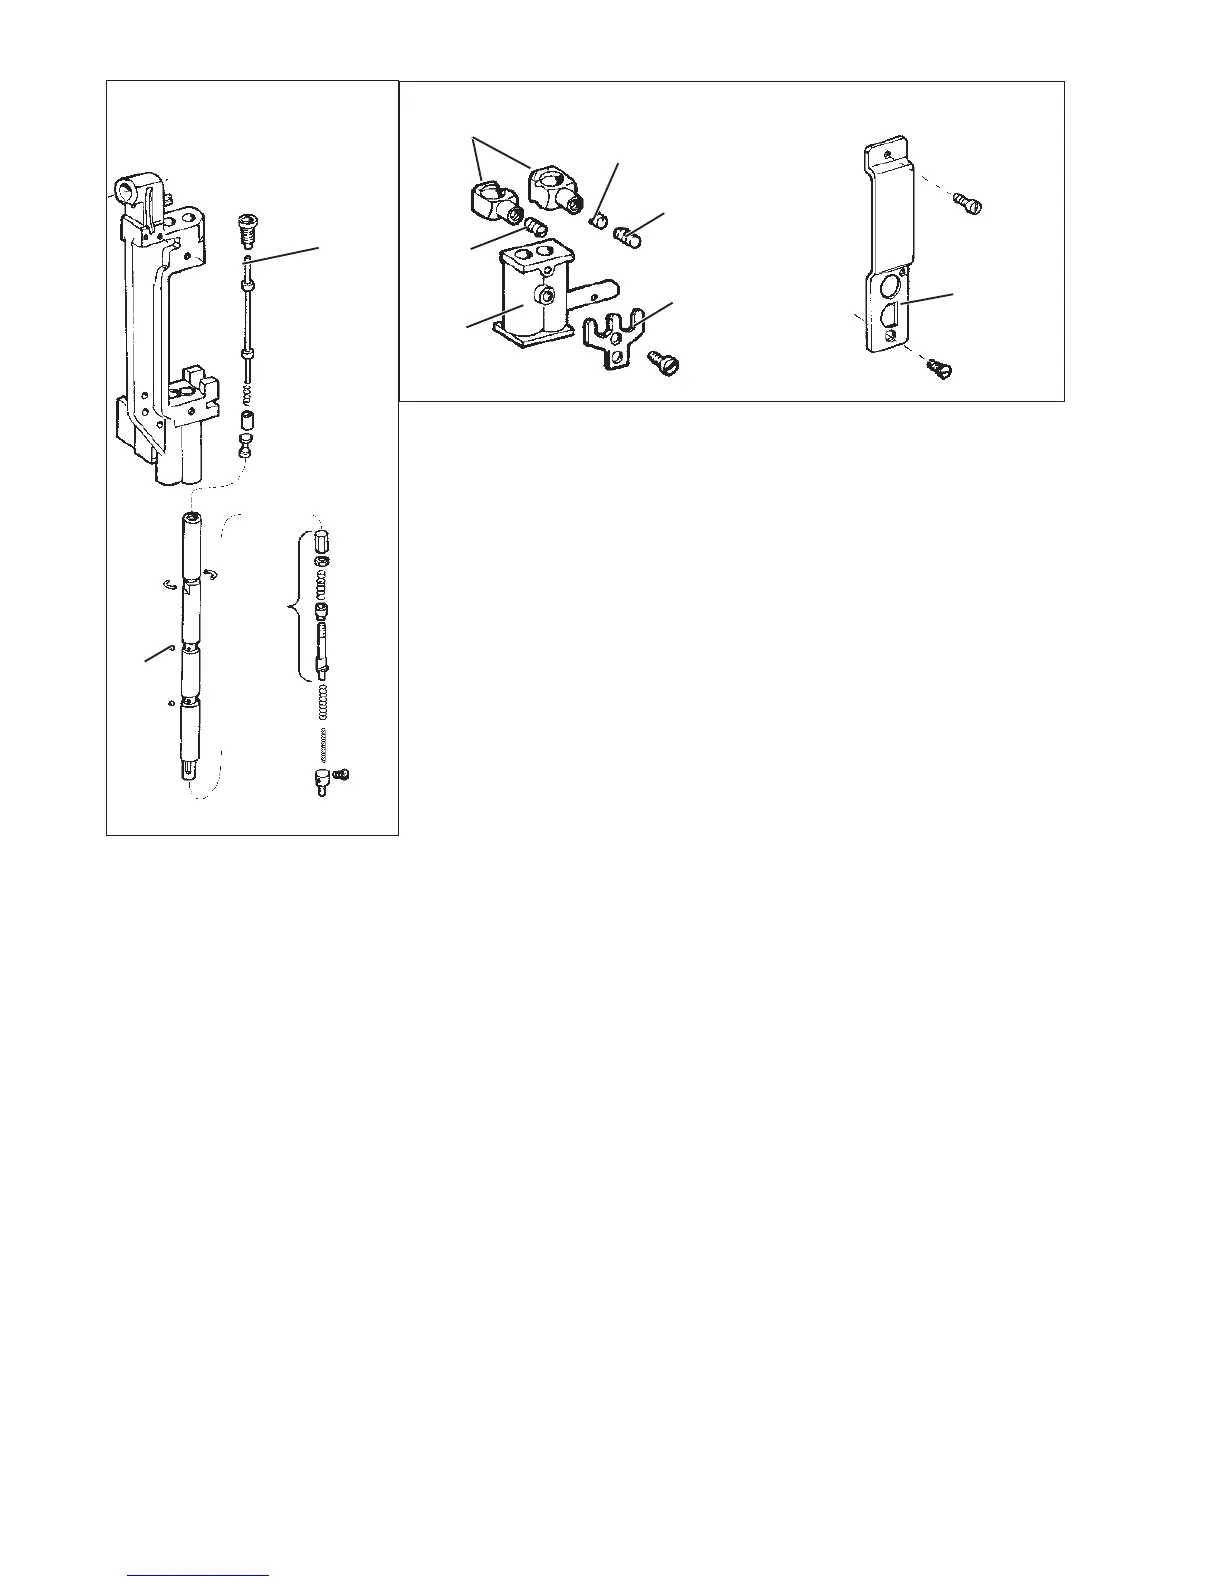
Fasten the clamping ring 13 on the needle bar. Please observe that
both clamping rings 13 with their round extensions are guided in
clevis 17 fastened on the yoke. After tightening the fastening screw
15 the safety bolt 16 has to be tightened, too.
–
Screw on the guide rail 19. It avoids turning of a disconnected
needle bar.
ATTENTION !
When the needle bar linkage is removed and the needle bar is
disconnected, the yoke 14 must not be pushed down too far. The
upper balls 6 might come out unintentionally.
Note:
The precise needle height to the hook has to be adjusted after the
installation of the linkage according to chapter 2.5.4 “Height of the
needle holder".
20
2
6
19
13
16
14
15
16
17
 Loading...


