Position of the hook and needle
Service instructions 967 - 00.0 - 12/2014
55
3. Move the hook cage (1) so that the distance of the tip of the hook (3)
from the needle (2) is max. 0.1 mm.
4. Tighten the screws in the openings (4).
5. Loosen the screw (7).
6. Move the drive shaft (5) aside so that it lightly touches the needle (2)
7. Tighten the screw (7).
8. Check that the tip of the hook (6) is touching the needle (2), if necessary
adjust the drive shaft (5) again.
10.5 Adjusting the loop former
The loop former (3) guides the loop in the thread in the needle towards the
tip of the hook and thus increases the reliability of catching the thread. Its
lateral position must be adjusted by means of the distance piece (2) to suit
the thickness of the needle.
Cover
• Tilt the upper section ( page 10).
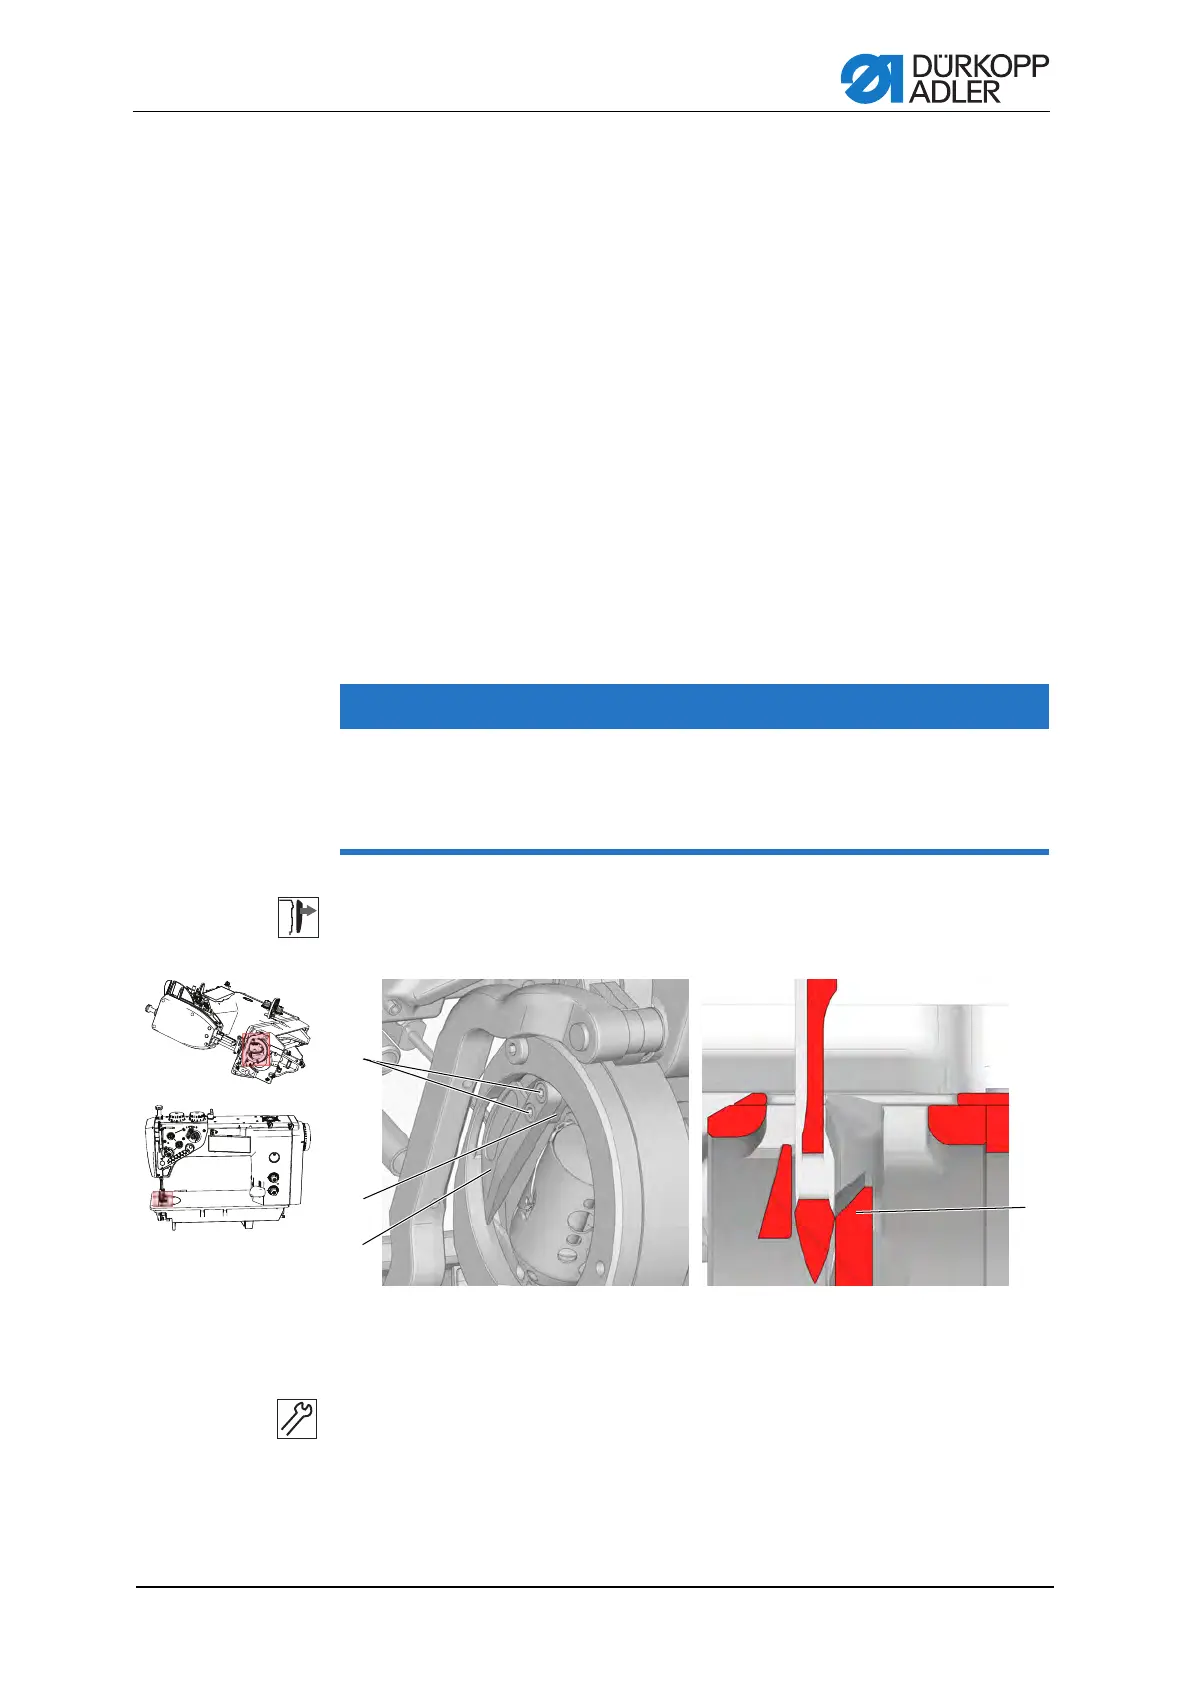
Figure 38: Setting the loop former
Setting steps
1. Unscrew the screws (1).
2. Take out the loop former (3) and distance piece* (2).
ATTENTION
Incorrect setting of the loop former can cause damage to the hook.
After the hook has been fitted it is essential to check that the needle has
sufficient clearance to pass through between the hook drive dog (4) and
the loop former (3).
(1) - Screws
(2) - Distance piece
(3) - Loop former
(4) - Hook drive dog
ཱ
ི
ཱི
ི

 Loading...


