Adjusting the sewing foot feed
Service instructions 967 - 00.0 - 12/2014
61
11.2 Adjusting the drive dog for the presser foot bar
Correct setting
When the stitch length is set to 0 and both feet (8) and (9) are at the same
height:
The drive dog (15) is attached to the presser foot bar (10) in such as
position that the needle shank inserted into the opening (11) touches
the presser foot bar (10).
Cover
• Arm cover ( page 11)
• Head cover (
page 12)
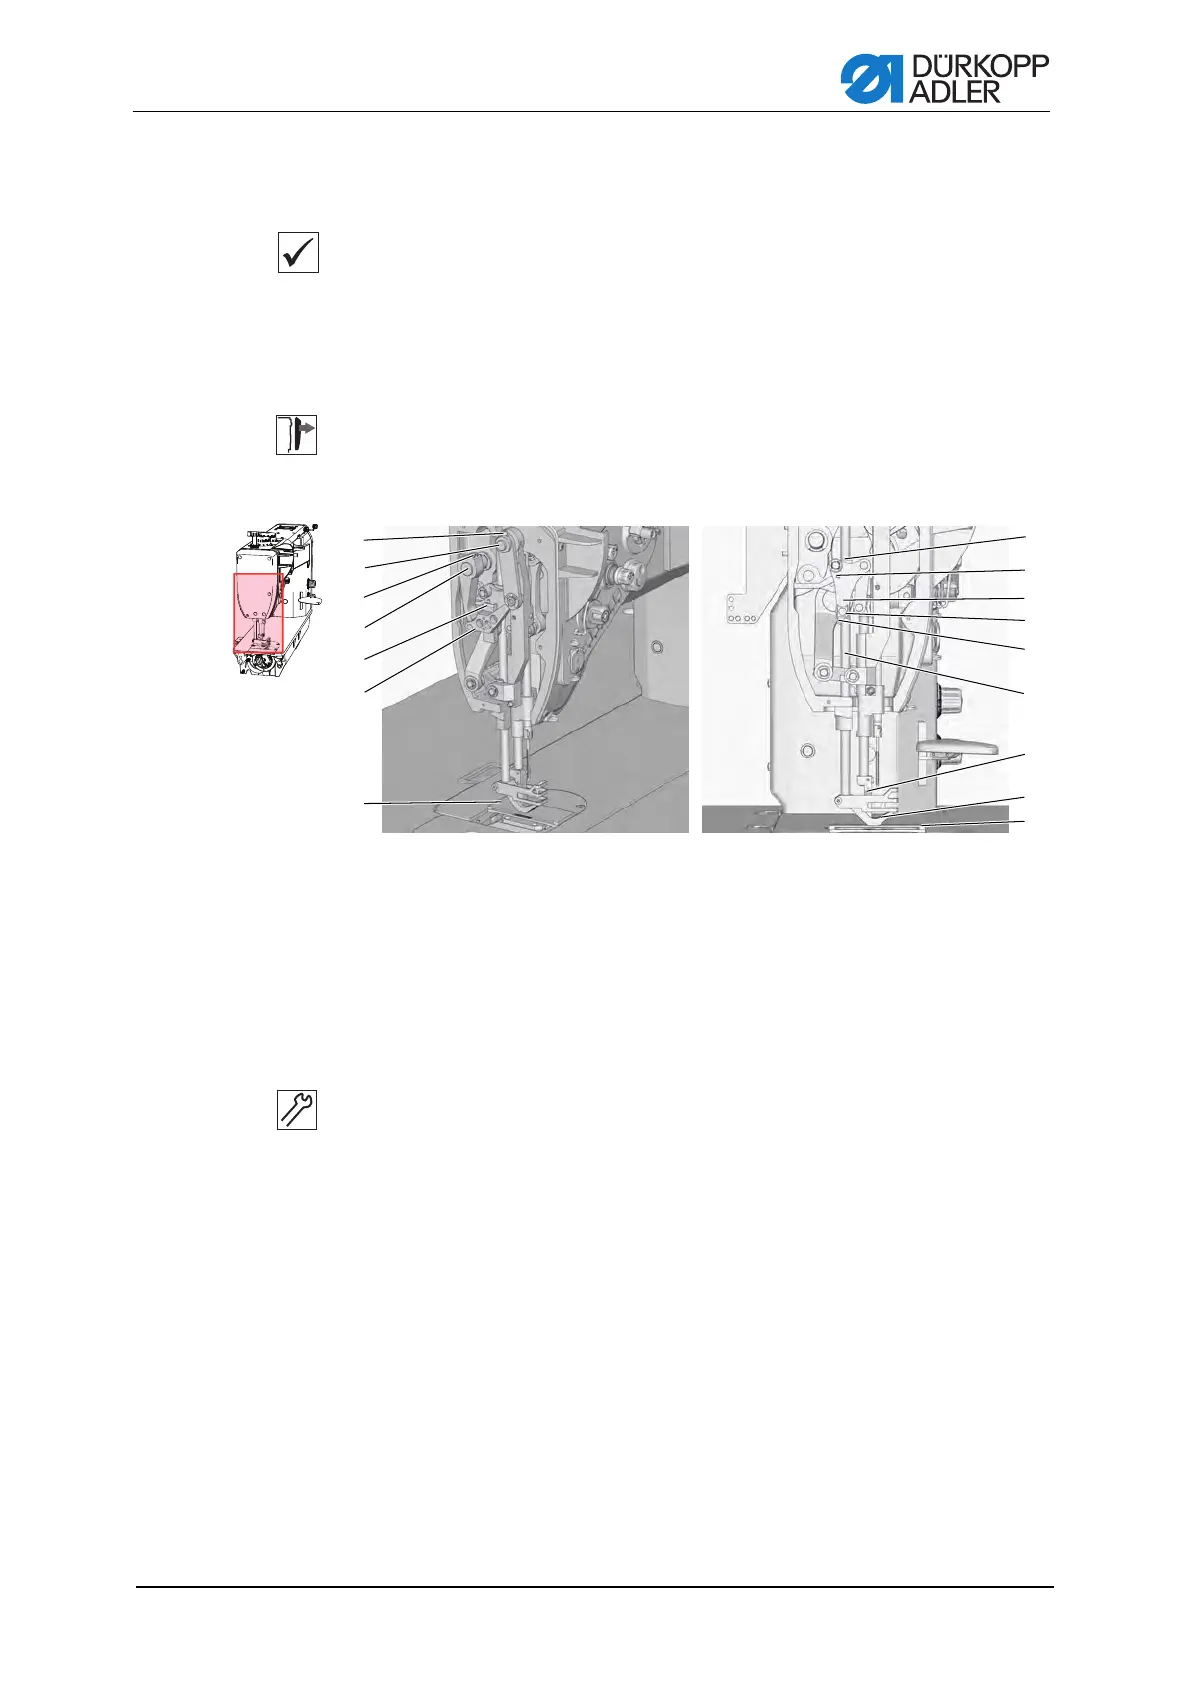
Figure 41: Adjusting the presser foot bar drive dog
Setting steps
1. Put the handwheel into the 0° position ( page 20).
2. Set the stitch length to 0.
3. Loosen the screws (3).
4. Loosen the screw (1).
5. Take off the assembly (6) together with the shaft (4) and the pin (2).
6. Release the driving dog screw (14).
7. Take out the plate (7) and insert it under the feet with the flat faces
upwards.
8. Insert the needle shank into the opening (11), turn the lever (13) so that
the needle shank touches the presser foot bar (10) and at the same time
press both feet (8) and (9) on to the plate (7).
9. Tighten the driving dog screw (14).
10.Refit the assembly (6). Make sure there is axial clearance of 0.2 to
0.3 mm between the slide nut (12) and the floor of the gully (5).
(1) - Screw
(2) - Pin
(3) - Screws
(4) - Shaft
(5) - Gully
(6) - Assembly
(7) - Plate
(8) - Presser foot
(9) - Sewing foot
(10) - Presser foot bar
(11) - Opening for the needle shank
(12) - Slide nut
(13) - Lever
(14) - Driving dog screw
(15) - Driving dog
ཱ
ི
ཱི
ུ
ཱུ
ྲྀ
ཷ
ླྀ
ཹ
ྲྀ
ེ
ཻ
ཽ
ཾ
ོ

 Loading...


