Aligning the needle bar linkage
Service Manual 867 Version 02.0 - 04/2015 41
9 Aligning the needle bar linkage
Order
First check the following setting:
• A straight and undamaged needle has to be inserted
( Operating manual Section, Inserting and replacing the needle)
Proper setting
Position the upper and lower stitch length adjusting wheel to 0.
The needle pierces exactly in the center of the feed-dog needle hole.
9.1 Moving the needle bar linkage sideways
Cover
• Arm cover ( 3.3.2 Removing and fitting the arm cover, page 13)
• Head cover ( 3.3.3 Removing and fitting the head cover, page 13)
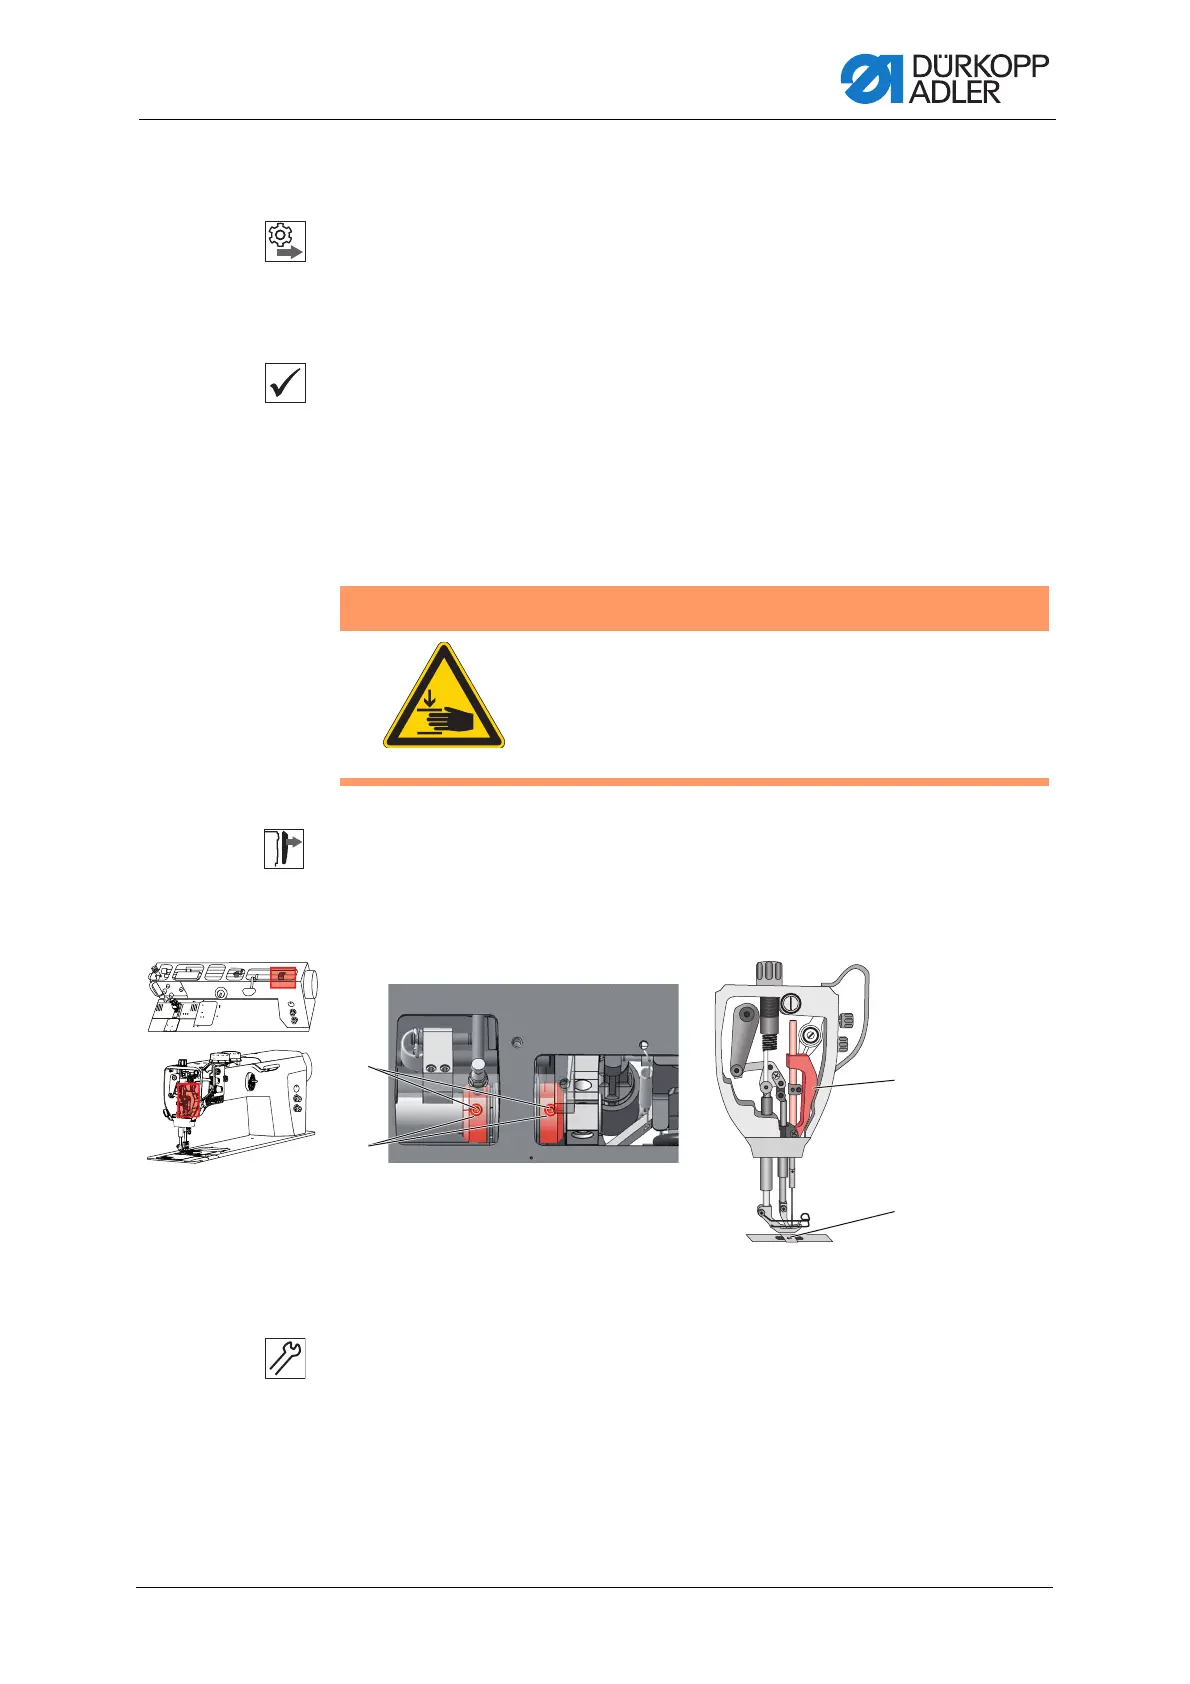
Fig. 29: Aligning the needle bar linkage sideways
Setting steps
1. Set the upper and lower stitch length adjusting wheel to 0.
2. Loosen the setscrews (1) on the two adjusting rings (2) at the right-hand
end of the shaft for the needle bar linkage.
WARNING
Risk of injury
Crushing injuries from moving parts.
Switch off the sewing machine before aligning the
needle bar linkage sideways.
1
2
4
3
(1) - Setscrews
(2) - Adjusting screws
(3) - Needle hole
(4) - Needle bar linkage
 Loading...


