5-159
Maintaining and Transporting the Printer | 159
4. Reinstall the carriage locking bracket and screw that was removed during
setup. (See page 22 for the Stylus Pro 7600 or page 33 for the Stylus
Pro 9600.)
5. Remove the following parts:
• Power cord and interface cables
• Paper basket
• Roll paper spindle
• All paper or other media
• Optional auto take-up reel (if installed)
• Optional manual cutter (if installed)
6. Make sure the ink cartridge lever is lowered and the ink cover is closed.
Since the ink was drained from the printer, no ink cartridges should be
installed.
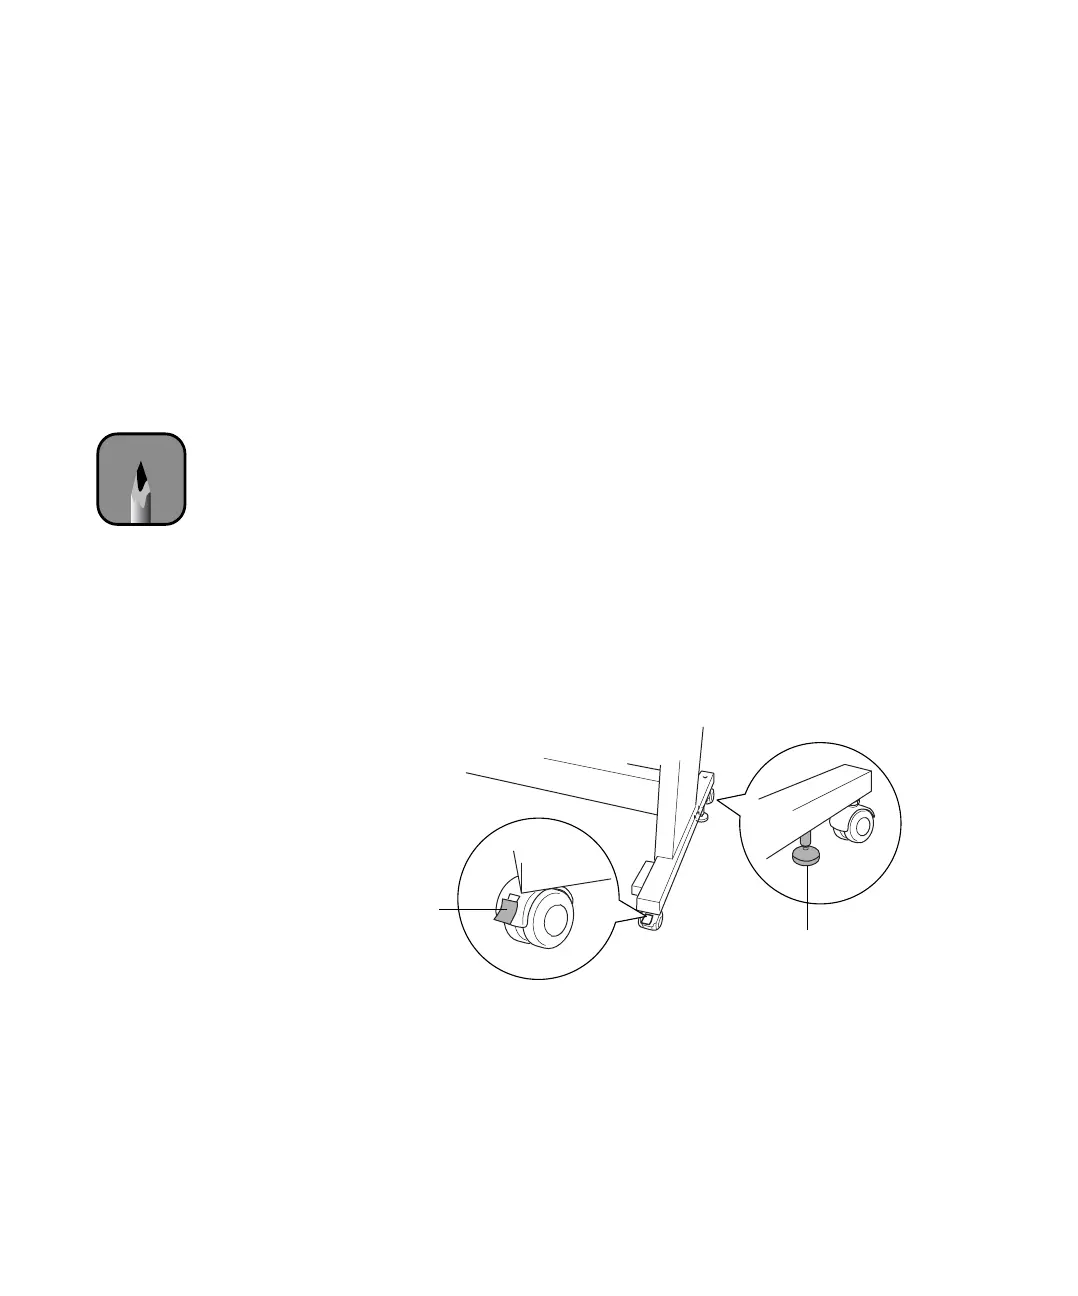
7. If the printer is mounted on a stand, you’ll need to remove it from the
stand. First make sure the casters are locked and the two stabilizer knobs
are touching the floor.
8. Remove the two wing nuts and lock washers securing the printer to the
stand (underneath the printer). Keep them in a safe place.
Note
It’s a good idea to store
partially used cartridges in
separate, resealable
plastic bags.
caster lock
stabilizer knob