EasyManuals Logo

Epson RC700 Series Original Instructions

Epson RC700 Series
228 pages
To Next Page IconTo Next Page
To Previous Page IconTo Previous Page
Page #46 background imageLoading...
Page #46 background image
Installation 2. Installation
28 RC700 Series Rev.3
2.5.2 Installation
Install the Control unit and Drive unit on a flat surface such as wall, floor, and Controller
box in the direction shown in (A) to (C).
(A) Flat mounting
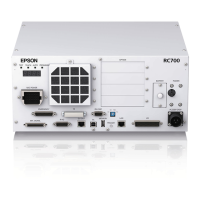
(Figure: RC700)
(B) Upright mounting
*
The rubber foot needs to be
replaced.
Attach the
rubber foot with the flat
side facing the controller.
The size of the screw that secure the
rubber foot is M4×8.
When replacing the rubber foot, be
careful not to lose the screw. Also, do
not use a screw of size other than
M4×8.
(C) Rack mounting
* A plate for rack mounting is required.
For Control Unit and Drive Unit installation to the Controller box or the base table, process
screw hole drilling as follows.
NOTE

Table of Contents

Other manuals for Epson RC700 Series

Questions and Answers:

Question and Answer IconNeed help?

Do you have a question about the Epson RC700 Series and is the answer not in the manual?

Epson RC700 Series Specifications

General IconGeneral
ModelRC700 series
CategoryController
Programming LanguageSPEL+
Safety StandardISO 10218-1
TypeRobot Controller
Communication InterfaceEthernet, RS-232, USB
Operating Temperature0°C to 45°C (32°F to 113°F)
Humidity20% to 80% (non-condensing)
Number of controllable robots4

Related product manuals