EasyManuals Logo

Epson WF-7210 series Administrator's Guide

Epson WF-7210 series
82 pages
To Next Page IconTo Next Page
To Previous Page IconTo Previous Page
Page #18 background imageLoading...
Page #18 background image
Setting the DNS Server
Set up the DNS server. Assign the address for the DNS server when Manual is selected for TCP/IP Address.
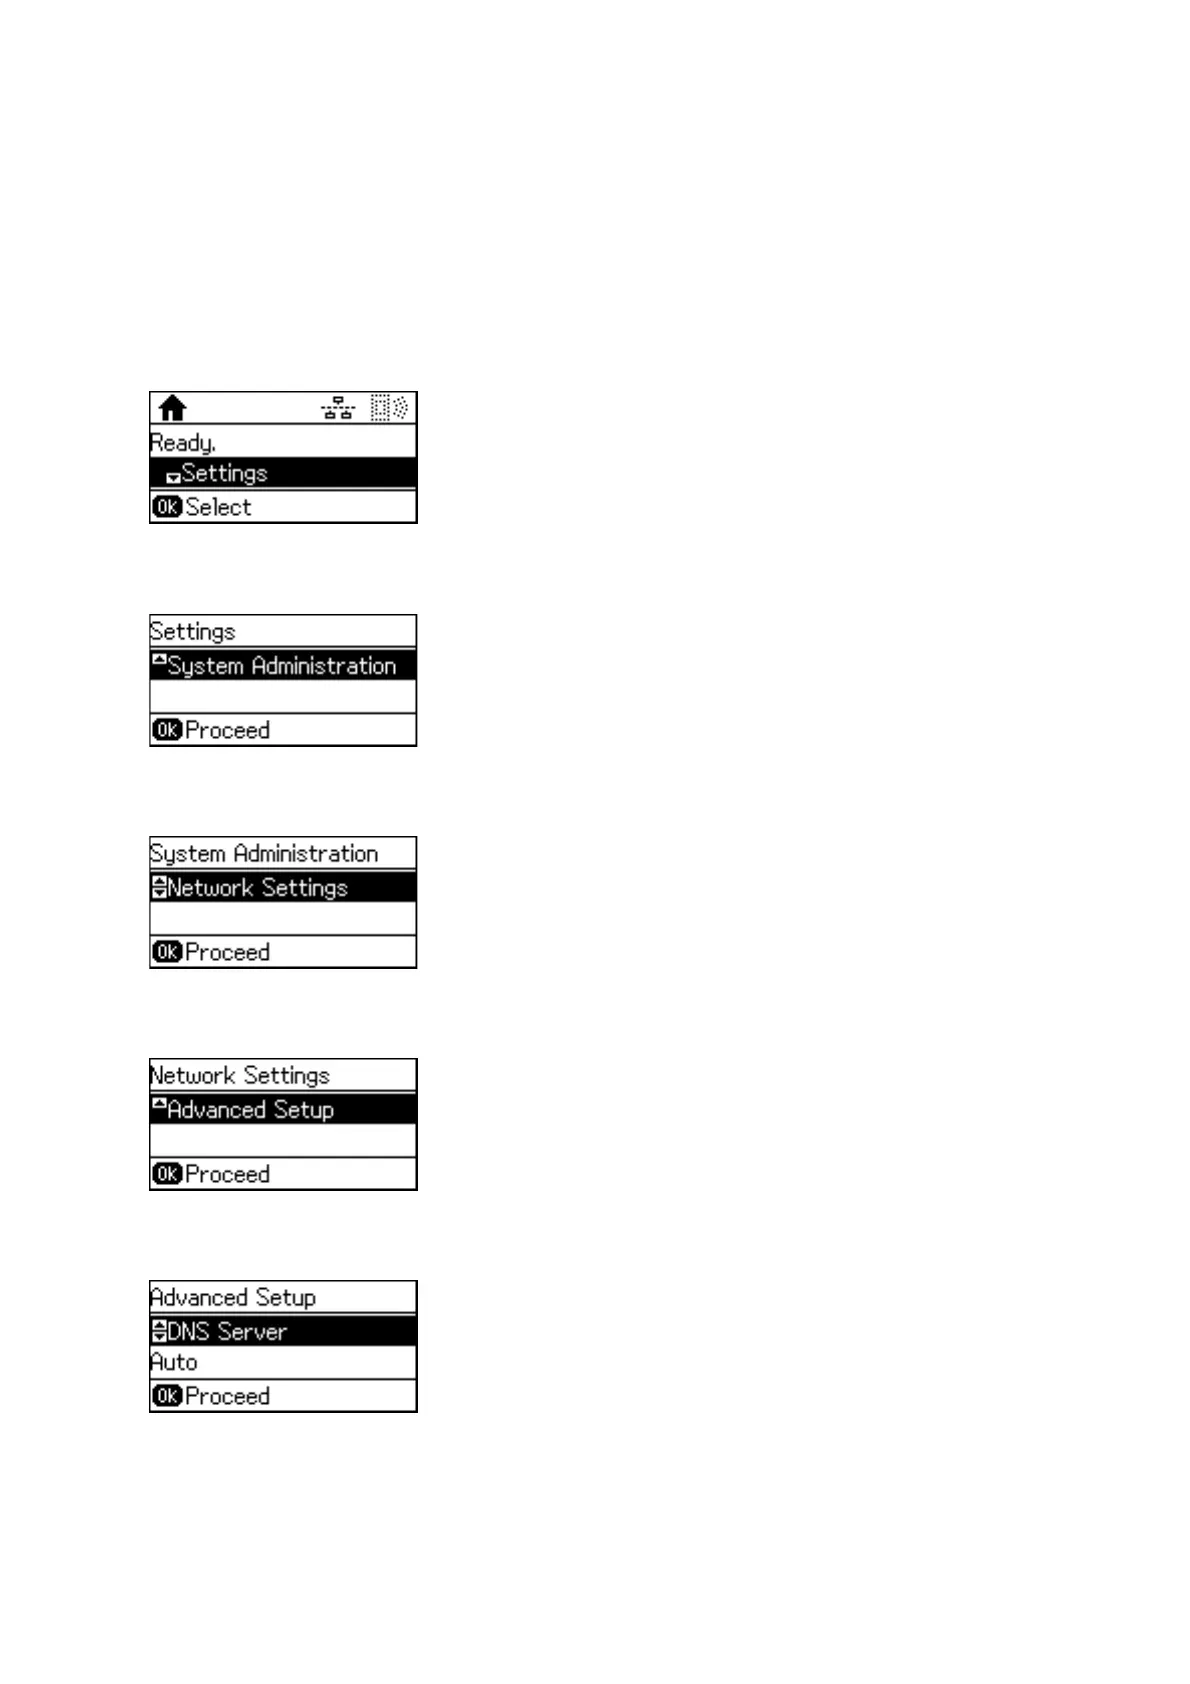
1. Select Settings on the home screen on the printer's control panel.
Note:
If the screen is turned o, press any button on the control panel.
2. Select System Administration.
3. Select Network Settings.
4.
Select Advanced Setup.
5. Select DNS Server.
6.
Select the way of obtaining the DNS server address.
When you select Auto for the IP address assignment settings, you can select the DNS server settings from
Manual or Auto. If you cannot obtain the DNS server address automatically, select Manual and enter the DNS
server address.
Administrator's Guide
Connection
18

Table of Contents

Other manuals for Epson WF-7210 series

Questions and Answers:

Question and Answer IconNeed help?

Do you have a question about the Epson WF-7210 series and is the answer not in the manual?

Epson WF-7210 series Specifications

General IconGeneral
Operating System SupportWindows, macOS
Number of Ink Cartridges4 (Cyan, Magenta, Yellow, Black)
FunctionsPrint
Print TechnologyInkjet
Max Print Resolution5760 x 1440 dpi
Print Speed (ISO)18 ppm black, 10 ppm color
Print Speed (Black)18 ppm
Print Speed (Color)10 ppm
ConnectivityUSB, Ethernet, Wi-Fi, Wi-Fi Direct
Paper SizesA3, A4, A5, A6, B5, Letter, Legal
Duplex PrintingAutomatic
Printer TypeInkjet
Mobile PrintingEpson Connect, Apple AirPrint, Google Cloud Print
Paper Capacity500 sheets
Ink TypePigment-based

Related product manuals