Commissioning
Machine cooling
Item No.: 099-004833-EWM01 97
6.5 Machine cooling
To obtain an optimal duty cycle from the power components, the following precautions should be
observed:
• Ensure that the working area is adequately ventilated,
• Do not obstruct the air inlets and outlets of the machine,
• Do not allow metal parts, dust or other objects to get into the machine.
6.6 Adding coolant
Only for machines with integrated cooling module:
The unit is supplied ex works with a minimum level of coolant.
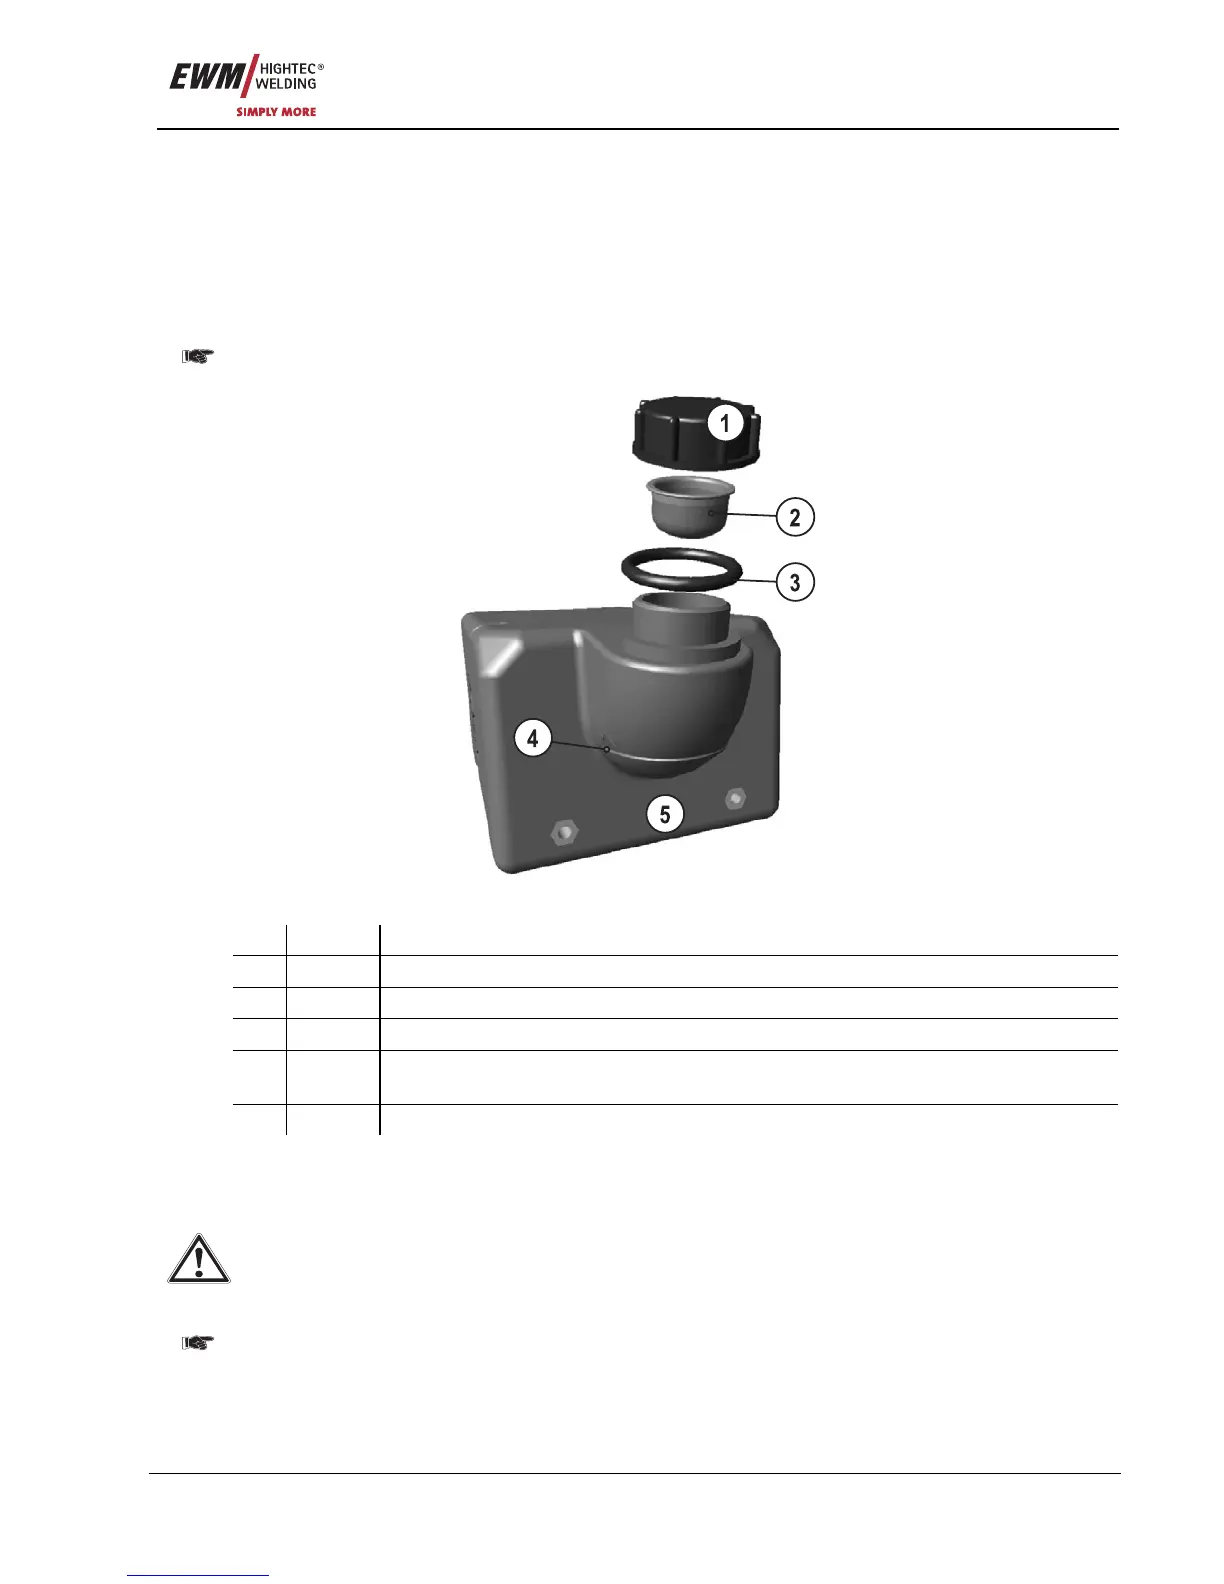
Figure 6-1
Item Symbol Description 0
1
Coolant tank cap
2 Coolant filter sieve
3 O-ring (conical nipple)
4 "Min" mark
Minimum coolant level
5 Coolant tank
• Unscrew and remove the coolant tank sealing cover.
• Check filter sieve insert for dirt, clean if necessary and reinsert into position.
• Top up coolant to the filter sieve insert, close sealing cover again.
After the initial filling, wait for at least one minute when the machine is switched on so that the
tube package is filled with coolant completely and without bubbles.
With frequent changes of torch and during the initial filling process, the cooling unit tank should be
topped up as necessary.
The level of coolant must never fall below the "min" mark on the tank.
The sieve must always be inserted in the filling pipe before filling.
Mixing with other liquids or the use of other coolants voids our manufacturer's guarantee.