FARO
®
Laser Scanner Manual
38
Chapter 6: Getting Started
Logfile - When exporting the log files from the scanner, they will be saved to
this folder. This folder will be created automatically by the scanner. See Log
File on page 108.
Preview - The preview pictures of captured scans will be saved to this folder.
The folder will be created automatically as soon as you start a scan. See
Starting a Scan on page 53.
Projects - Scan projects information will be saved to this folder. The folder will
be created automatically by the scanner. See Scan Projects and Clusters on
page 73.
Scans - The captured scans will be saved to this folder. The scans folder will
be created automatically as soon as a scan has been started. See Starting a
Scan on page 53.
Updates - Copy firmware updates to this folder. This folder must be created
manually. See Firmware Update on page 111.
FARO-LS - Signature file, used to identify the SD card as a FARO Laser
Scanner card. This file will be created automatically as soon as a scan has
been started.
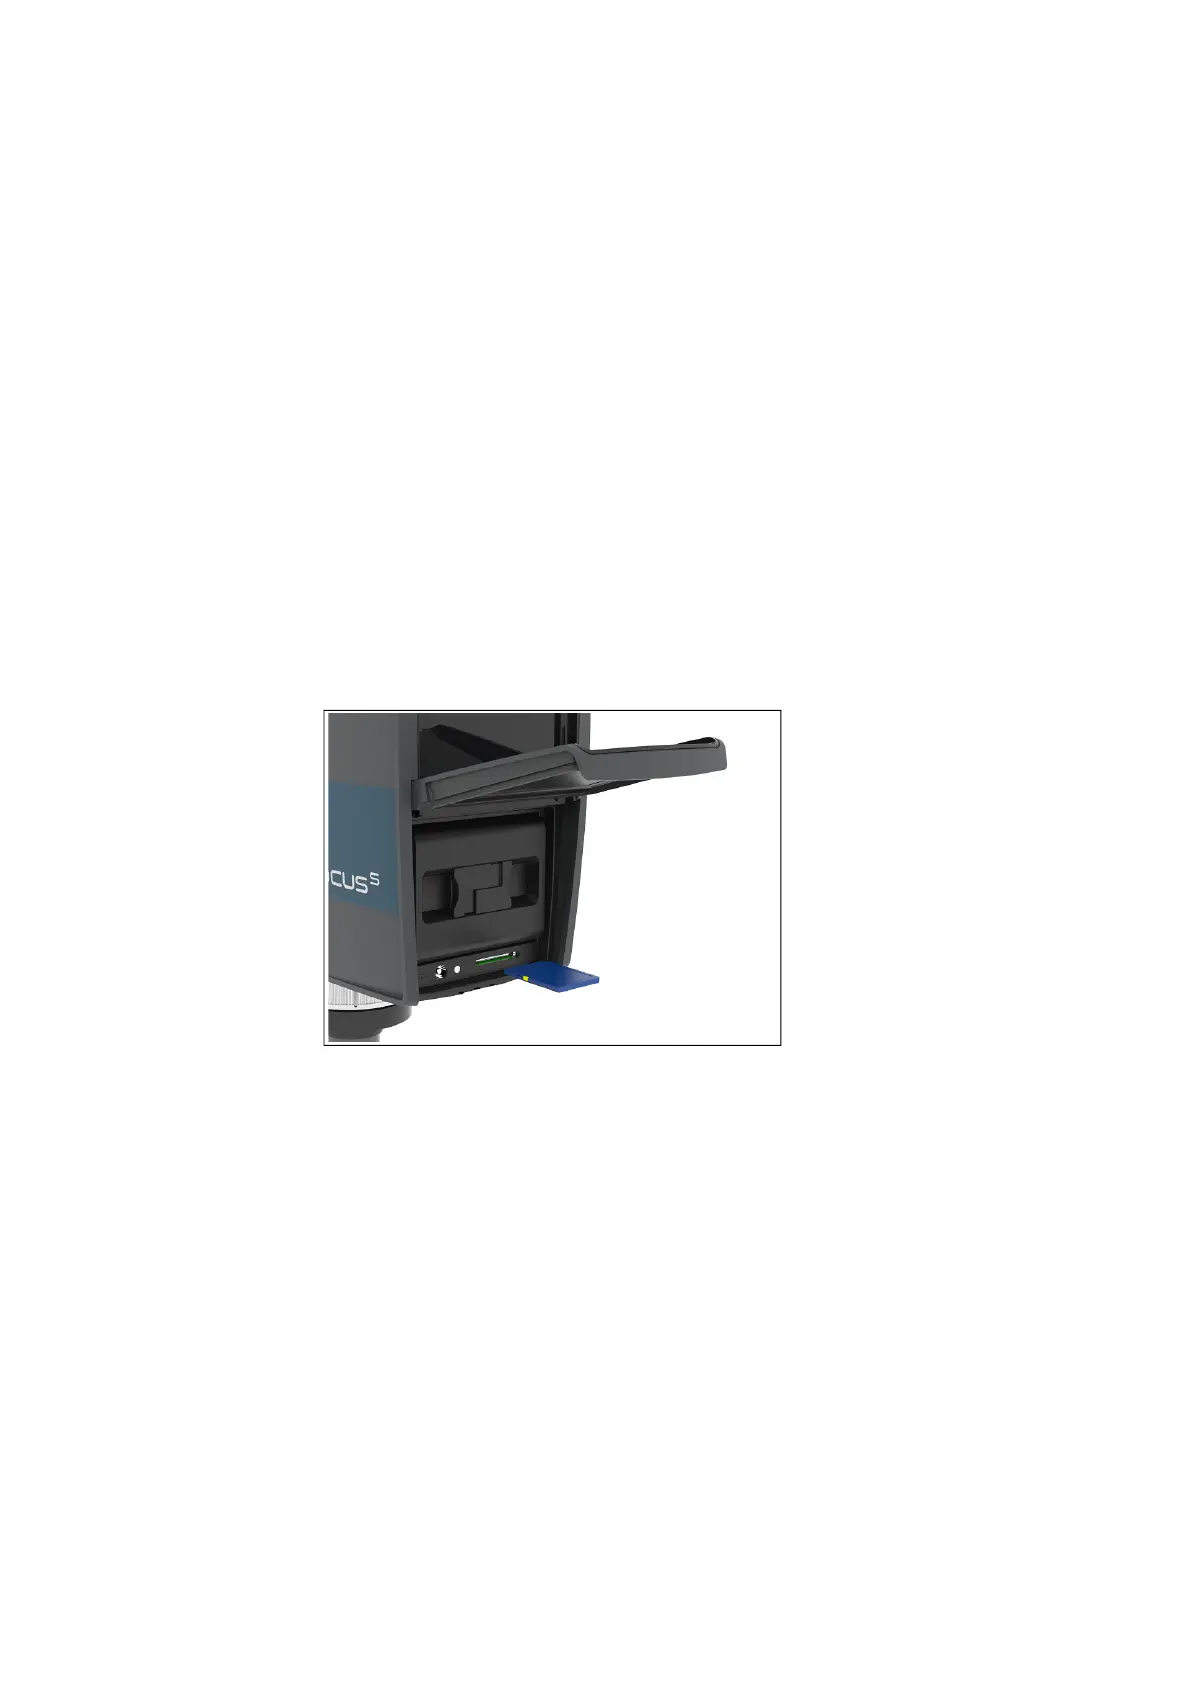
6.5.3 Inserting the SD Card
Figure 6-8: Inserting the SD Card
1. Open the battery compartment cover to find the SD card slot down on the
right side.
2. Insert the formatted SD card with the notched edge in the direction as
illustrated until it clicks.
3. Confirm the direction of the memory card. If you forcibly insert the memory
card in a wrong direction, the SD card, the card slot or data on the card can
be damaged.
4. Close the cover.
Ejecting the SD Card
To remove an SD card from the scanner, open the SD card slot cover and
lightly push the memory card.