4-22
4.1 Electrical Installation
4.1.1 Tools needed
• Philips screw driver small and
medium
• Screw driver small and medium
• Wrench:
– n. 2,5
– n. 5,5
– n. 6
– n. 8
– n. 10
– n. 13
• Allen Key:
– n. 2,5
– n. 4
– n. 5
• Socket Wrench n. 13
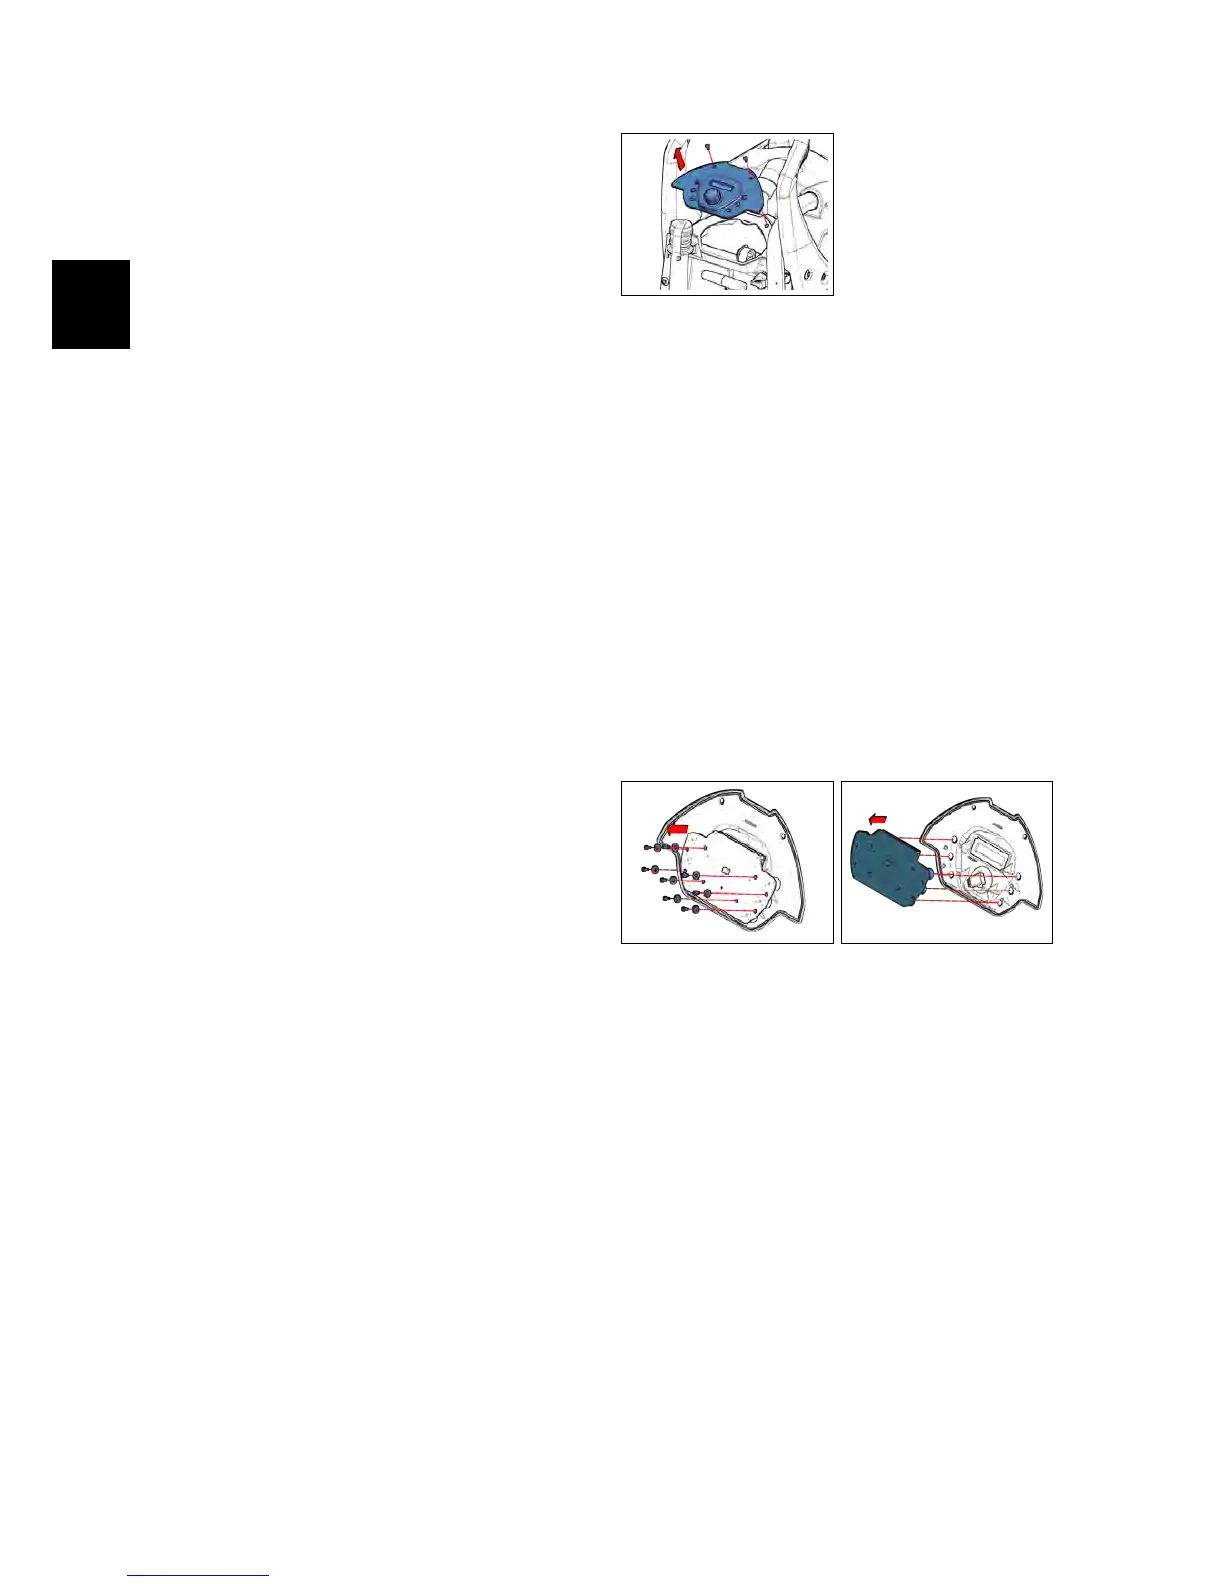
4.1.2 Function Dashboard IMx
B/BT
• Put the machine in safe conditions.
• Loose the screws that block the
Function Dashboard to the machine
(see fig. 4.1.2-1).
• Unplug the cable that connect the
Power Card to the Display Card.
• Remove the function Dashboard.
• Remove the Button Covers from the
Function Dashboard.
• Proceed at reverse to refit the part.
4.1.2-1
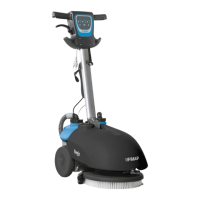
4.1.3 Display Card IMx B/BT
• Put the machine in safe conditions.
• Remove the Function Dashboard (see
section 4.1.2 at page 17)
• Unplug the cable that connects the
Display Card to the Power Card.
• Loose the screw that block the Dis-
play Card to the Function Dash-
board. (see fig. 4.1.3-2) (see fig. 4.1.3-3)
• Proceed at reverse to refit the part.
4.1.3-2 4.1.3-3
4.1.4 Potentiometer IMx B/BT
• Put the machine in safe conditions.
• Remove the Function Dashboard (see
section 4.1.2 at page 17)
• Remove the Display Card (see section
4.1.3 at page 17).
• Unplug the wires connected to the
potentimeter (Rif. POT) (see section 5.5.2
at page 43).
• Slip out the Potentiometer Adjuster
Knob (it’s fit with pressure).