4-34
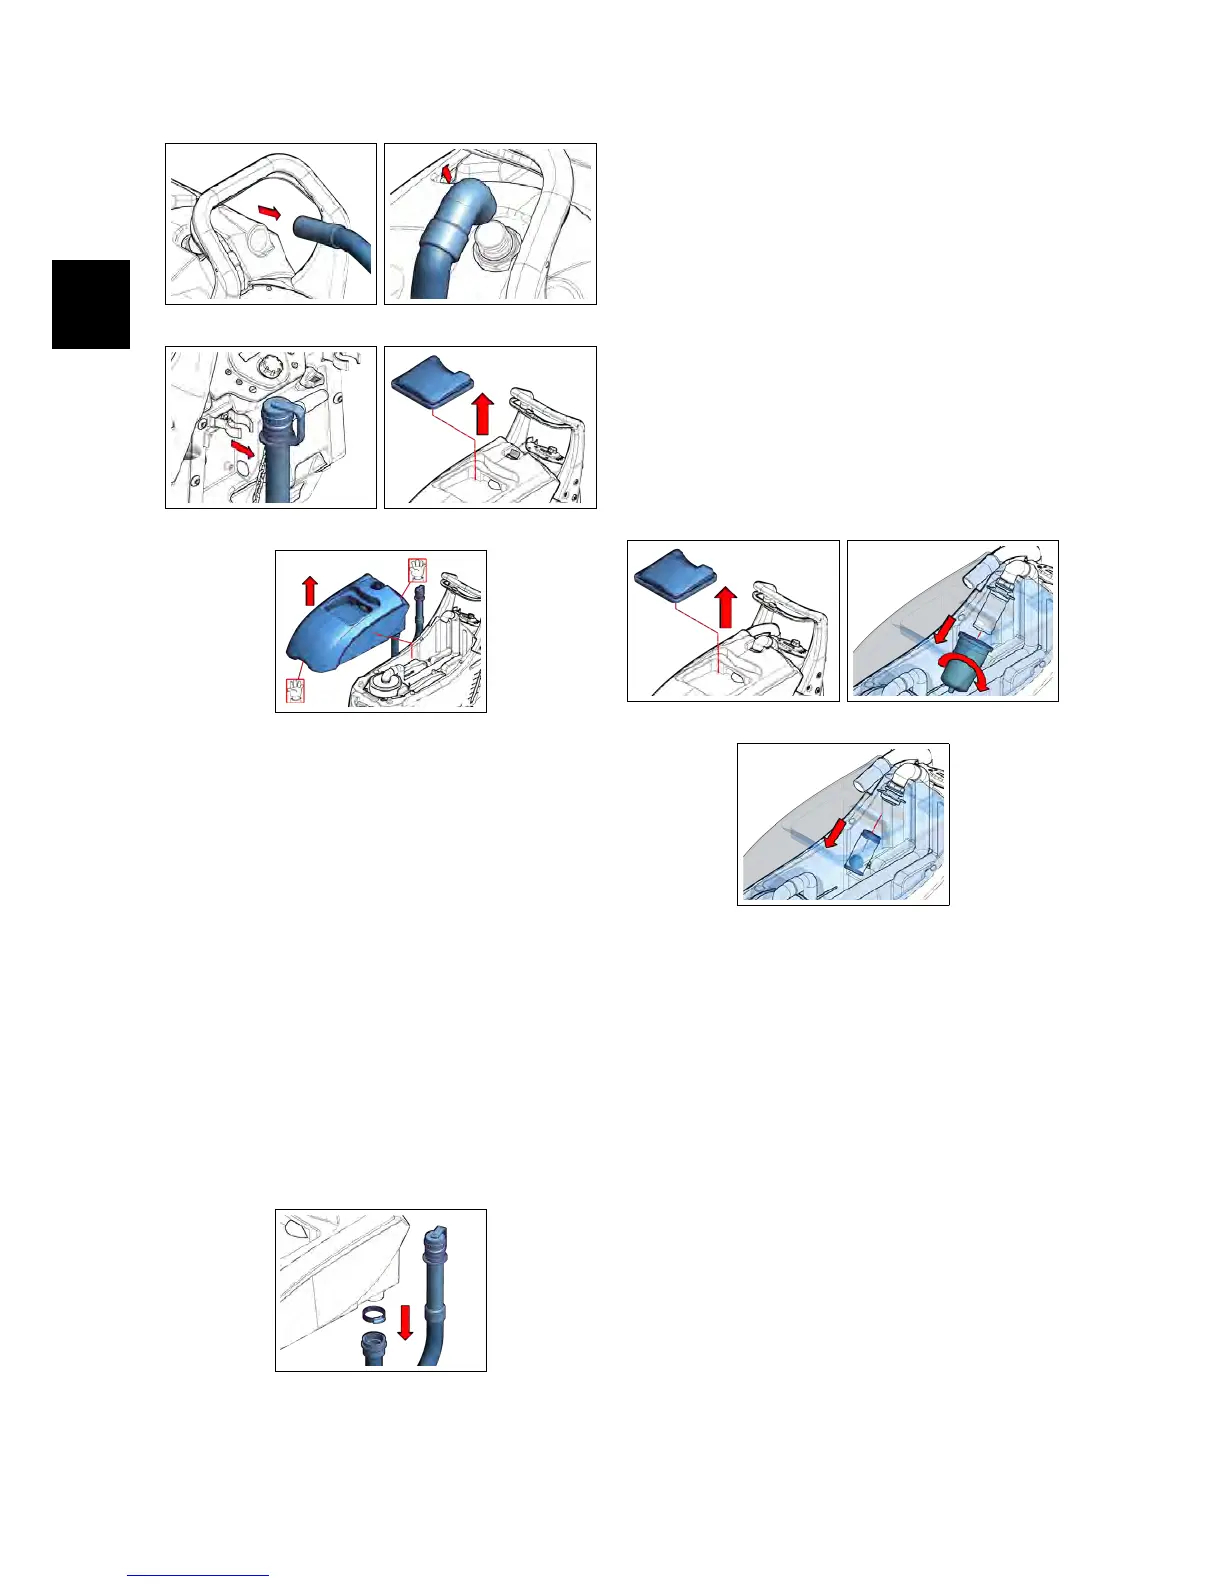
4.3.7-59 4.3.7-60
4.3.7-61 4.3.7-62
4.3.7-63
4.3.8 Drain Hose
• Put the machine in safe conditions.
• Remove the Recovery Tank (see section
4.3.7 at page 28)
• Loose the clamp that block the Drain
Hose to the Recovery Tank (see fig. 4.3.8-
64).
• Unplug the Drain Hose from the Re-
covery Tank.
• Proceed at reverse to refit the part.
4.3.8-64
4.3.9 Vacuum Filter
• Put the machine in safe conditions.
• Remove the Recovery Tank Lid(see fig.
4.3.9-65).
• Uncouple the Filter Cover. (see fig. 4.3.9-
66)
• Remove the Vacuum Filter pulling it
down (see fig. 4.3.9-67).
• Proceed at reverse to refit the part.
4.3.9-65 4.3.9-66
4.3.9-67
4.3.10 Vacuum Motor
• Put the machine in safe conditions.
• Remove the Recovery Tank (see section
4.3.7 at page 28)
• Remove the clamp that block the
Vacuum Manifold to the Vacuum
Motor and move it apart (see fig. 4.3.10-
68).
• Loose the screws and remove the
Vacuum Motor Cover (see fig. 4.3.10-69).
• Remove the Upper sound-absorbing
Sponges.


 To Next Page