D20/D200
Installation and Operations Guide
GE Energy
994-0078-2.00-7 General
92
Full
Power-up and Test, continued
Procedure:
Powering-up
the D20
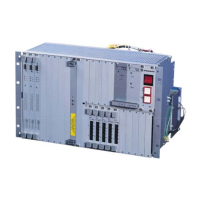
Follow these steps to power up the D20 and check for correct functioning of the
components.
Step Action
1
Check that all field wiring, grounding wires and fuses are in place and
secure on your D20 system.
2
Turn the chassis-mounted Power Supply switch to ON.
Result:
The unit is powered-up.
Software
Corruption on
Power-up
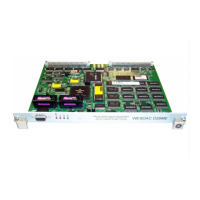
On start-up, inspect the D20ME/ME II LED indicators on the front panel. If the code
file resident on the Flash memory or the configuration file downloaded to the
NVRAM is corrupted, then:
• The RUN and FAIL LEDs illuminate alternately, which means the board is
resetting continuously, OR
• The FAIL LED is constantly illuminated.
There is a workaround available for these problems using WESMAINT II+.
Procedure:
Workaround
Follow these steps to login to the 68K Monitor and restore the default configuration
when the FAIL LED is constantly illuminated:
Step Action
1
Set up your PC to act as a WESMAINT II+ terminal. See “Procedure:
Set up Term
inal”, page 91.
2
For serial communication, connect a WESMAINT cable from the PC
running your terminal emulation software to the DB9 connector on the
front panel of the D20ME.
3
Open your WESMAINT II+ terminal emulation software.
4
Restart your D20 or D200.
5
Use the 68K Monitor to download a fresh code file to the Flash memory
and a fresh configuration file to the NVRAM. See “D20/D200 Software
Configuratio
n”, page 99.